Vintage Tile Tag
Welcome to Technique Week at the Penny Black Blog! We have so much to show to you this week, a tutorial every day! Let’s get right to it — Elizabeth Allan is here with a fun technique that involves creating a vintage style tag using ultra thick embossing powder for a tile-like feel.
Penny Black Stamps; Christmas Text – 4115K and Pine Avenue – 4103H. Materials: StazOn Ink; Jet Black, Stone Gray, Gold Metallic, Frost Dazzle Watermark VersaMark Ink, Jumbo Sponge Daubers Distress Ink; Peeled Paint, Pine Needles, Aged Mahogany, Scattered Straw, Walnut Stain, Cut ‘n Dry Pen Nibs, Gloss Paper, UTEE (Ultra Thick Embossing Enamel), Gold Krylon Pen, Christmas Red Stickles, Tim Holtz’s Styled Labels Die, Metallic Rub-Ons, Red Glitter, Heat Tool.

Finished tag measures 3 x 4 3/4″.
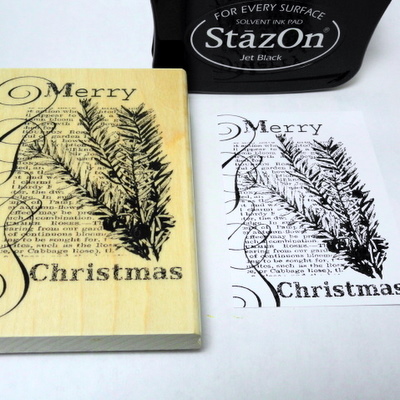
Step 1: Stamp Christmas Text on Gloss paper with Black StazOn ink. Let dry and trim to 2 ¾x3 ¾”.

Step 2: Using pen nibs, color the pine bough with Peeled Paint and Pine Needles Distress inks.
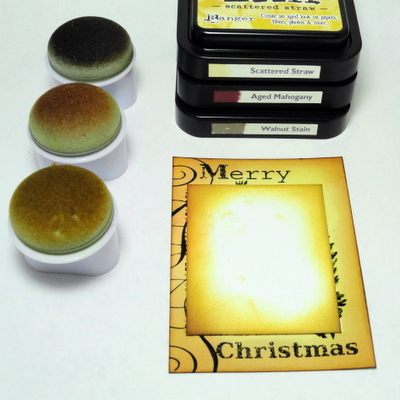
Step 3: Place a mask over the text and pine bough then rub Scattered Straw, Aged Mahogany and Walnut Stain inks around the perimeter. After desired blending has been achieved, remove the mask.

Step 4: Add accents to the pine needles with a gold Krylon pen. Using the gold Metallic StazOn ink pad direct-to-paper, edge the rectangle. Place small dots of Christmas Red Stickles on the berries and cover with red glitter and tap off excess. Let dry.
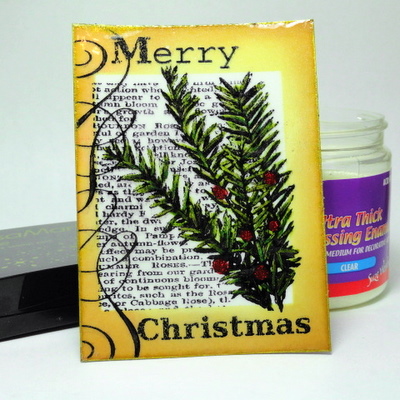
Step 5: Pounce the entire piece with Frost VersaMark Watermark ink. Pour UTEE powder on the coated piece and tap off the excess powder. Heat set the powder. For an added vintage effect, this design has one coat of melted powder. You can continue to build layers to create a thicker piece, if desired. Depending on the weight of the paper and the size of the piece, additional layers can cause curling. Hint: After three coats have dried you can crack the enamel for a shattered glass effect!
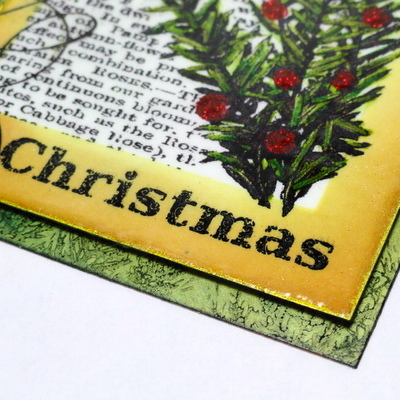
Step 6: Create a tag (3 x 4 ¾”) from a heavy-weight file folder and run the top portion through a die-cutting system with Tim Holtz’s Styled Labels. Coat the tag with various colors of metallic rub-ons. Stamp Pine Avenue over the tag with Stone Gray StazOn. Mount the enamel artwork to the front of the tag and accent with ribbon.
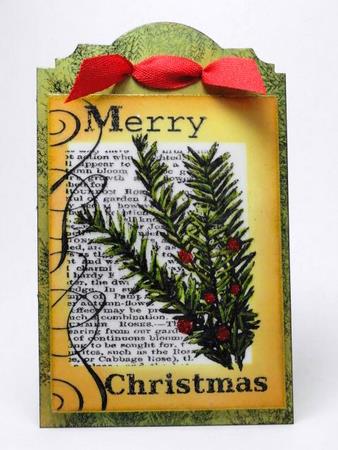
Thank you for joining us — be sure to stop by every day this week for stamping tutorials you will love! For more detailed photographs and instructions, please visit Elizabeth’s Blog.


awesome tutorial. Love the collage stamp.
“WOW” This is beautiful. I love it. THe colors are beautiful Thank you for explaining how you did this.
Your talent is wonderful. Thank You, Ellen Hinds
This PB stamp is BEAUTIFUL as it is, but with Elizabeth’s vintage touch, it became even MORE BEAUTIFUL!!!
Great to see the process here – thanks so much and looking forward to seeing what else is in store!
OMG – this is really beautiful. Looks fairly easy to do. Thanks much for sharing. I will put this card in my idea book.
This is just divine Elizabeth and I love how the pine needles get so much depth!! Awesome tutorial! Hugs,Kathy
What a gorgeous tag! Love the crackled effect from the UTEE!
Just beautiful!!! Love the tutorials – can’t wait to see what else is in store! TFS!
This is stunning! Love the colouring on the pine needles and the masking 🙂
So many great tips! I love this!
What a masterpiece!! Love the tutorial and detailed instructions! Thank you, Elizabeth, for the amazing inspiration!
this is so pretty! thanks for the tutorial!
Absolutely gorgeous, wonderful technique.. thanks for sharing.