
When slicing our models for printing we use Simplify3D, but most of the settings we talk about will be available in any slicing software.
Orientation of the model on the print bed
With STL files in hand it is now time to print you models. The first thing you have to do is make sure the model is facing the right direction. Most 3D printers have a higher resolution in the x and y directions than they do in the z direction. As a result, the models should be arranged so they are printed “edge on” ensuring you get the most resolution in the direction the model “pops out”.

The slicer settings
Here are a list of the settings we use for printing:
- Layer height: 0.1 mm gives the best results, 0.18 mm works well for prototyping
- First layer height: 150% of the layer height
- Top solid layers: 3
- Bottom solid layers: 2
- Outline/perimeter shells: 2
- Raft: No if using a heater print bed, Yes if not
- Infill: 10-15%
- Supports: No if printing with the top edge off
- Cooling: When using PLA we turn the fans to 100% on the 3rd layer
All other settings (e.g. temperature) are dependent on the material being used for printing.
Things to watch out for
Because of the way our code makes the models, sometimes there are “holes” in the model near the notches after slicing. A similar thing will happen around the letters when printing a name plate. Note: this only happens with some slicing software (such as Simplify3D) and not with others (our printer’s default program FlashPrint has no issues).

This is easily fixed by separating connected surfaces before slicing.
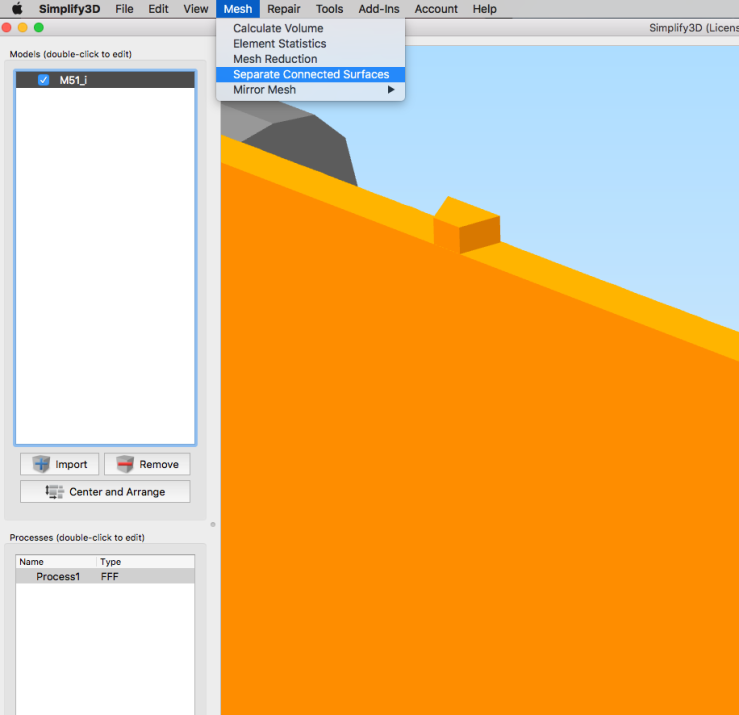
Once separated, make sure all the models are selected (they should be by default) and run the slicing process again.

Send the sliced g-code to the printer
Once the slicing is done, transfer the resulting g-code to the printer and run it. In a few hours you model should be done. If your printer is reliable enough, you can slice/print multiple models at once.

1 thought on “6. How to slice the models and print them”