Welcome to the TweetDeck Learning Guide, where I’m going to walk you through using TweetDeck and making it work for you.
Hopefully you know a lot of people on Twitter. I’m meeting more every day! The only problem? It’s hard to keep up on all those tweets in your primary feed! Luckily, Twitter offers a solution, and TweetDeck makes that solution even more powerful.
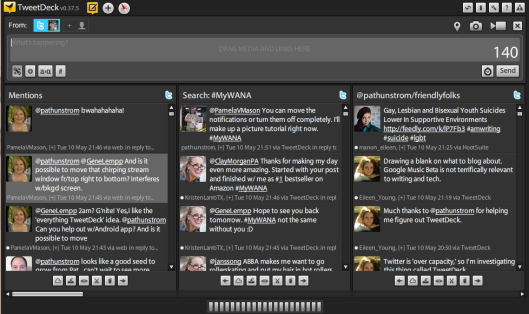
When you first use TweetDeck, you experience a handful of columns. These columns separate certain tweets into unique feeds. You can even add columns! I’ve added quite a few!
 This bar at the bottom of TweetDeck shows an icon for every column you have active. When one receives a new tweet, its symbol flashes. Clicking on any of these bars immediately focuses on that column. Neat stuff. Why do I have so many columns? Well, to be able to read my feed without missing people to the flood of information!
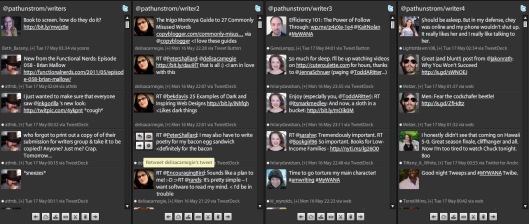
 That’s four of my current five writer columns! There’s a dozen or fewer people to a column, making the feeds quite manageable for me to read when I have a chance. So how do you do this amazing column filtering? Lists.
When adding a new column there’s more than one option, the second one being lists.
 This option shows a list of all your lists. The logo tells you which network you’re working with, and the lock tells you if your list is public or private. To add a list, just insert the url to the public list in the text box and hit Add. If you want to create a list, hit the New List button.
 This window lets you name your list, give it a description, and choose if it’s a public list or private. A public list can be seen by other Twitter users. A private list is only for you. Once you’ve filled this form out, hit the Add list members button to continue.
 Here you’re able to add members to the list. You can pick from your ‘Friends’, which in this case means the people you’re following, you can choose users from lists or groups you’ve already created, or you can search for users! Once you’ve added the users you want to the list, click save.
 Here, you can write a tweet about your new list while it loads the users you picked. When done, just click the Completed button and go back to TweetDeck!
Removing or changing users in a list is as simple as going to the column with the list, and hovering in the top right corner of the column. This reveals an exit button (“X”) and an Edit button. The Edit button returns you to the selection screen where you can modify the list as you see fit!


Helpful post 🙂 I’m not very fond of Tweet Deck, but it is a necessary tool to organize people and tweets.
It’s the first I used, and it does what I need. I’m considering exploring some of the other clients out there after I’m done with this series, I might end up liking something better!
Wow! You have single-handedly changed my mind about TweetDeck. I pretty intimidated of it before reading this. As soon as I finish typing this comment, I’m going to go download it. Thanks a MILLION!
Now it won’t be so hard to keep up with #myWANA. 🙂
Thank you, and I’m glad to help!
This is good to know. Thank you. I’ll use this feature when I get a better handle on tweeting!
It’s my favorite feature, and my columns bar is getting longer every week! Thanks for commenting!