On this page:
- Introduction/background
- Buying the gear
- Making the connections
- Importing to Twitch/Sample Gameplay Demonstration
Introduction/background
Displays on pinball machines have evolved over the years. From simple scoring reels on electromechanical games, to numeric and alphanumeric displays when pinball went digital, and on to the dot matrix display in the 90s, which introduced rudimentary graphics and video modes.
Today, pinball machines feature full-color, high definition LCD screens that display all sorts of information, along with HD graphics and video.
It’s great for players, as the screens provide more detail on rules and a more interactive experience. But they can be challenging for streaming, as traditionally we’ve pointed cameras at the displays to show viewers at home what’s happening. With a full-color display, smaller details can be easily lost or hard to see when shooting it with a camera.
Enter the direct capture. This is a way to intercept the signal going from the game and duplicate it exactly into your stream layout.
Some manufacturers, like Jersey Jack Pinball, use common connections like VGA, HDMI or DVI, making it relatively simple to capture. Split the signal, maybe with an adapter cable, feed it into a capture card, and you’re off to the races.
On Stern pinball machines, things are a bit tricker. Stern uses a display connection known as LVDS, which requires some specific hardware to convert to a signal you’ll be able to capture.
Before we start, I MUST give all credit for the background info on this procedure to the fine folks over at Tilt Forums. There, pinball enthusiasts have been testing and trying different configurations to make this work for more than two years. I’ve pulled the gear I’m using from that thread and would not have been able to do this without them. This guide is my way to pay it forward, by (hopefully) making it as easy as possible for people to get what they need and get on to streaming.
Disclaimer: This install was done on a Stern Jurassic Park premium, install may vary slightly depending on which game you have. This guide is for informational purposes only, proceed with caution, you’re on your own if you cause any damage, etc., etc…
With that, let’s dig into it.
Buying the gear
You’re going to need some very specific items to make this work. It’s not too expensive, but pay attention to the details below to be sure you get what you need. The parts from AliExpress can take some time to arrive, so order early and be patient (my LVDS cable took 40 days to arrive!).
Conversion board
This board converts the LVDS signal to HDMI and has a passthrough to go back to the display in the game. NOTE: After placing your order, go into your Account -> My Orders and click the “Contact Seller” link to start a chat with the vendor. There, send the following message: “Hi, please send me the Single 8, Support 720P/768P/960P model.” This ensures you’ll get the model compatible with the resolution on the Stern display.
- LVDS to HDMI Adapter Board at AliExpress ($29.69) – Qty. 1
Cable

You’ll need a cable to go from the conversion board back to the game. This is the one to get.
- LVDS 30P Cable at AliExpress ($1.98) – Qty. 1
PCB Standoffs
Grab these to make the install clean in your game. The adhesive isn’t great so you may need to use some 3M Mounting tape or similar to get it to stick better in your backbox. This is a 30 pack so you’ll be set for a while.
- 30 Pcs adhesive PCB spacer at Amazon ($8.99) – Qty. 1
HDMI Cable
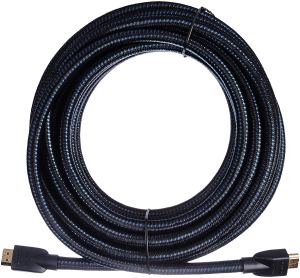
Any standard HDMI cable will do, but get a long one to give yourself the extra length needed to get from your game to your computer/capture card.
- AmazonBasics 25-Foot HDMI Cable ($15.99) – Qty. 1
Making the connections
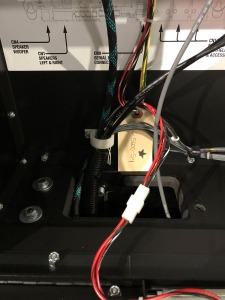
Open up the backbox of your game (keys are hanging by the coin slot inside the coin door), then take the translite off and fold down the display/speaker panel. The connector you’re looking for is at the top of the small white board. It’s the cable that connects to the larger of the two connectors on the back of the display.
Unplug this connector (push down on the release tab at the top to disconnect), and unscrew the two nuts on the post directly above it to remove the cable tie and disconnect the ground cable.
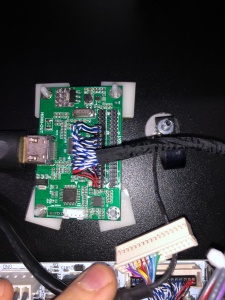
Take the new cable you purchased from AliExpress and plug it into the connector you just removed the cable from, leaving one set of pins open on both sides. The connector should be perfectly centered. Be careful not to bend any pins while plugging any of the cables in. The red wires should be on the right.
Take the other end of the cable and connect it to the LVDS -> HDMI converter board you purchased from AliExpress. Connect this to the connector further from edge of the board, with the red cables connecting starting with pin 1, indicated by an arrow on the board.
NOTE: For streaming, it’s best to not connect the monitor while playing. On my Jurassic Park (and other’s I’ve seen and heard from), it causes graphical issues, lockups, etc. that can be detrimental to your show. I recommend either looking at your streaming software to see the scoreboard or hooking up an external monitor via the HDMI out on your capture card to see the display.
I’ve heard that some games are capable of running both the display and the direct capture without a problem, so you can experiment and see what works best for you.
To restore the signal to your monitor, take the the connector that you removed from the board, and plug it in to the second connector on the converter board, the one closest to the edge of the board. NOTE: the connector should overhang to the right by one, so the pink and purple wires connect starting with pin 1, indicated by an arrow on the board.
Take the PCB standoffs and pop one into each corner of the PCB. Remove the backing to reveal the adhesive.
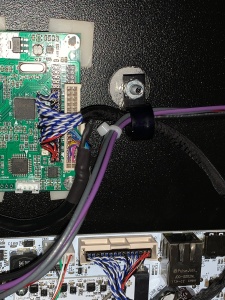
Stick the converter board above the main PCB, making sure you’re close enough to reconnect the ground cable to the post.
Reconnect the ground cable to the post, thread on and tighten the nut, and reattach the cable tie with nut on top.
Connect the HDMI cable to the converter board, and feed it down into the cabinet, using the pre-installed cable ties to keep everything neat and clean.
Under the playfield, at the back of the cabinet, you’ll see a row of air holes with a wire mesh covering them. Remove a few staples so you have enough room to feed the cable underneath the mesh and out the bottom of the cabinet.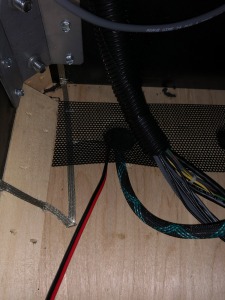
With that, you’re done! I’d recommend testing everything out at this point, to be sure all your connections are good. If it all works as intended, close up the game and you’re set to connect the feed to your computer for streaming.
Importing to Twitch
To get the signal into your computer, you’ll need a video capture card of some sort. Since my streaming rig uses a laptop, I use USB capture cards. Here are links to three options that I’ve had good luck with:
- ElGato HD60
- ElGato Camlink
- AVerMedia AVerCapture HD (This is the capture device I use specifically for capturing the direct display output on my Jurassic Park)
Connect the HDMI cable from your pinball machine to the “HDMI In” port on the capture device, then connect it to a USB port on your computer. Add it as a video source in your streaming software of choice and you’re all set for nice, clean display video in your streams.
Sample Gameplay Demonstration
Here’s how it will look!
If this guide was useful to you, or you want to see more of it in action before diving in, consider following us on Twitch. Thank you!
Audio impact
On my particular game, setting this up introduced noise into the line on the headphone adapter I use to capture audio directly from the game. I solved this by plugging a ground loop isolator into the coin door headphone jack, and then connecting the audio cable that goes to my mixer into that.

