Here’s what the hammer finally looks like . . . and I missed another photo-op. Remember the two sections of 1X3 that I didn’t use in the first glue up? I used them instead to provide a bit more depth to the head, cover over the end of the axe handle, and provide a bit more strength by being glued across the seam down the middle of the head. Just cut them to length, apply glue, and clamp them down. I did one at a time so that I could use one to act as a gluing guide for the next.Remember to get rid of the squeeze out before it dries so that the next piece will butt snugly up against the first.
Easier to see in this shot is the rounding I did on corners. There’s nothing fancy here, just mark an arc using the bottom of a glass at each corner of the face and use the rasp to round the corners. You’ll also want to use a bit of sandpaper to round over all the sharp edges. I wanted to add a bit of strength to the striking surface – I was concerned about the wood splitting along the grain – so I used painters blue tape to mask off the front of the hammer and applied a coat of marine epoxy using a foam brush. I removed the blue tape once the epoxy was partially cured.
Since I’m a “belt and suspenders” sort of guy and had epoxy left I re-taped the head and applied a second heavy coat of the epoxy. The foam brush leaves a nice textured surface.
I gave the head a light sanding (used a sanding block for this), wiped the dust off and used painters blue tape and newspaper to mask off the handle. I sprayed on two coats of gray primer, sanding between coats. Lowes carries truck bed paint in a spray can which gives a flat black slightly crinkled finish. Two coats completely covered the primer.
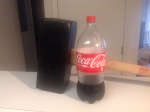
Here’s the finished hammer next to a 2 liter bottle. The black hammer head contrasts nicely with the hickory handle and looks very dramatic in performance.


