
Why am I doing this again oh god


This post is a photo progress log for the costume. It may come in helpful as a semi-tutorial or visual clarification of how some parts can be done. Some parts are easier than others (e.g. skirt, inner shirt), but overall I would rate the construction level of the costume to be intermediate. It is easier to make than Silica’s red SAO outfit though, in my opinion.
Parts of the progress will be copy and paste from my SAO Silica progress page since the two outfits are quite similar in parts and silhouette. The gold trim is one key thing that I’m doing differently this time around because of how difficult and expensive pleather was to deal with last time, not to mention that I was less than satisfied with the results.
Cost of the costume are shown by part. Prices in parentheses are the costs if all of the raw materials had to be purchased instead of using leftovers or whatever is already available.
Skip to:
- References
- Circle Lenses
- Socks
- Skirt
- Inner Shirt
- Hand Wraps
- Overskirt
- Breastplate
- Hoodie
- Wig
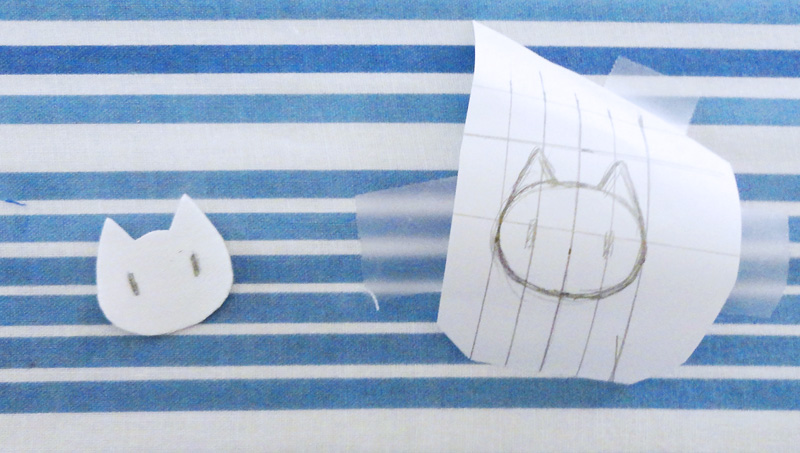
- Cat ears & tail
- Belt
- Dagger
- Sheath
- Boots
- Wings
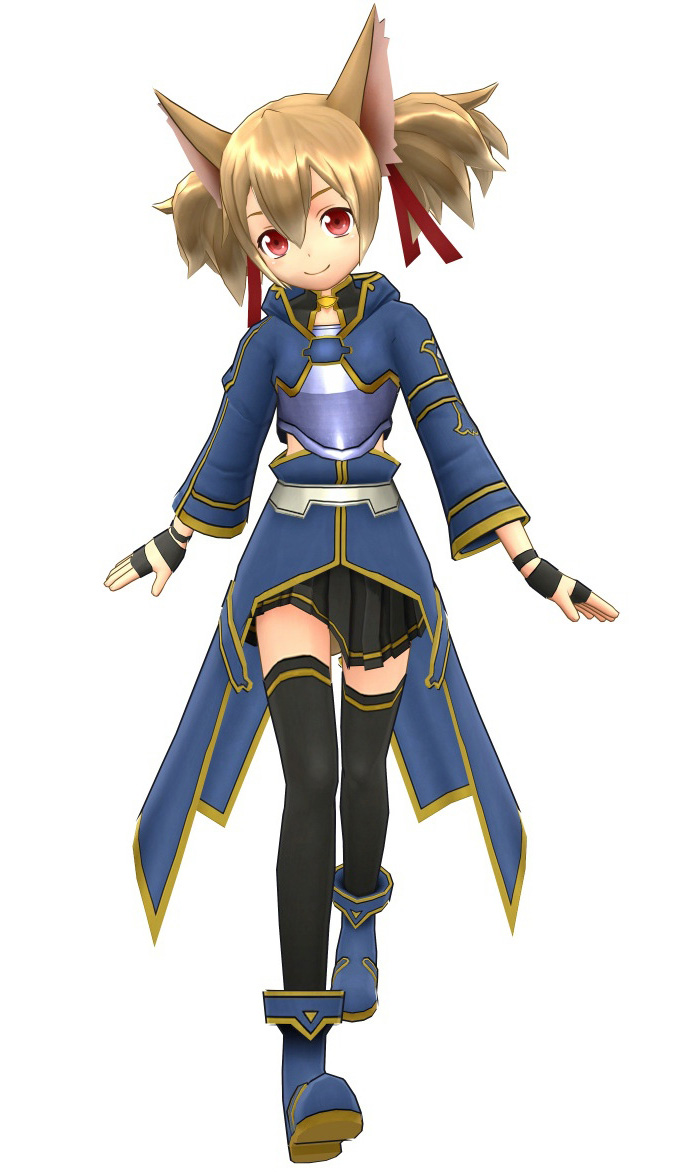
REFERENCES
Official website image
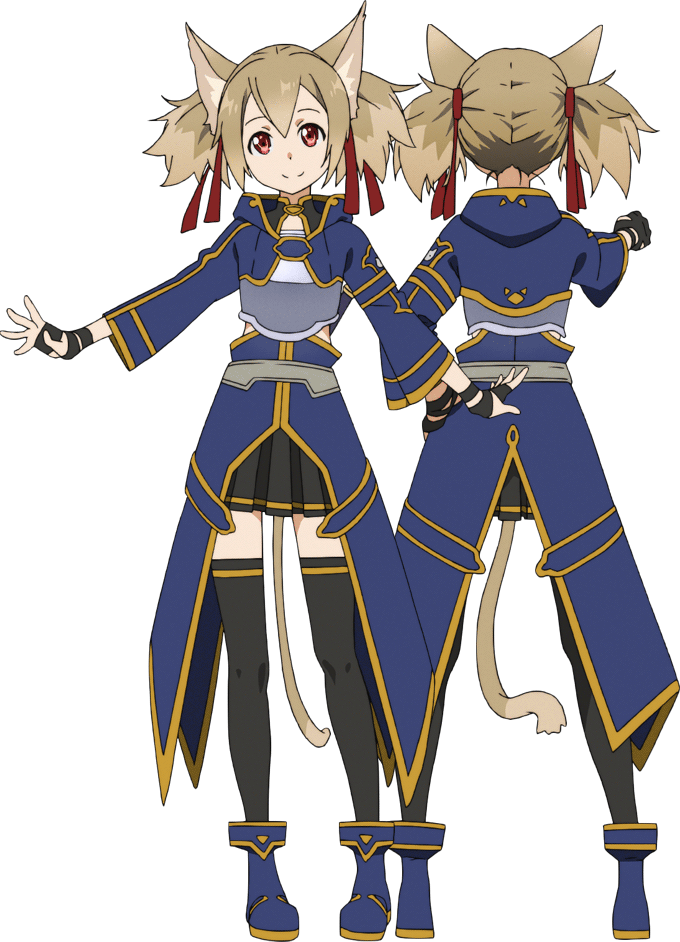
Official production art from Dengeki’s release of Sword Art Online anime news (with fixed colors)
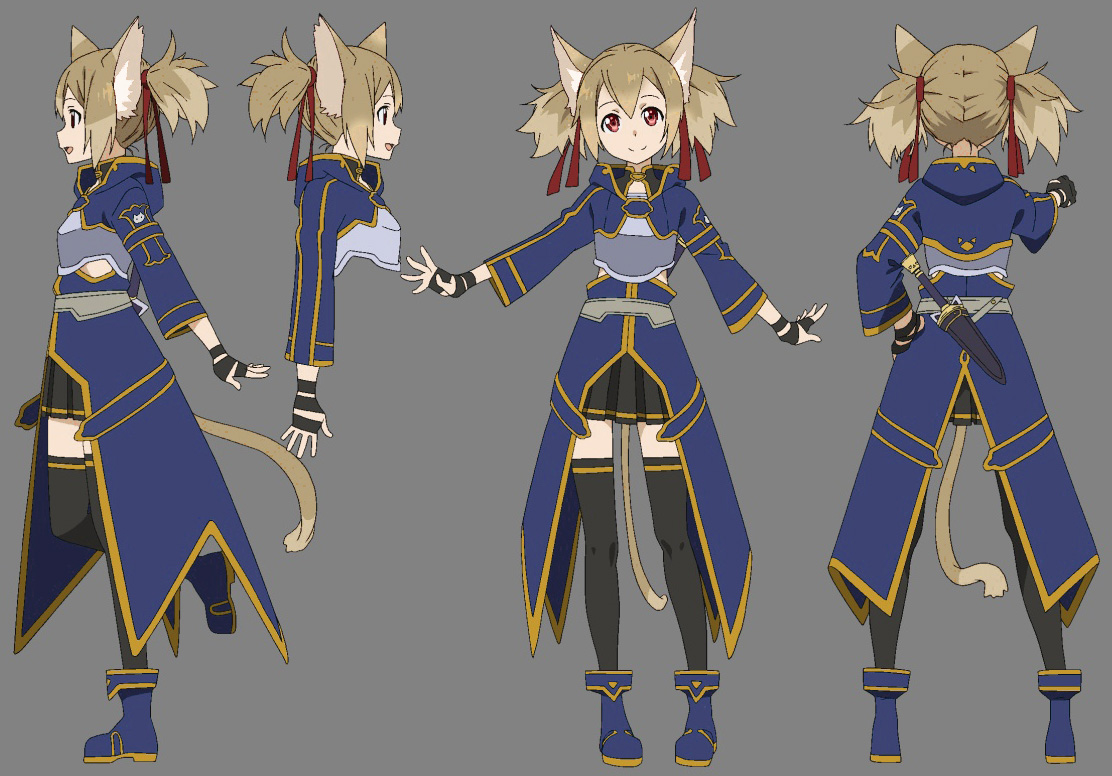
abec’s character art for Extra Edition (the actual animation from Extra Edition can’t be used since the design is different)
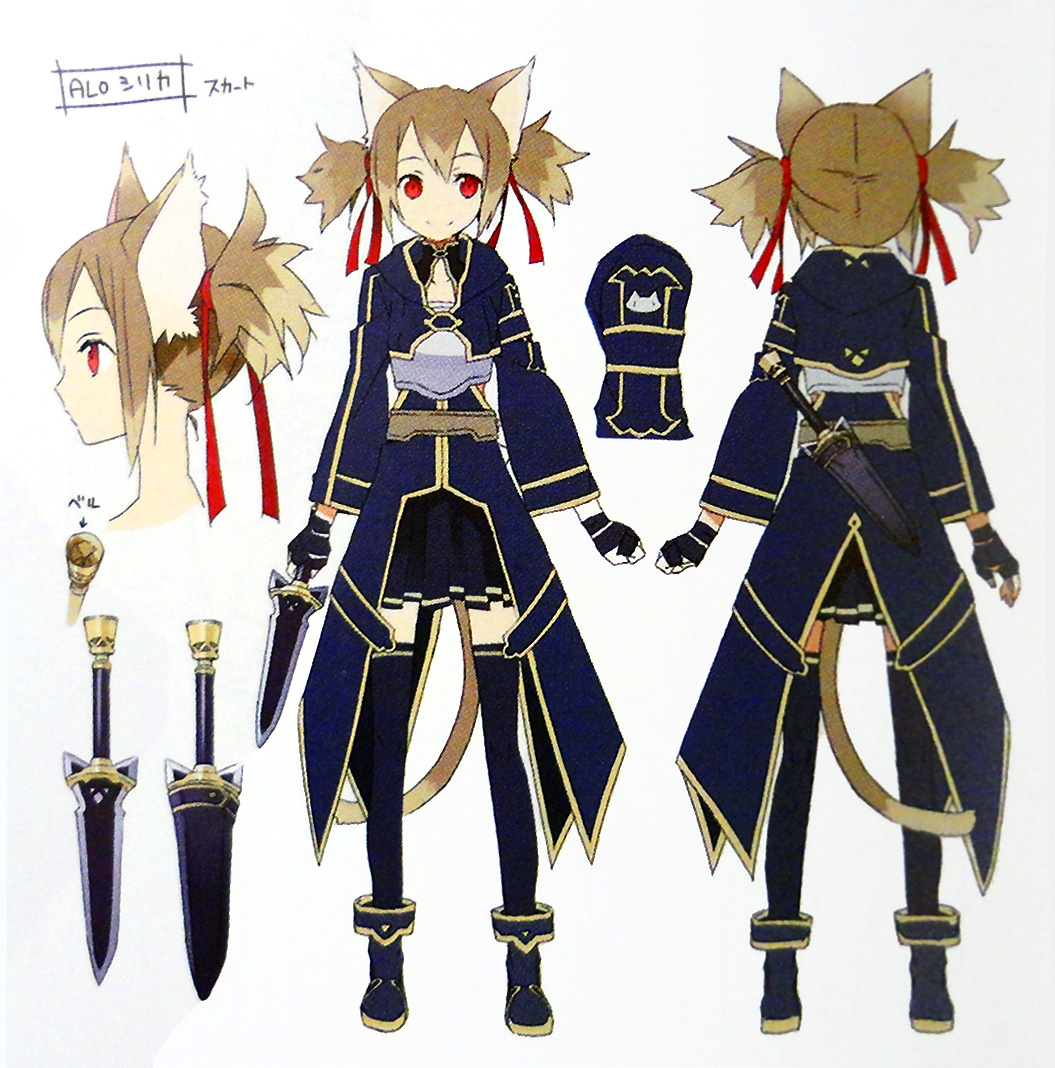
Lost Song game sprite
I color-sampled the character art from the official website for matching.
All dark yellow/gold parts appear to be the same color. They are darker than the similar trim in her SAO version.
All dark gray/black parts appear to be the same color. They are darker than the similar parts in her SAO version.
Hair ribbons are more of a true red and slightly darker than her ribbons in the SAO version.
Numerous amateur Silica costumes were consulted for ideas.
CIRCLE LENSES
Cost: $0.00 ($16.95)
I used the same pair as I did for the SAO Silica cosplay, Super Pinky Bright Red.

SOCKS
Cost: $0.00 (~$29.00)
Materials: Black thigh-high socks, elastic, golden yellow dye, orange dye, goldenrod thread, sock glue
I also reused the socks from my previous Silica cosplay. The socks are from Cospatio in size M (a bit big for my 21.5cm feet).

I’d sewn custom-dyed elastic bands at one point to the socks. When stretched, they stay in place for the whole day.

Finished socks. They stay up with the help of sock glue.

SKIRT
Cost: $7.38 (~$10.30)
Materials: Caviar stretch poplin, mediumweight interfacing, black thread, black invisible zipper, skirt hook & eyes, gold satin, golden tan thread
I decided to remake the skirt despite that it’s essentially the same as the one Silica had in SAO because I wanted to have all of the gold trim to match.
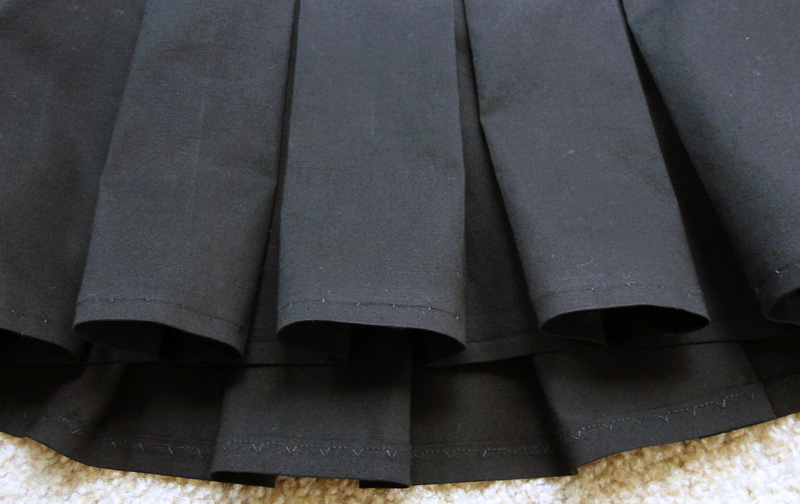
Silica’s skirt has 10 box pleats, centered. I chose to make this skirt slightly wider than the last one, but shorter at the same time to account for how it would sit lower on my waist. The pleats came out to be 2.625″ wide and the skirt body was 9.5″ long. The waistband was 1.5″ wide.
The skirt took up a 51″ × 23″ piece of poplin. I chose caviar for color, which appeared to be Jo-Ann’s “off-black”.
Pattern pieces were long rectangles with pleat folds marked.
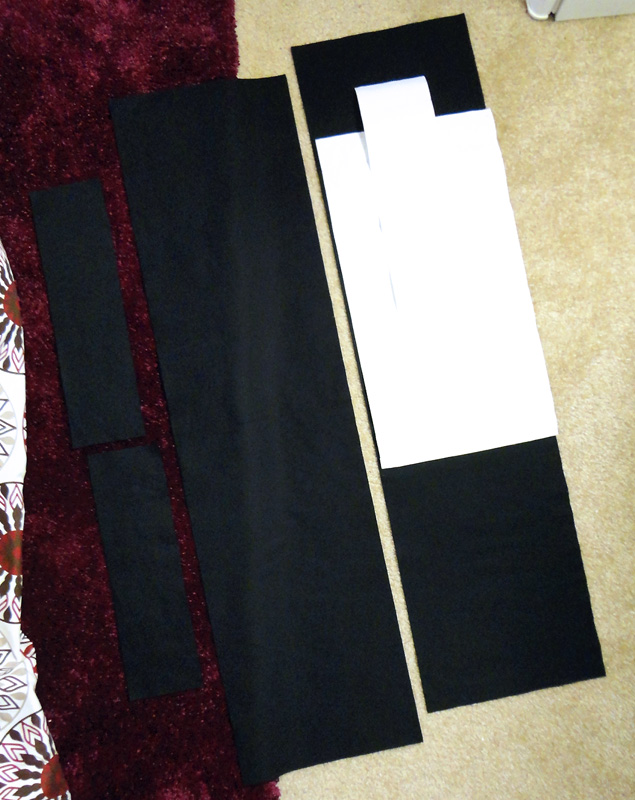
The pieces are as follows:
- Two 40.625″ × 10.75″ skirt body
- One 14.375″ × 4.25″ front waistband
- One 15.375″ × 4.25″ back waistband
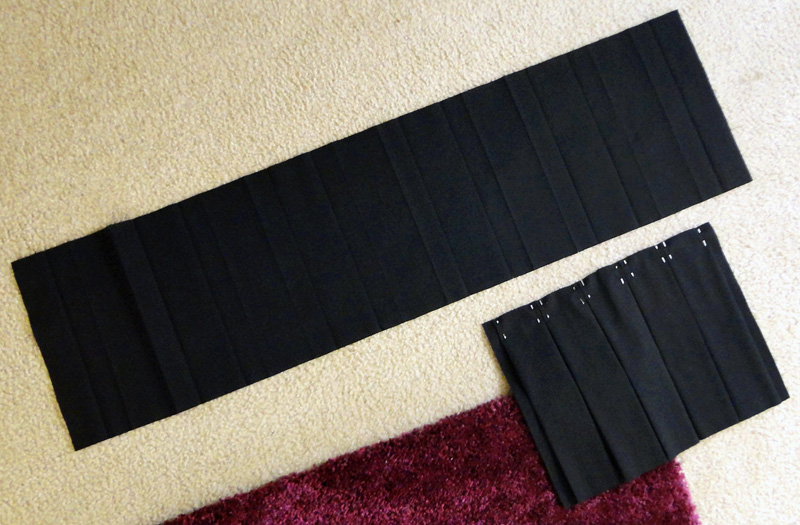
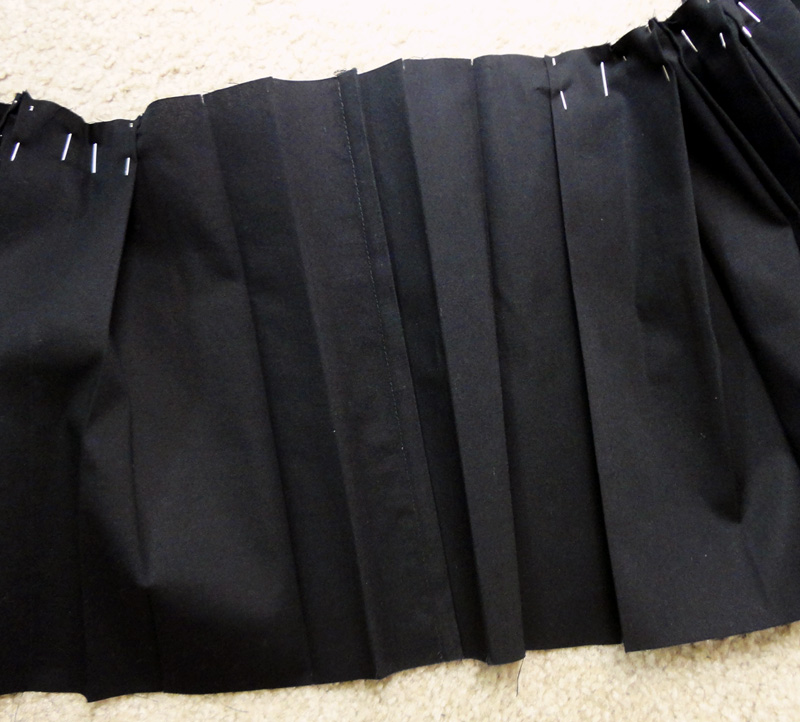
I made little snips into the sides of the skirt body pieces as easy guides for where the pleat folds would go. Making the pleats required little effort, just a lot of repetitive folding and pressing. I pinned one side of the pleats to keep them from falling apart.
The skirt body was sewn together on one side with a french seam. This would become the right side of the skirt.
I used an overcasting stitch to finish the raw hems on the other end of the skirt in lieu of a serger. I hand-folded the seam allowances for them as well.
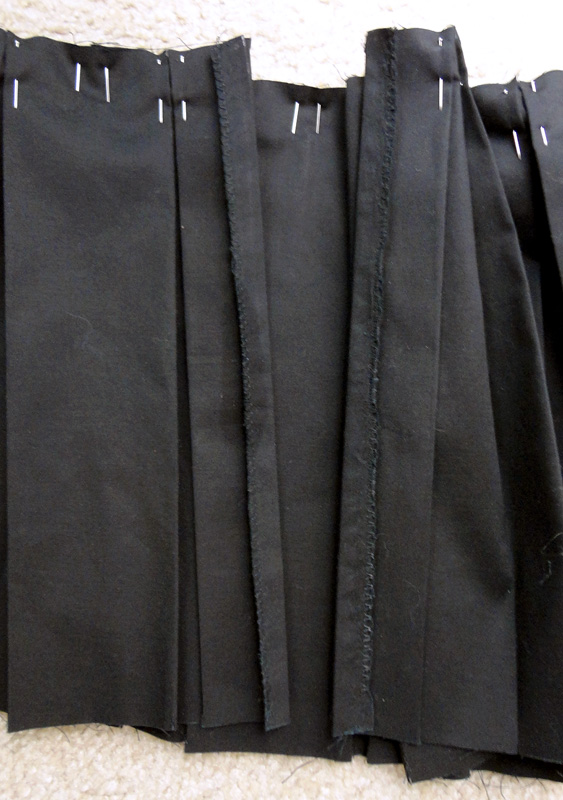
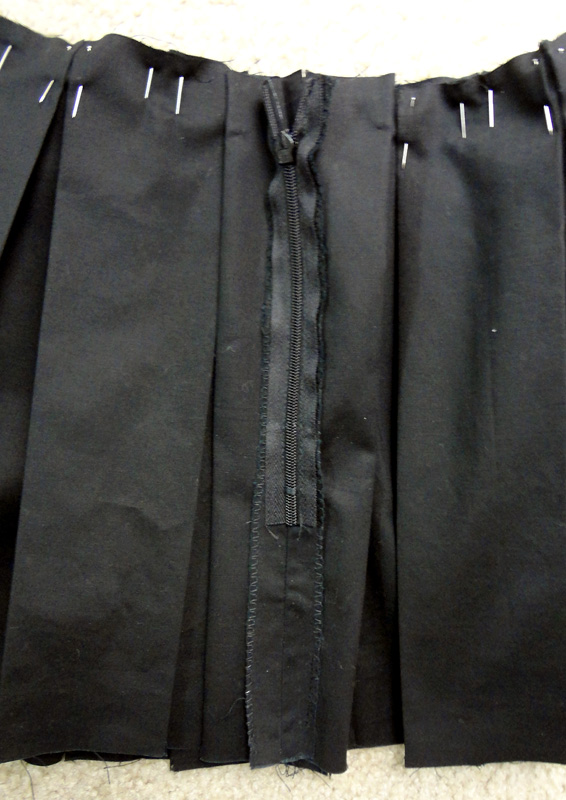
A 5.5″ (trimmed down from 9″) black invisible zipper was sewn to the left opening side of the skirt and the rest of the seam was finished as well.
The top hem of the skirt body was basted all the way around.

The mediumweight interfacing was pressed to the inner side of the waistband pieces. I used heavyweight interfacing last time and the waistband came out far too stiff.
I sewed the waistband pieces together on one end and pressed the fold for the inner side.
I added the waistband to the top of the skirt body. The longer piece goes on the back side.
I sewed up the ends of the waistband pieces and trimmed them so that they could be flipped right side out. I also trimmed off about 0.375″ of excess fabric from the top of the skirt body pieces to reduce bulk.
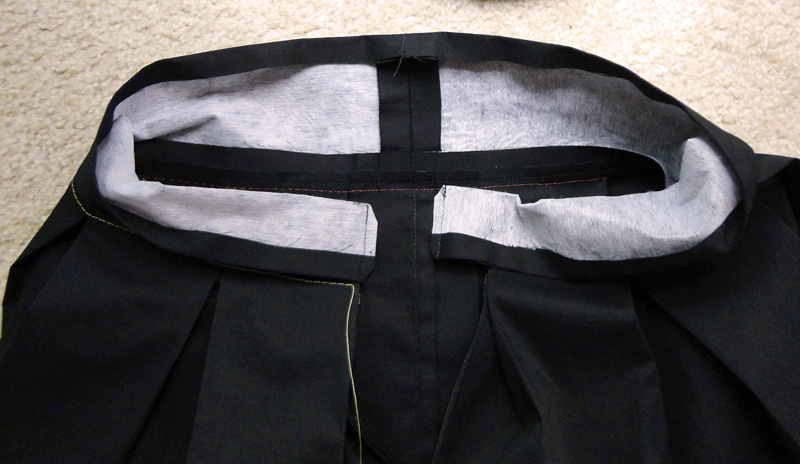
Sewn and pressed waistband, 1.5″ wide in height. I used the basting as a guide for where to pin the inner side of the waistband and stitched right under the bottom of the outer side of the waistband. Then the basting was removed.
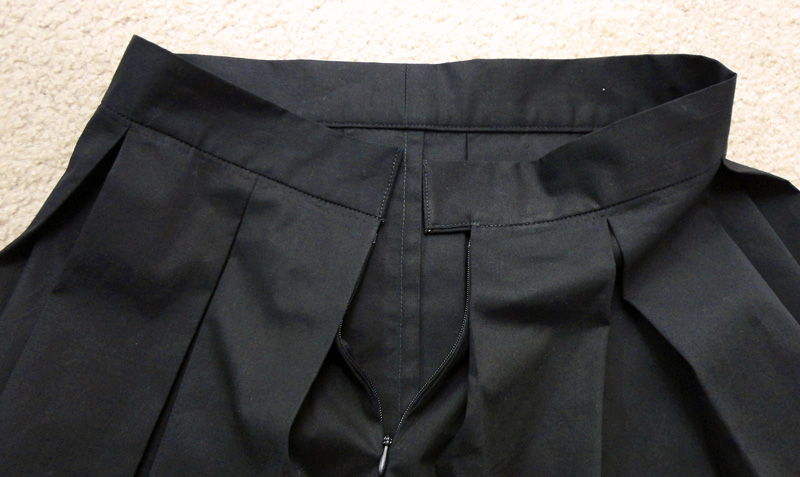
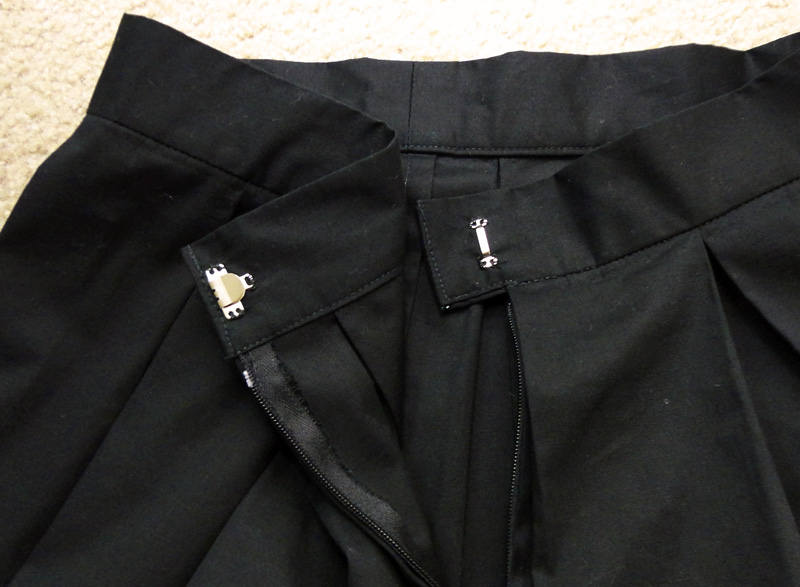
Pant/skirt hook and eyes were hand-sewn to the waistband for closing the skirt in addition to the zipper. I’m not sure why I hadn’t ever done this before when all those Cospatio skirts are configured this way. In the past, I only used snaps, which were prone to popping open under stress.
The bottom hem of the skirt was finished by blind stitch.
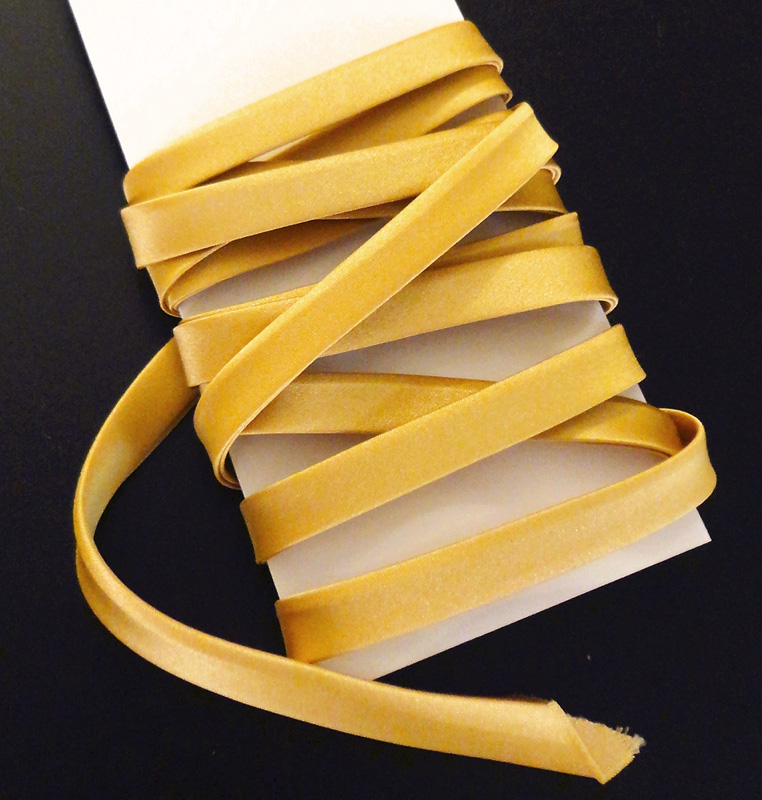
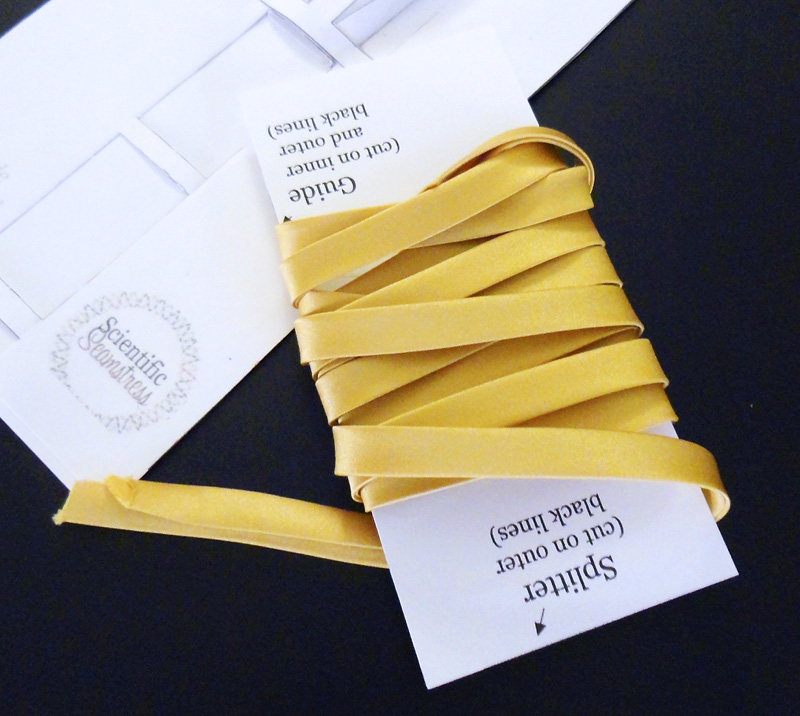
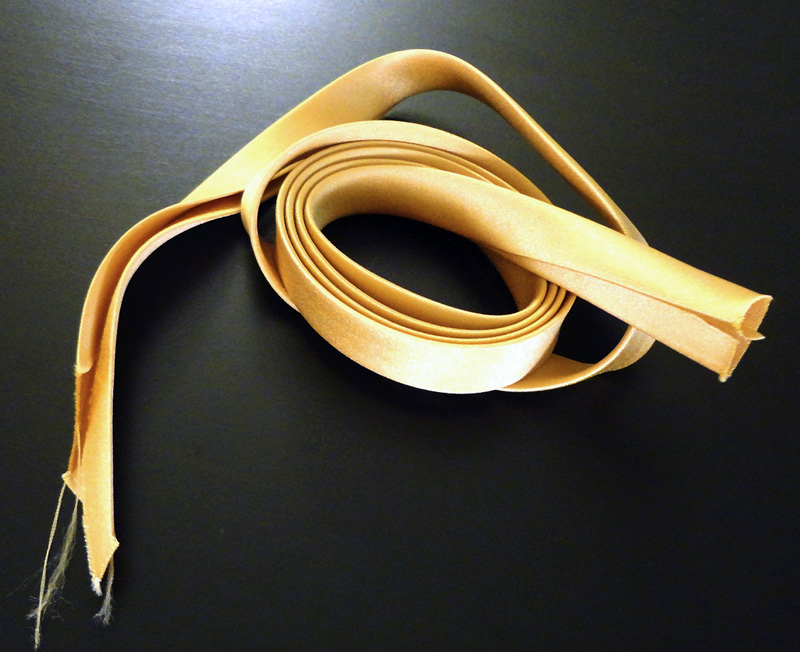
This time I made my own bias tape from satin. I couldn’t find satin in the right gold color at Jo-Ann and wound up purchasing it from Hancock Fabrics. The only ready-made bias tape available was this super tacky and shiny gold lamé tape stuff, which doesn’t resemble the darker gold trim on Silica’s outfit. Non-satin yellow trim looked too flat and ‘weak’ for a fantasy-type costume.
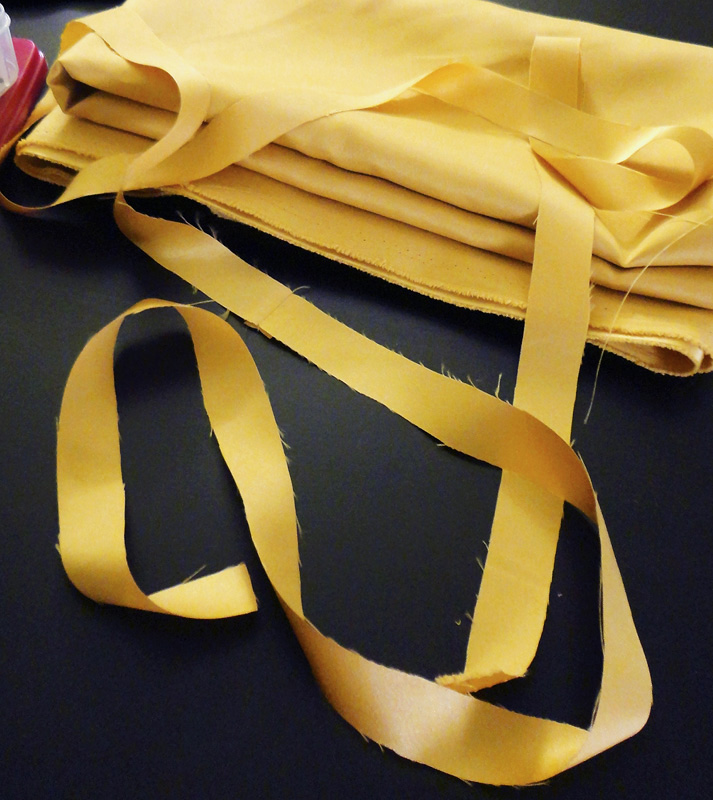
The finished gold bias tape is 0.5″ wide and placed 0.625″ away from the bottom hem. I used golden tan top thread and black bottom thread for sewing it on. The ends were tucked into the french seam on the left, which I had ripped open just wide enough to insert the bias tape ends into. The opening was then hand-sewn shut.
I hand-folded the pleats and pressed them again to get them nice and crisp again (the pleating had rounded out during the sewing process).
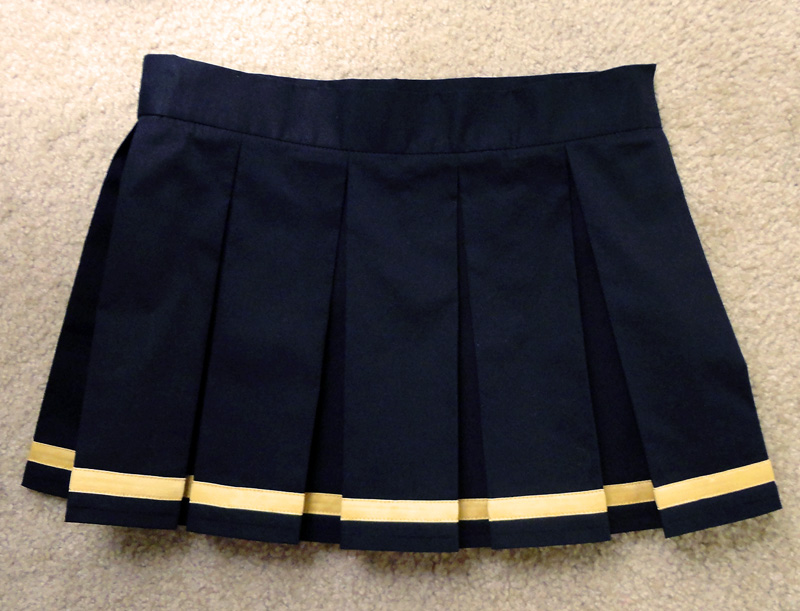
The skirt is finished. I noticed that the poplin fabric was thinner than what I used last time, despite that I bought the same product from Jo-Ann. Perhaps the quality had downgraded over the last two years.
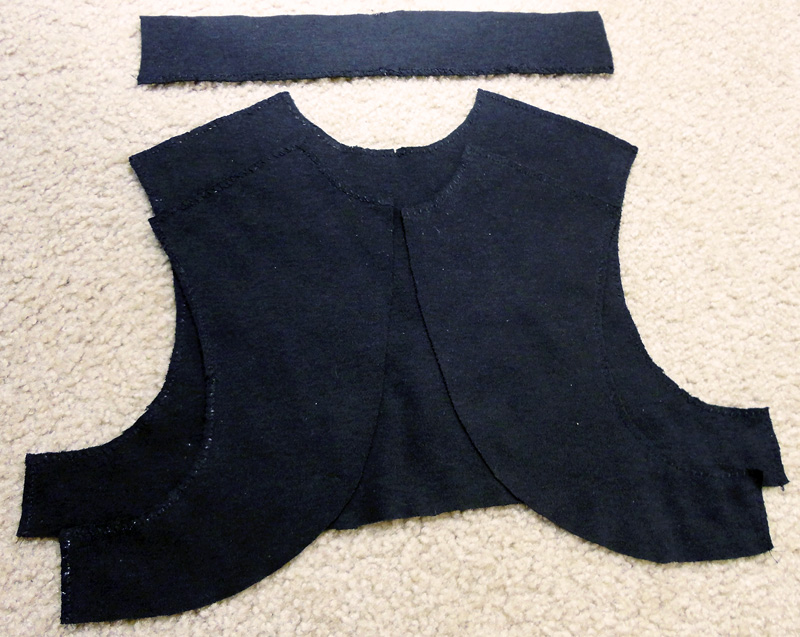
INNER SHIRT
Cost: $2.78 (~$6.78)
Materials: Black knit, black thread, gold satin, golden tan thread, mediumweight interfacing, dark brown thread, snaps
The design of the black shirt is somewhat odd; it seemed like it’d be an inner shirt, but it goes over the top of the breastplate instead of under. It is also short enough that it does not show from under the blue hoodie.
I purchased 11″ of black knit fabric (cotton/spandex mix) for making the inner shirt and still had enough left over for the hand wraps. I went with a knit fabric so that it would tightly hug my neck and shoulders while still offering flexibility without suffocation.

The basic pieces are as follows:
- Right & left front bodice
- Back bodice
- One 11.375″ × 1.875″ neckband
The back bodice piece was 16.25″ × 11.25″ and the front pieces were 7.75″ × 11.25″. They were all cut from the same pattern piece.
Major seam allowances on the shirt were 0.375″ and curved seam allowances were 0.25″.
I finished the raw edges, except for the the sides that will have bias tape trim, with an overcasting stitch and pressed the pieces.
The bodice pieces were sewn together at the shoulder and side seams. I also reinforced the seams with two more rows of stretch stitches.
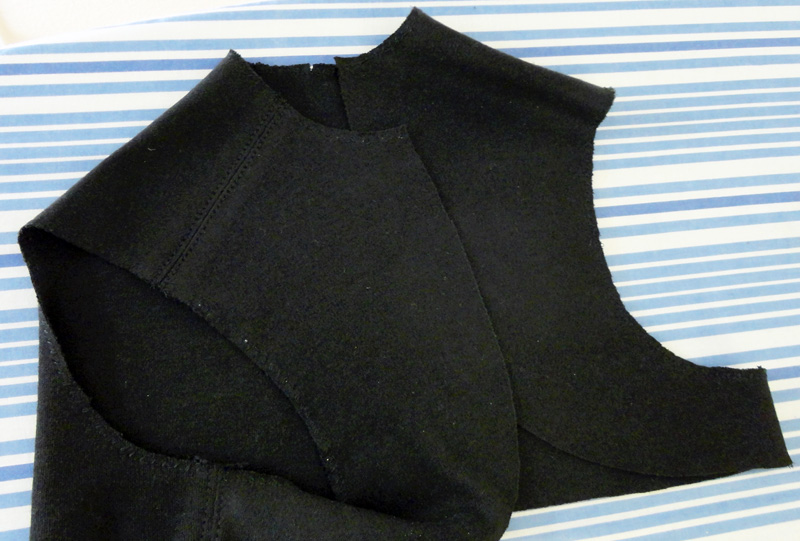
I sewed the neck band to the top of the bodice and reinforced the seam as well.
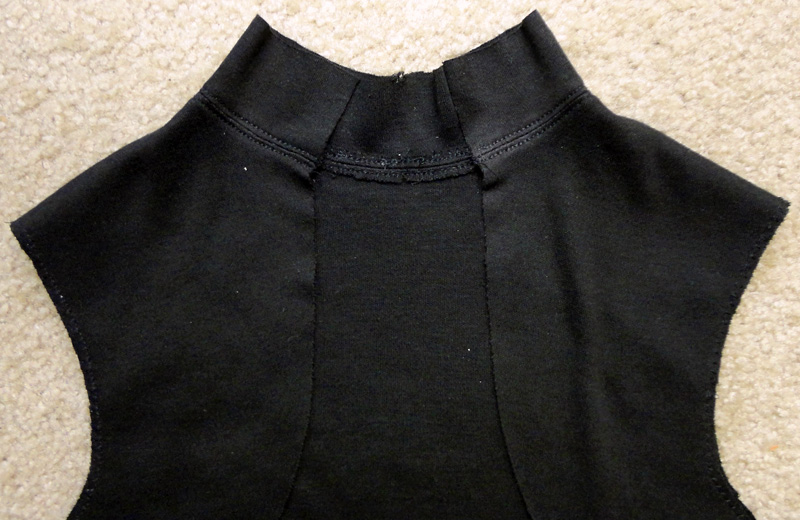
The armhole hems were turned 0.25″ into themselves and finished with a zigzag stitch.

I made 0.375″ double-folded bias tape out of dull satin (the same as for the skirt trim).
The bias tape was sewn to the shirt. I left the armholes alone since they won’t be showing and I couldn’t find any official art verifying whether or not they’re supposed to have gold trim. The bias tape also helped to strengthen the flimsy knit fabric, making the collar stiff enough to stand against my neck.
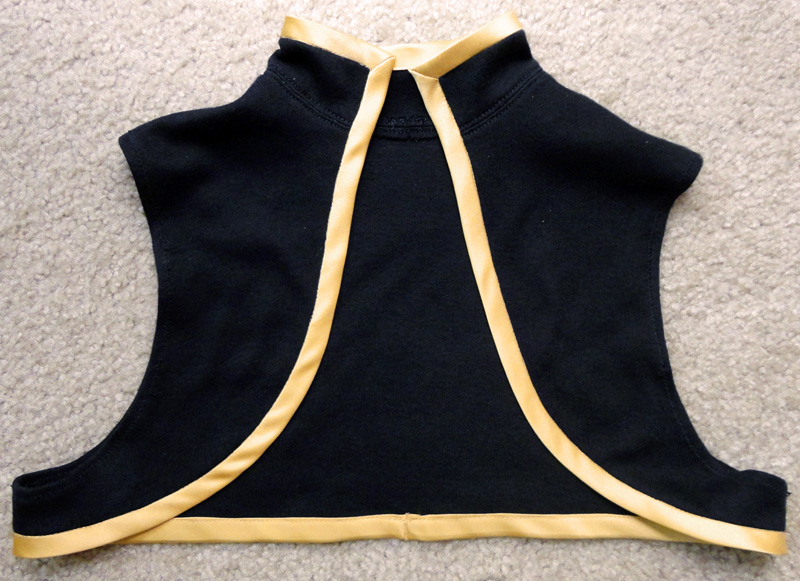
For the fastener-like piece on the shirt, I cut front and back pieces out of the same satin I used for the trim. The pieces are 2.5″ × 1.375″.
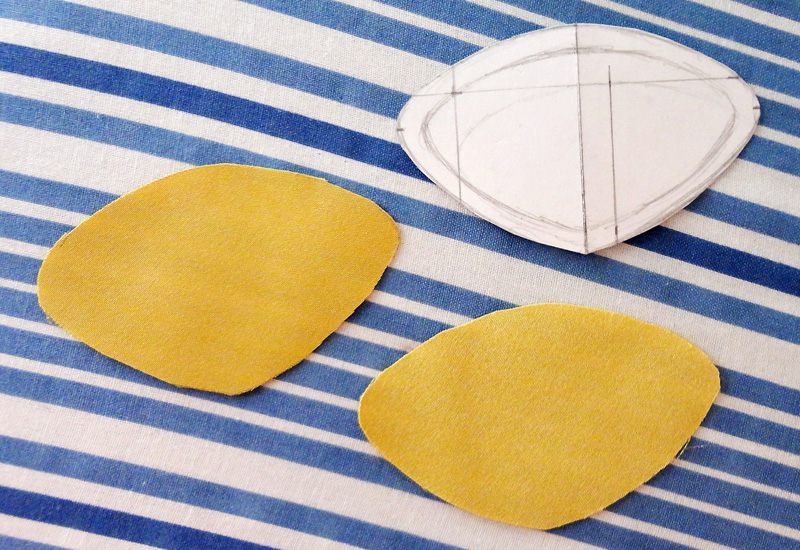
Mediumweight interfacing was applied to the back sides of the fastener pieces.
The two halves of the fastener were sewn together with a 0.25″ allowance, turned right side-out, and pressed.
I use a brown top thread and golden tan bottom thread to stitch on detailing around the fastener at 0.25″ away from the edges.
I hand-stitched the fastener piece to the right side of the shirt at the collar and sewed on a small, black snap for the left side.
Finished inner shirt. The gap between the left and right sides of the collar at the throat is about 1″ wide.
Like with the skirt, the fabric turned out to be thinner than what I’d used for my previous Silica costume. It isn’t a big deal since most of the shirt isn’t visible from the outside when worn with the rest of the costume and the collar was rigid enough to stand against the neck thanks to the bias tape.
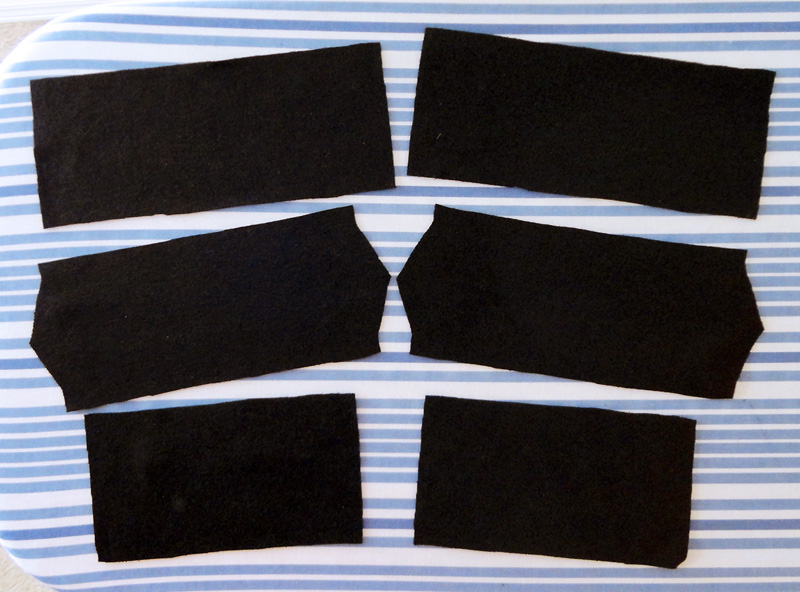
HAND WRAPS
Cost: $0.00 (~$8.00)
Materials: Black knit, black thread, sock glue
Silica’s hand wraps turned out to be just three separate black bands around her hands and wrists. I sort of hoped for something a little more complicated.
The basic pieces:
- Two 7.25″ × 3″ top bands
- Two 7.325″ × 3″ middle bands
- Two 5.75″ × 3″ bottom bands
The slants on the middle bands are about 0.5″ deep and account for how that part of the hand is trapezoidal in shape.
The band pieces were folded in half horizontally and sewn with a 0.375″ seam allowance, then turned right side-out and pressed.
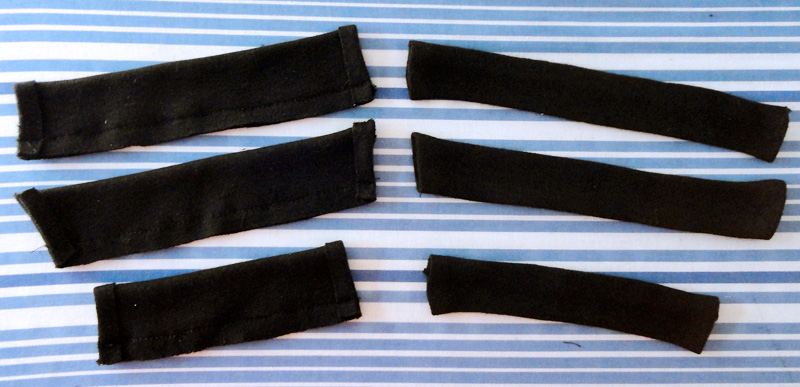
I sewed the ends together with a ladder stitch by hand.
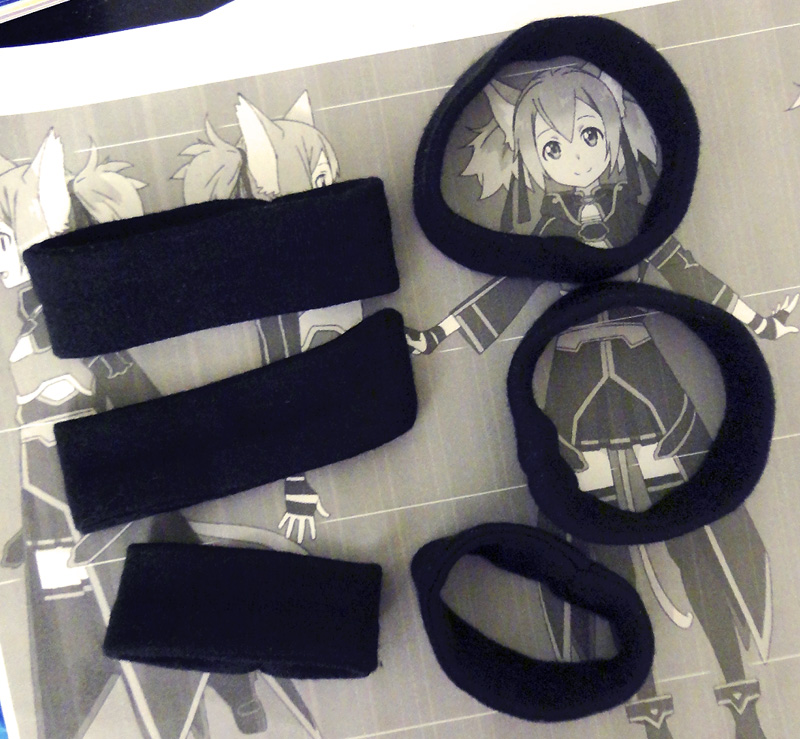
Finished hand wrap pieces. Three per hand, with the top band around 12″ in circumference and the bottom band 5″. Due to the location of the middle band, it would always fall toward my wrist, so I had to use sock glue to keep it in place.
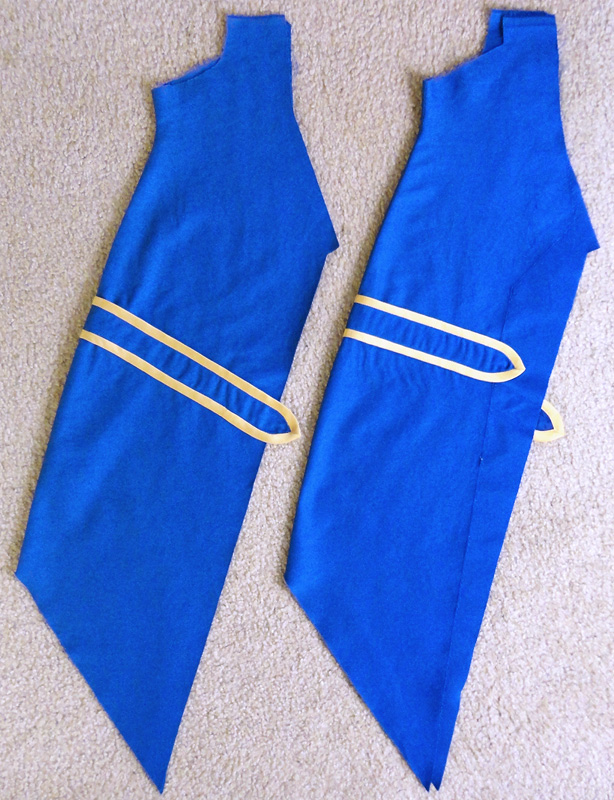
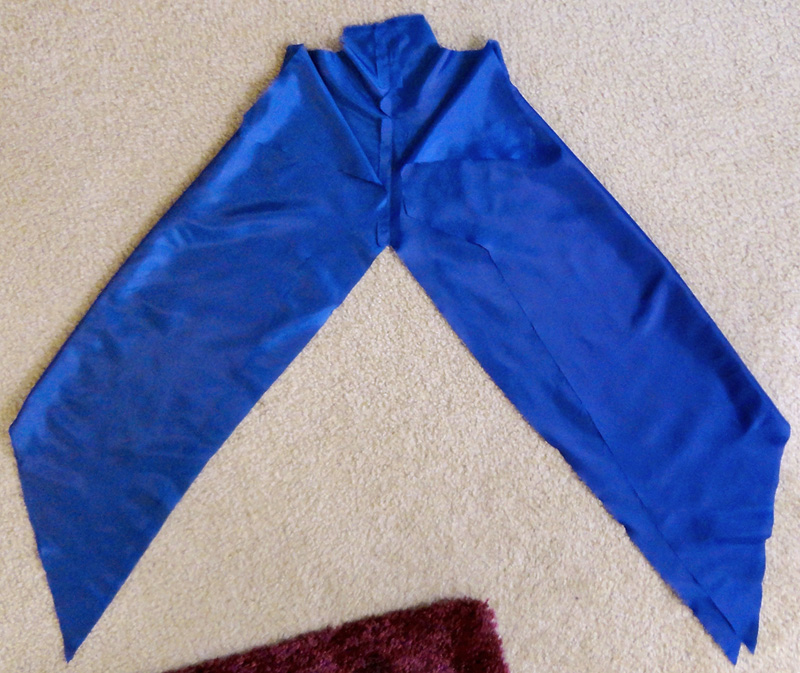
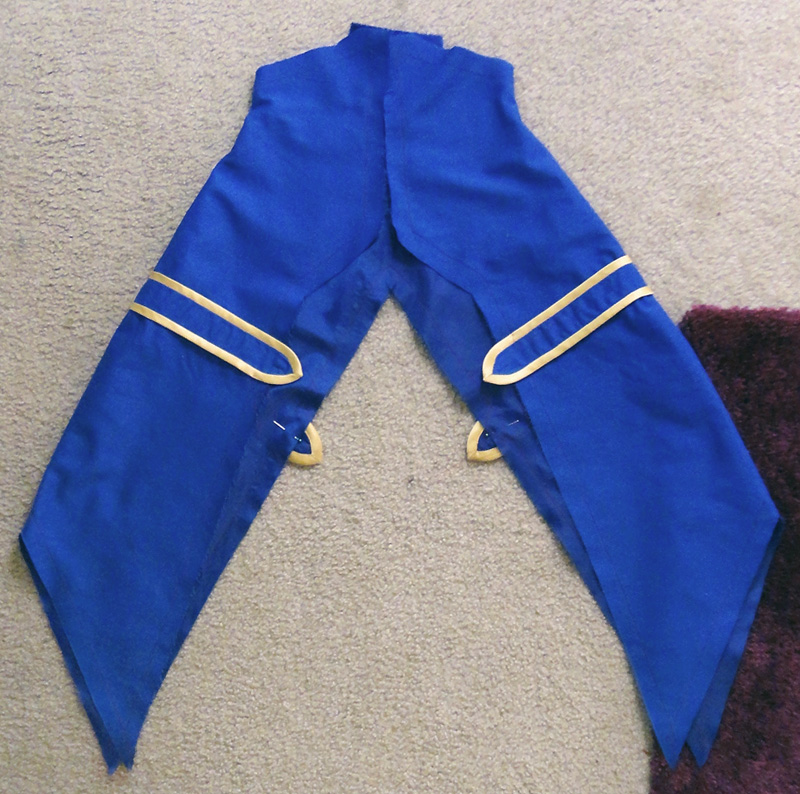
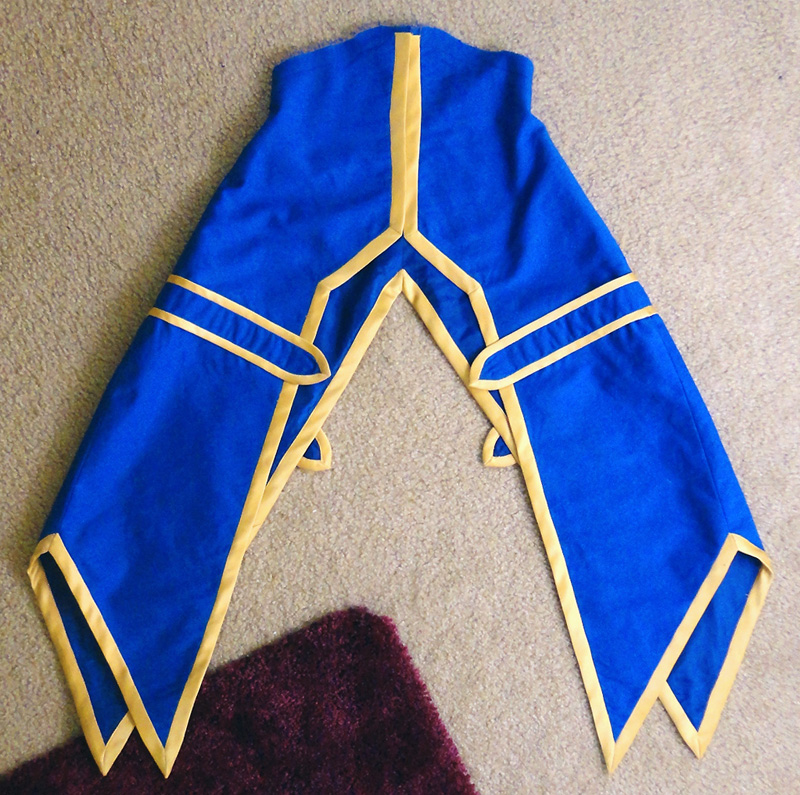
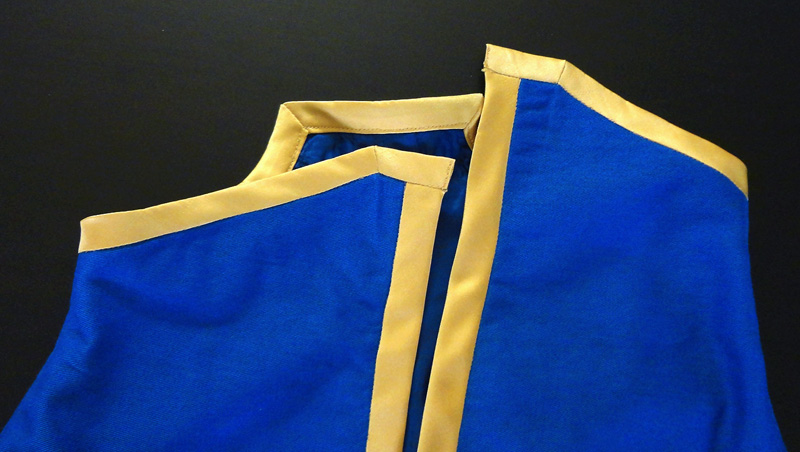
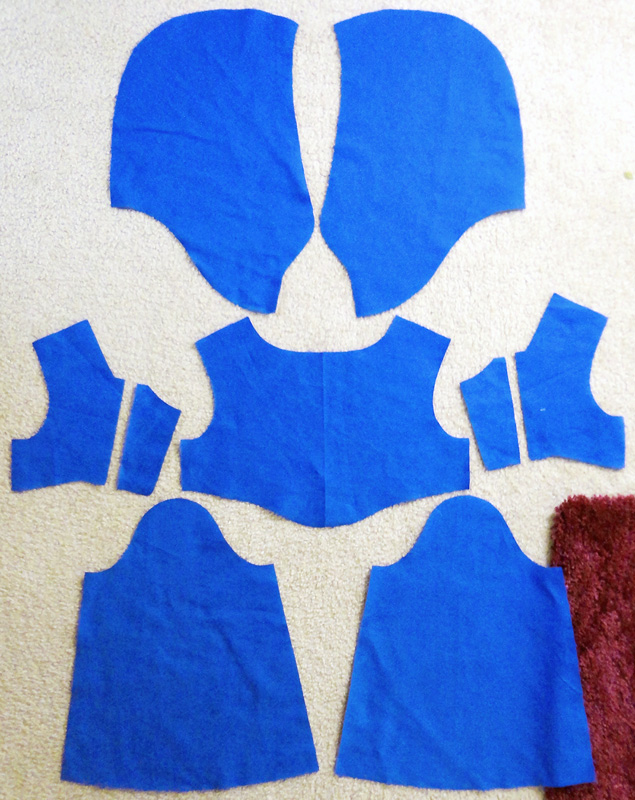
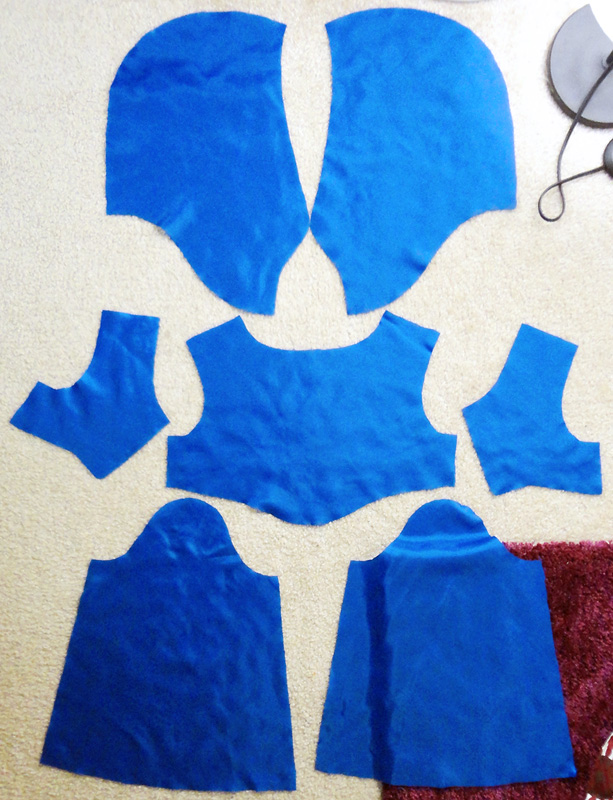
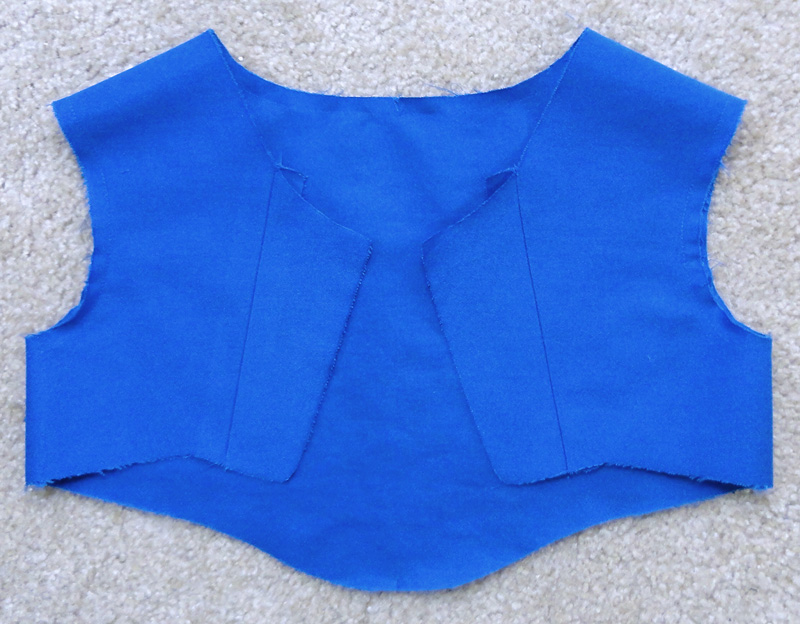
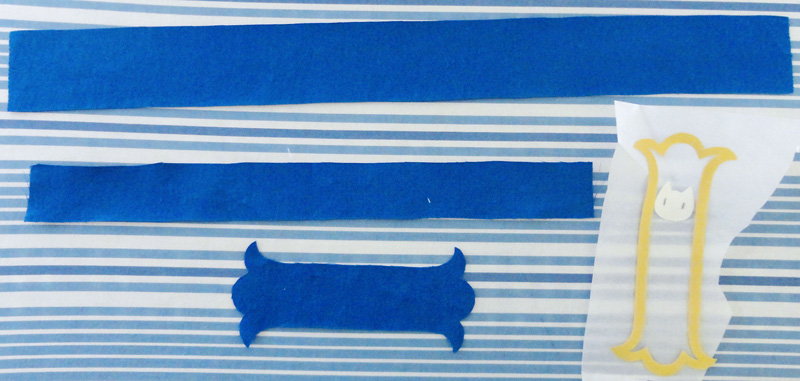
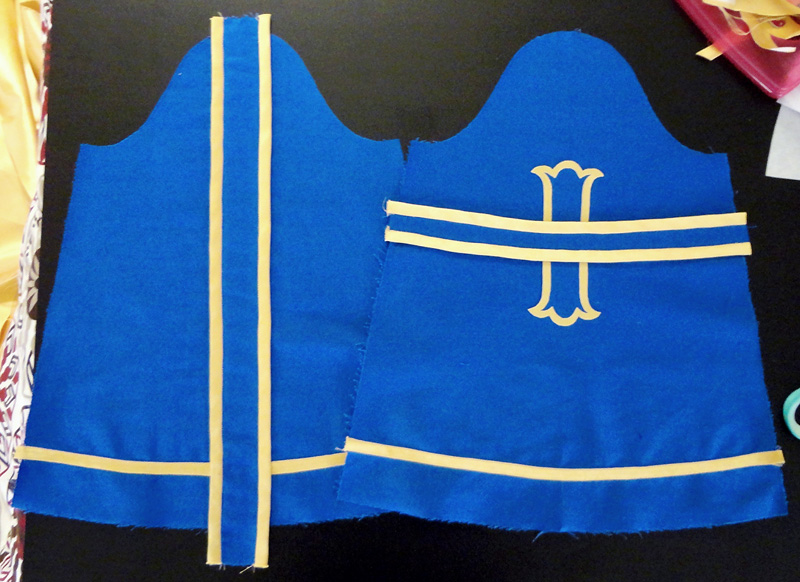
OVERSKIRT
Cost: $29.73 (~$???)
Materials: Blue twill, blue lining, blue thread, gold satin, golden tan thread, iron-on adhesive, hook and eyes, snaps
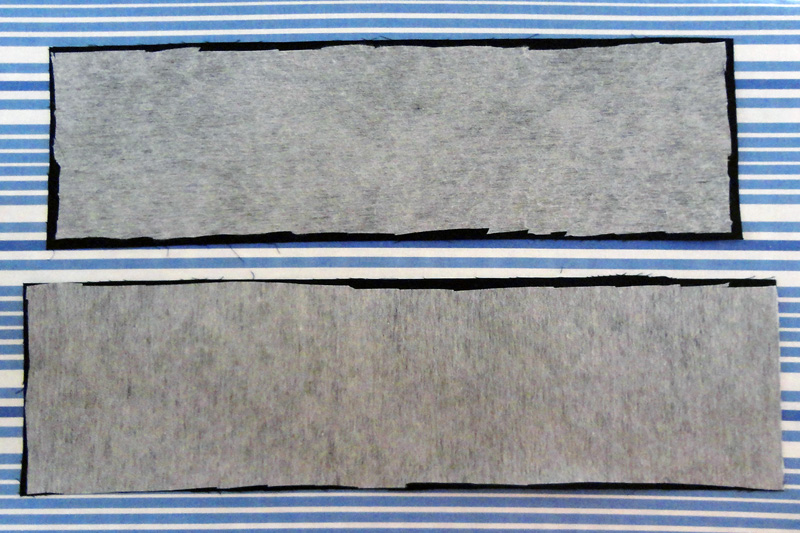
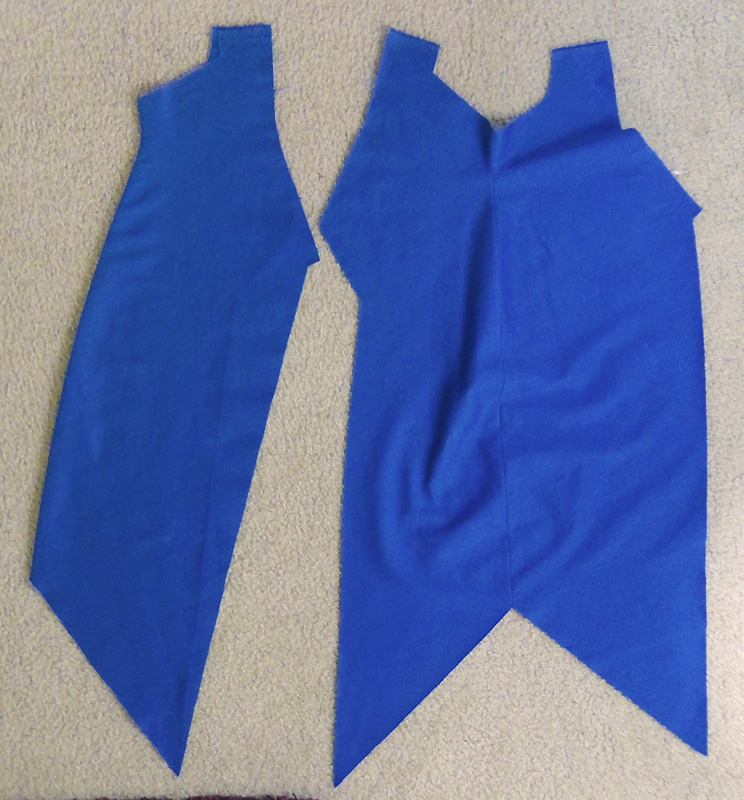
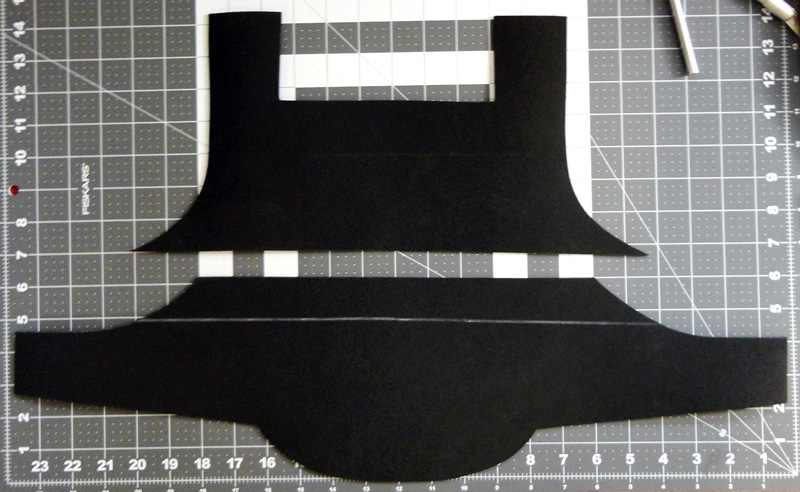
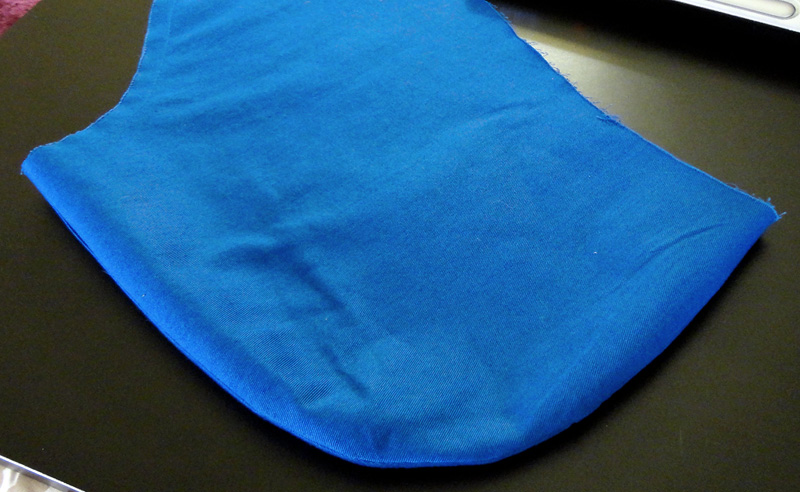
I drafted the pattern by hand on paper and narrowly avoided one error I made with the previous Silica costume, which was forgetting that the hips curve out in the middle of the back and drawing a straight line. Each of the overskirt pieces was around 36″ × 15″ in size, cut on twill outer shell and matching lining (not photographed).
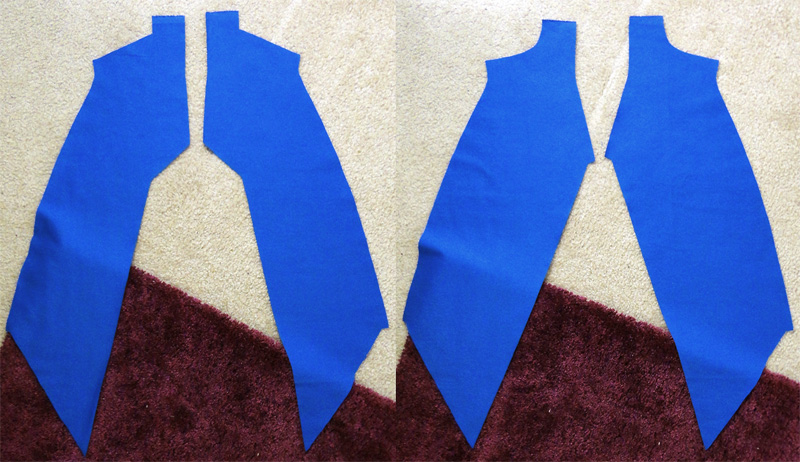
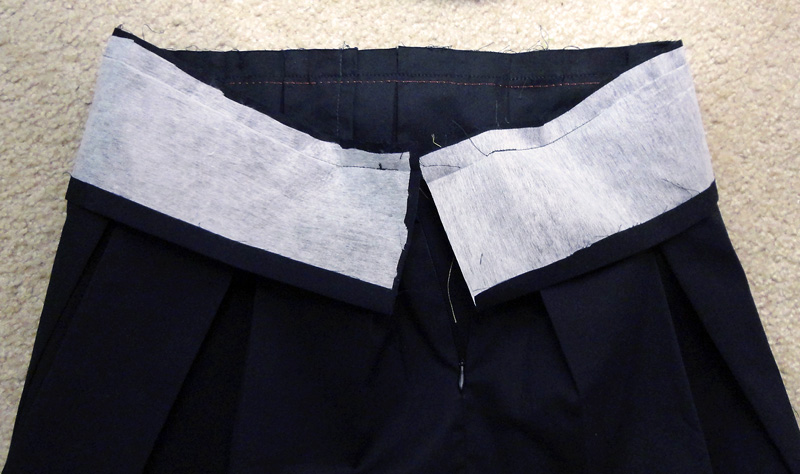
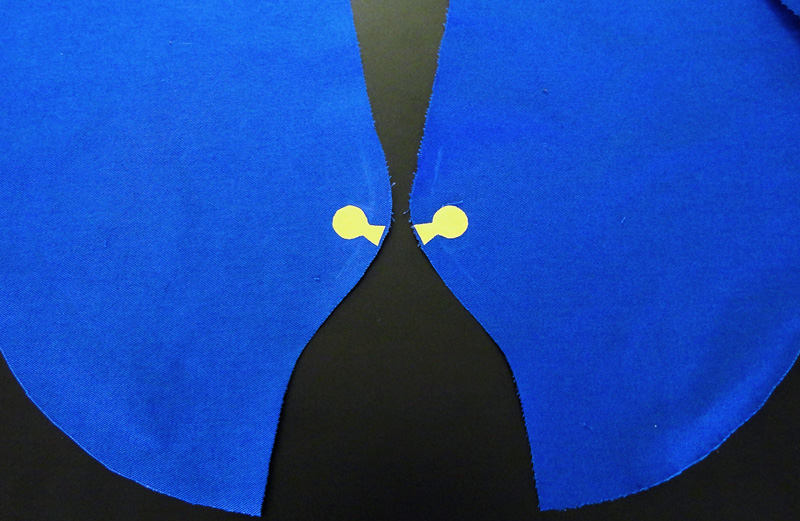
The belt parts on the overskirt were strangely designed. Both front and back views showed them angled downwards, which led to the logical conclusion that they must be L-shaped for that to happen, and yet the animation art always showed them as straight.
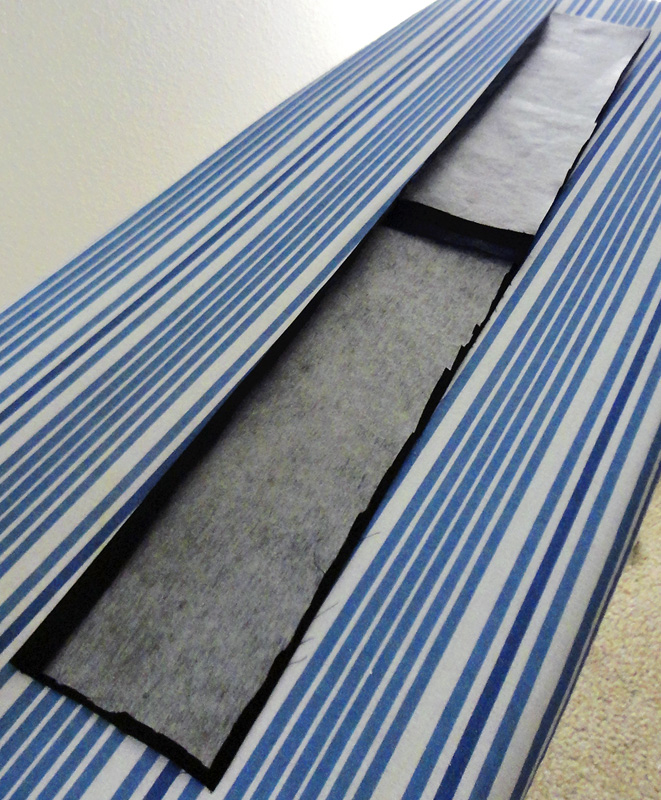
I cut out pieces on both the twill and lining, using the overskirt pattern pieces as guides.
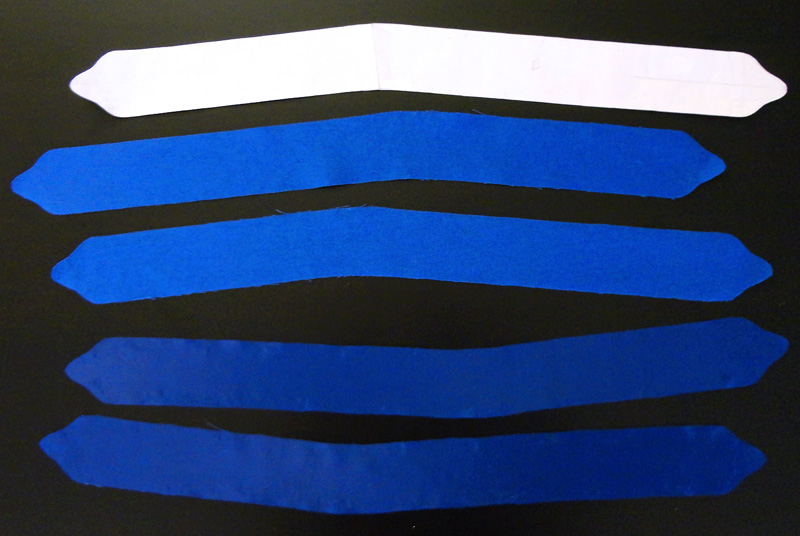
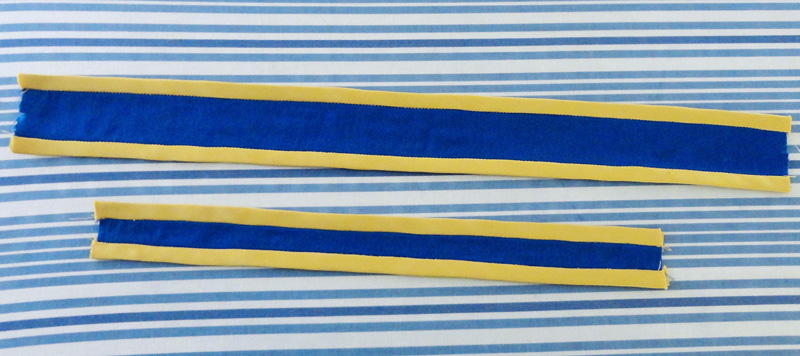
The belt pieces were basted together.
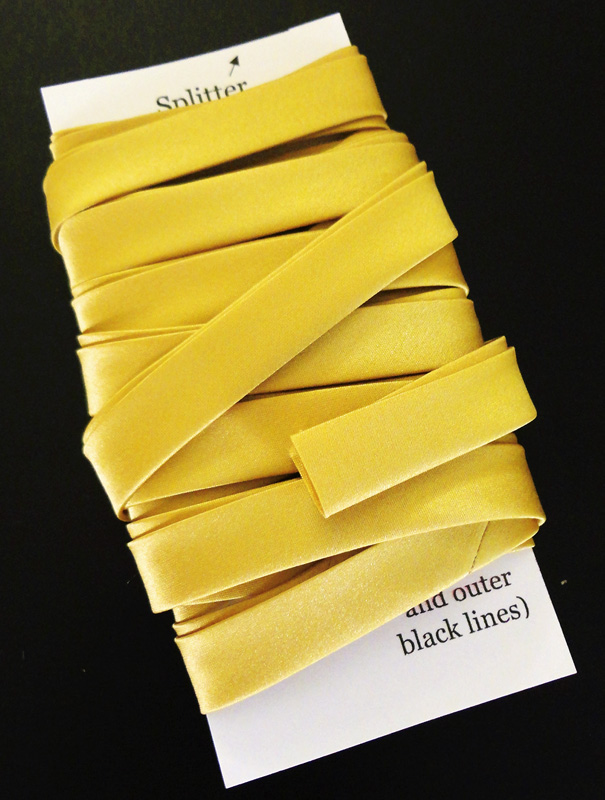
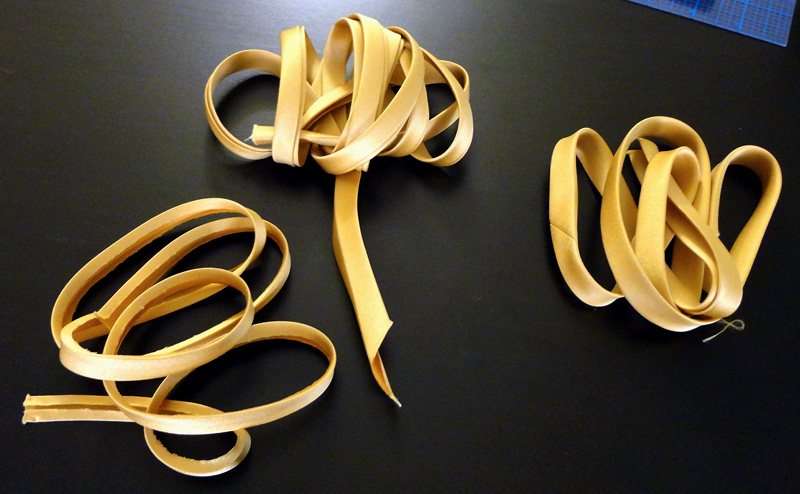
I made around 80″ of 0.375″ wide double-folded bias tape for the belt pieces.
Attaching the bias tape to the belt pieces lost the curve details at the ends. After some consideration, I had to let it be.
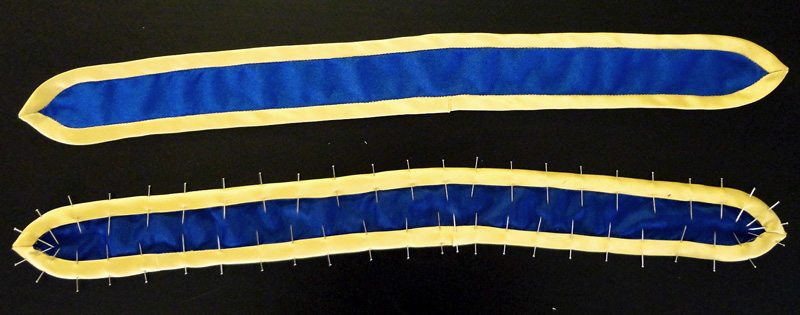
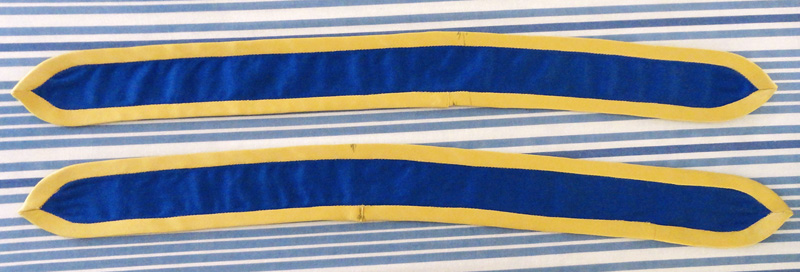
Finished belt pieces.
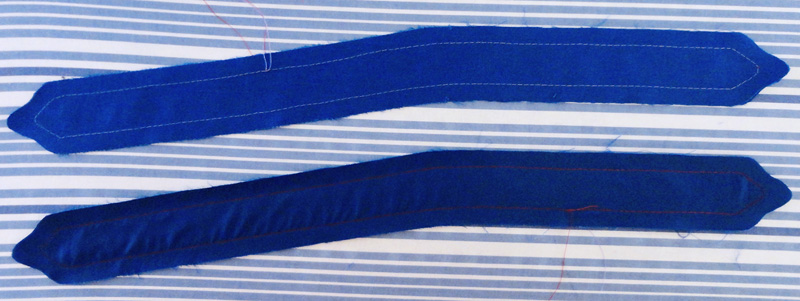
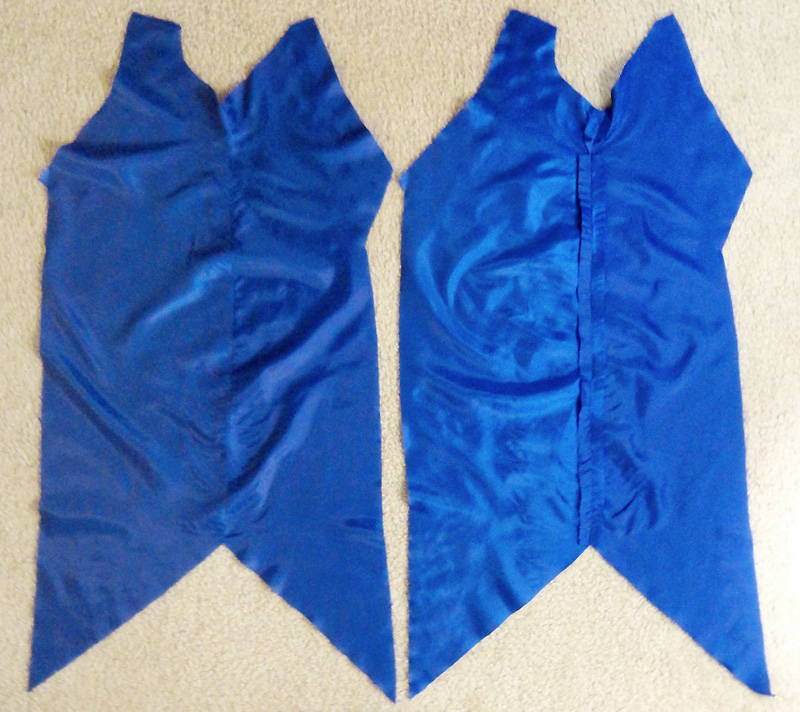
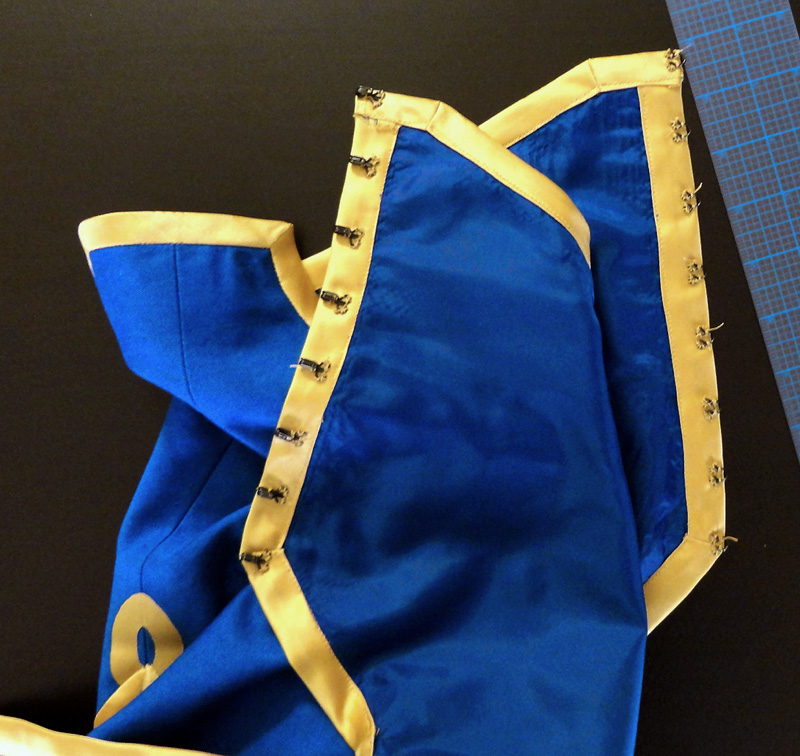
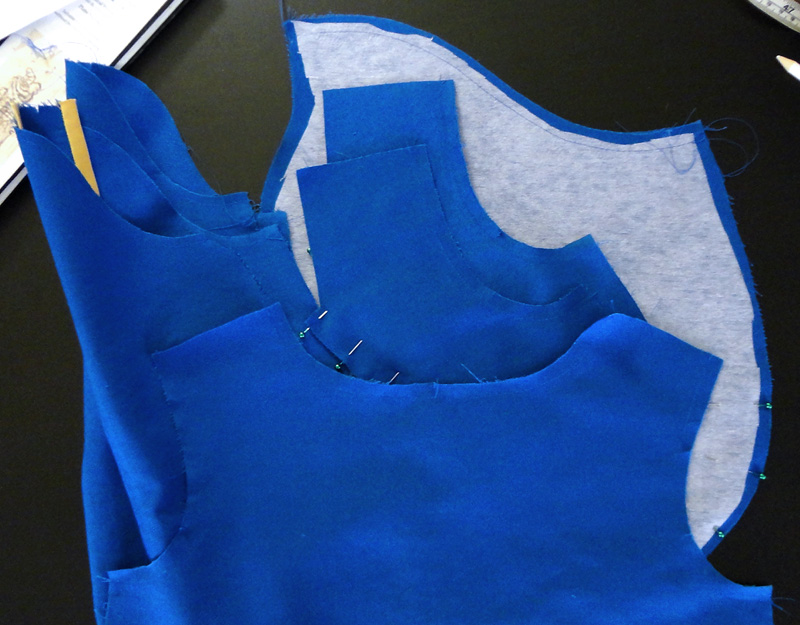
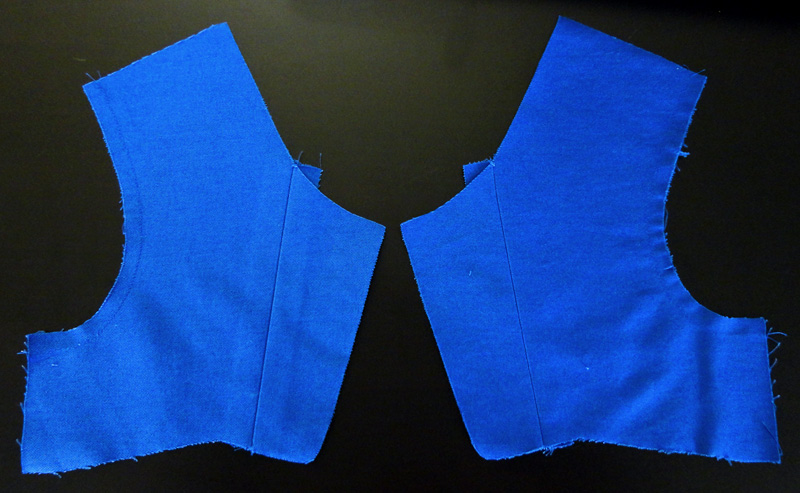
I sewed the overskirt pieces together at the sides for both the twill shell and lining.
The belt pieces were sewn to the overskirt shell, with the stitches ending about 0.75″ away from the edge of the fabric since I still needed to apply the trim there.
The overskirt pieces (shell & lining) were sewn together at the back seam.
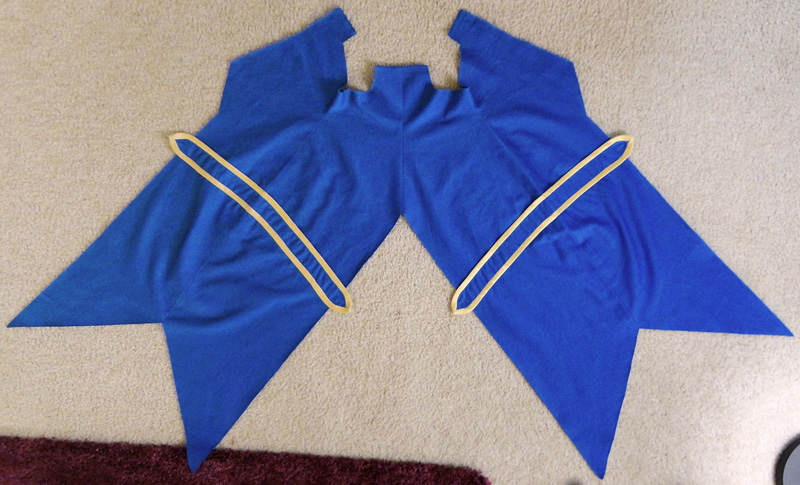
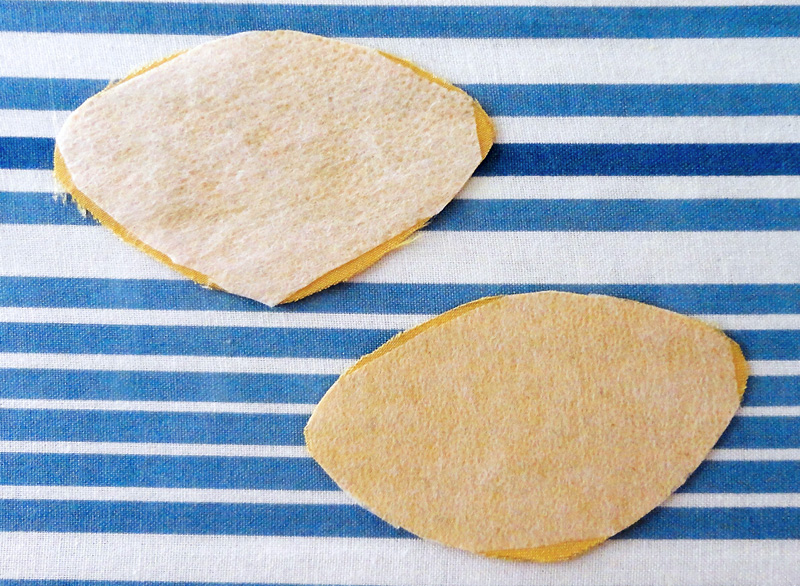
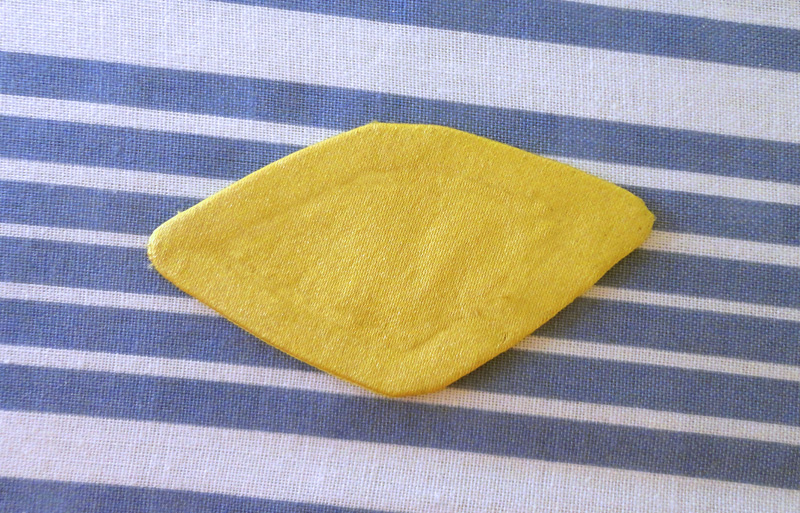
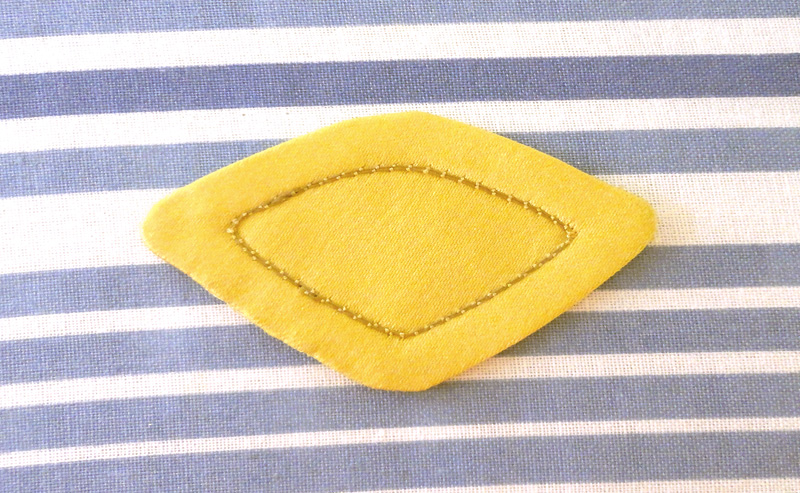
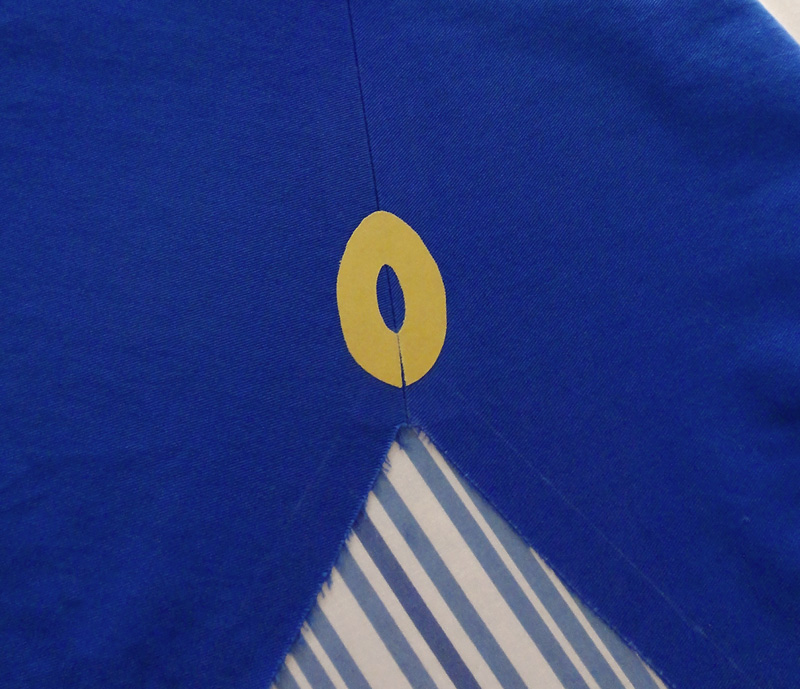
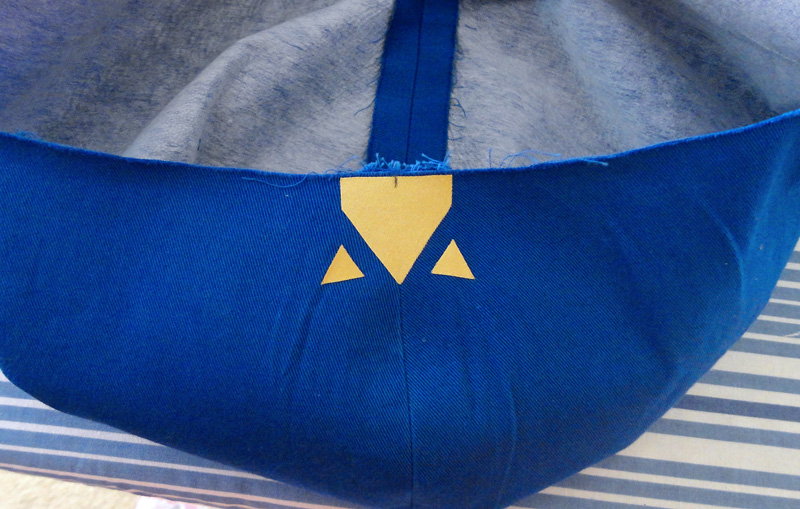
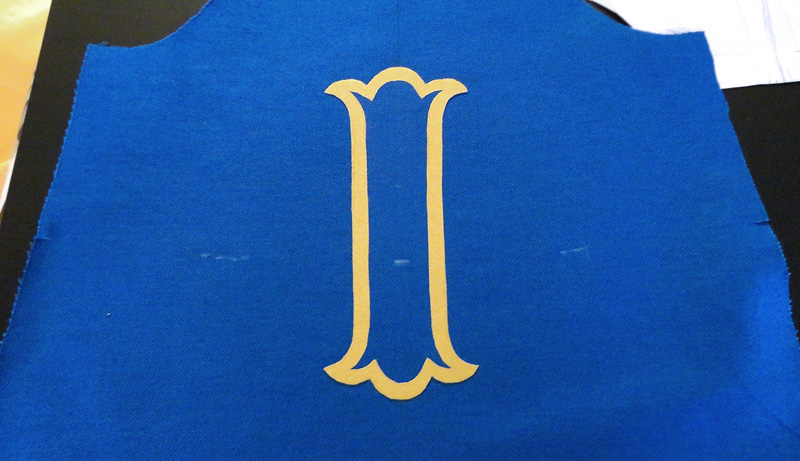
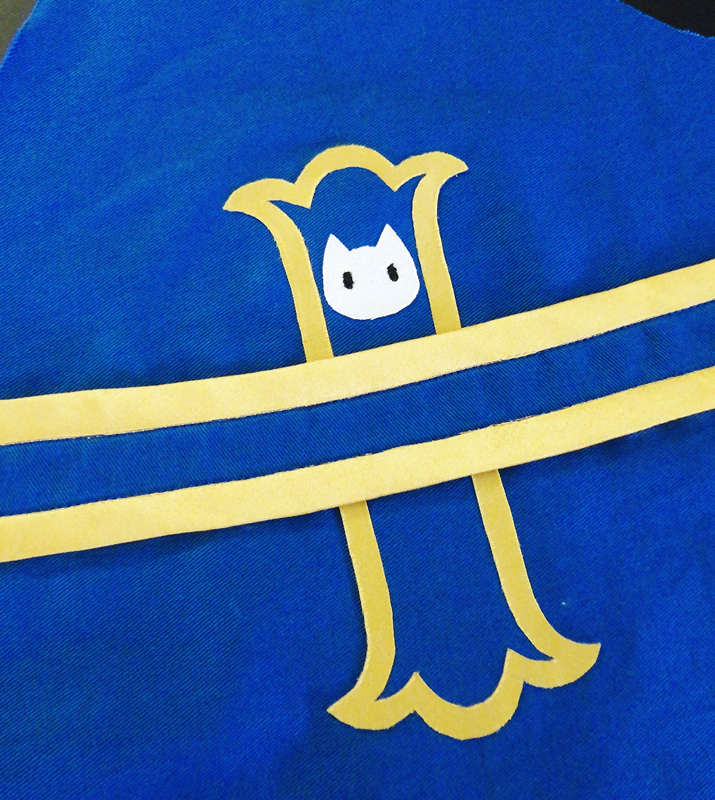
I made the little oval detail on the back side of the overskirt on fusible web bonded to leftover gold satin. The shape measures about 2″ tall × 1.25″ wide.
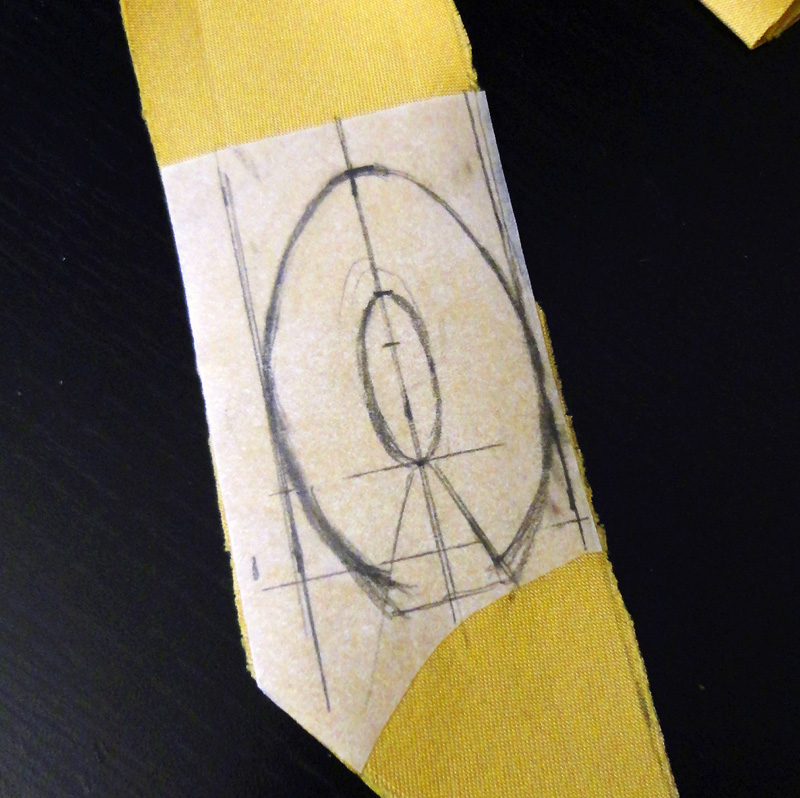
The cutout was heat-bonded to the overskirt. I opted out of satin stitching the edges.
The twill shell and lining were basted together.
I made around 185″ of 0.625″ wide double-folded bias tape for the majority of the overskirt gold trim.
In progress. To be updated.
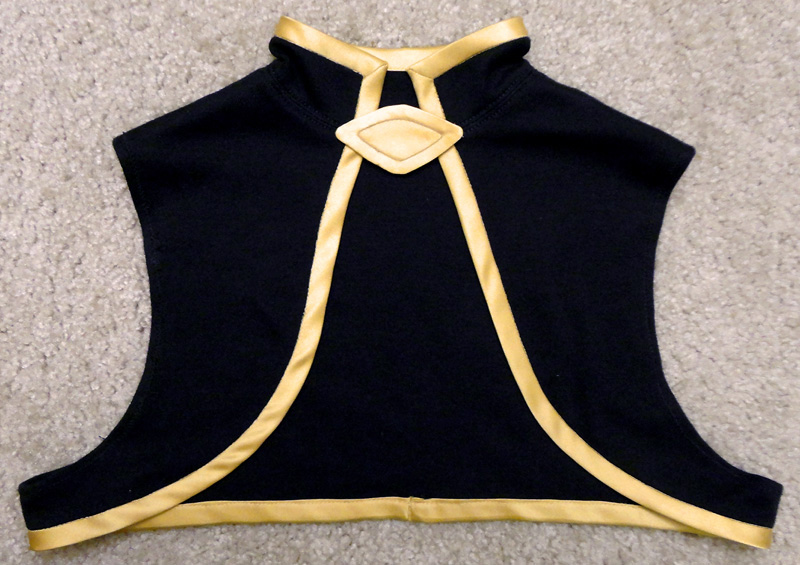
BREASTPLATE
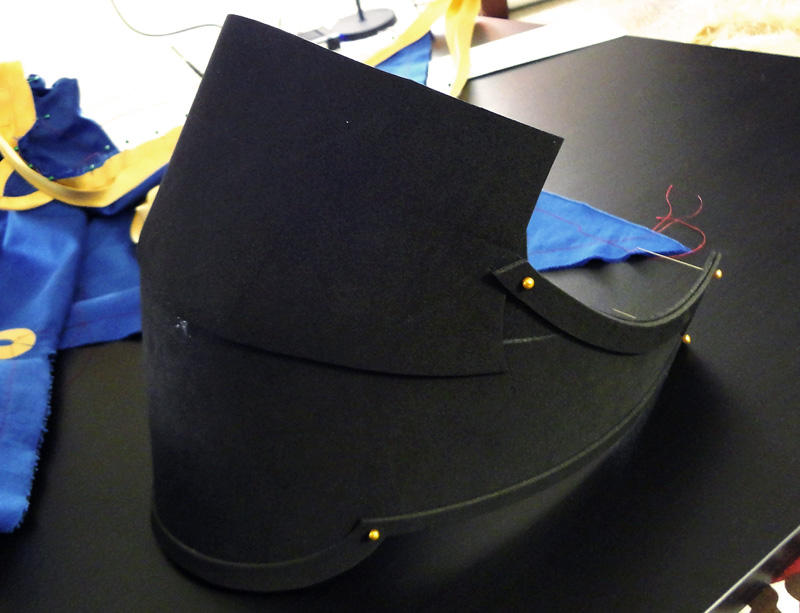
In progress. To be updated.
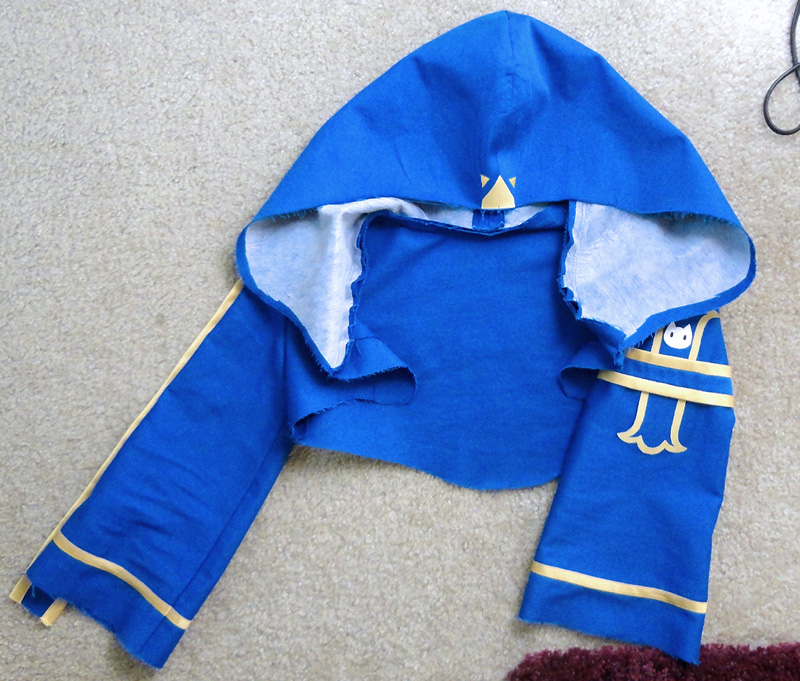
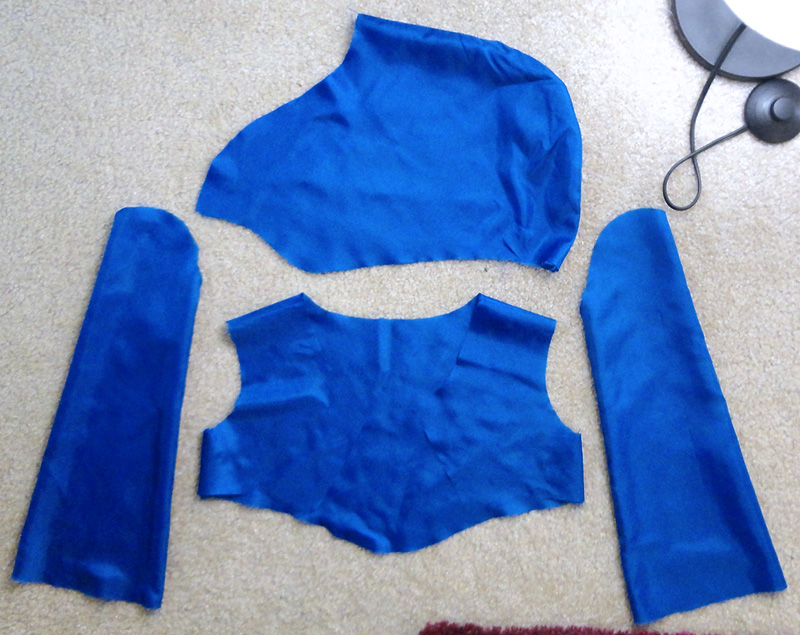
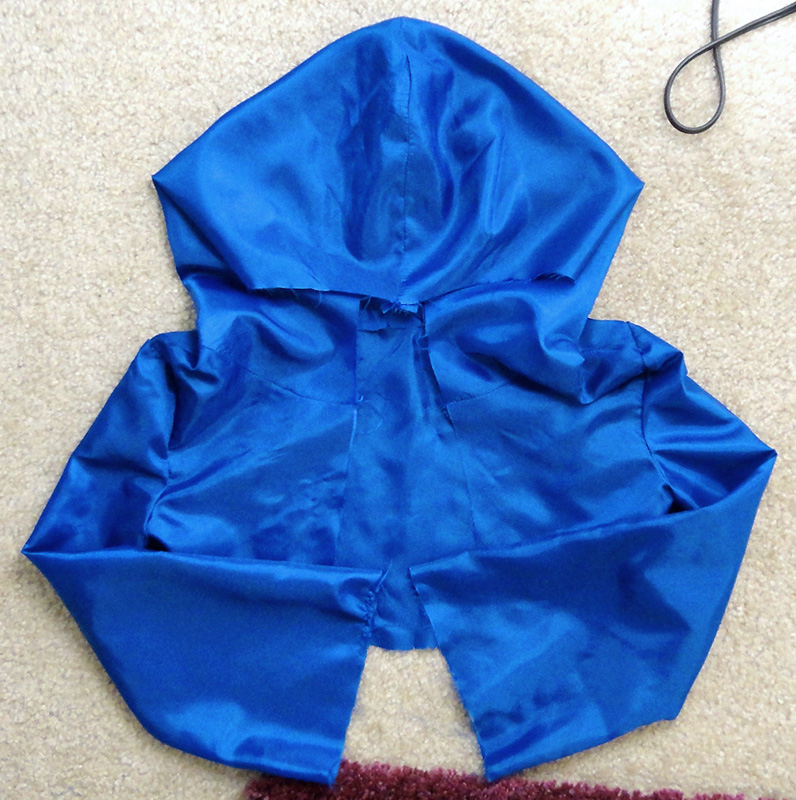
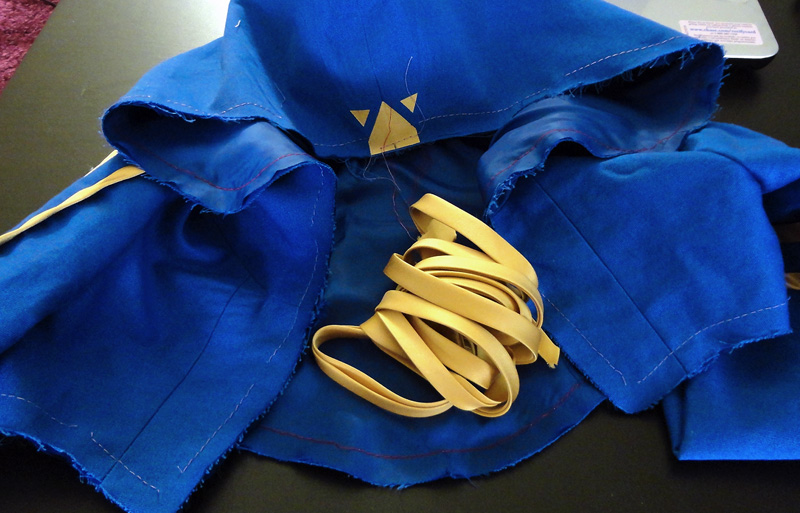
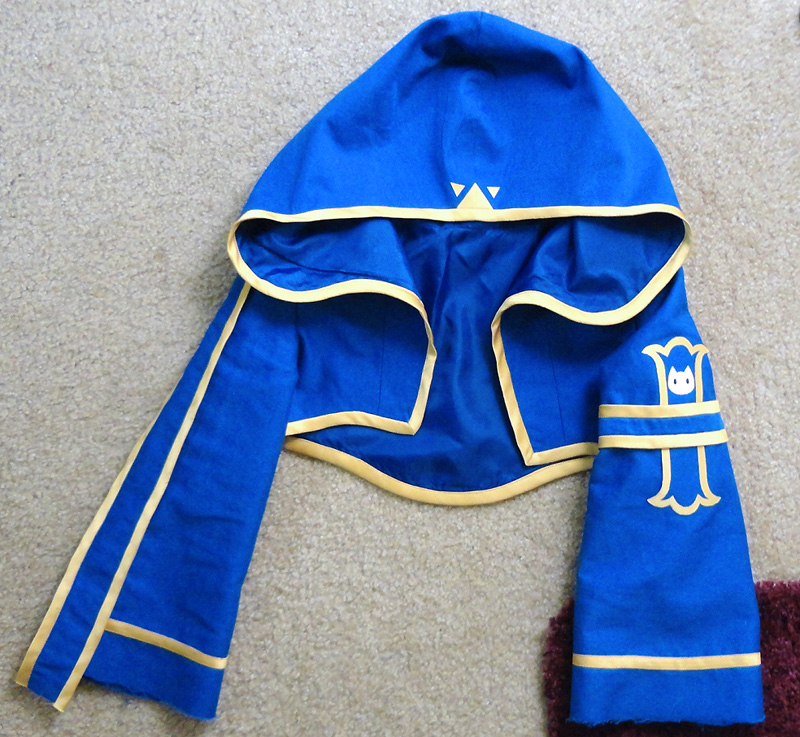
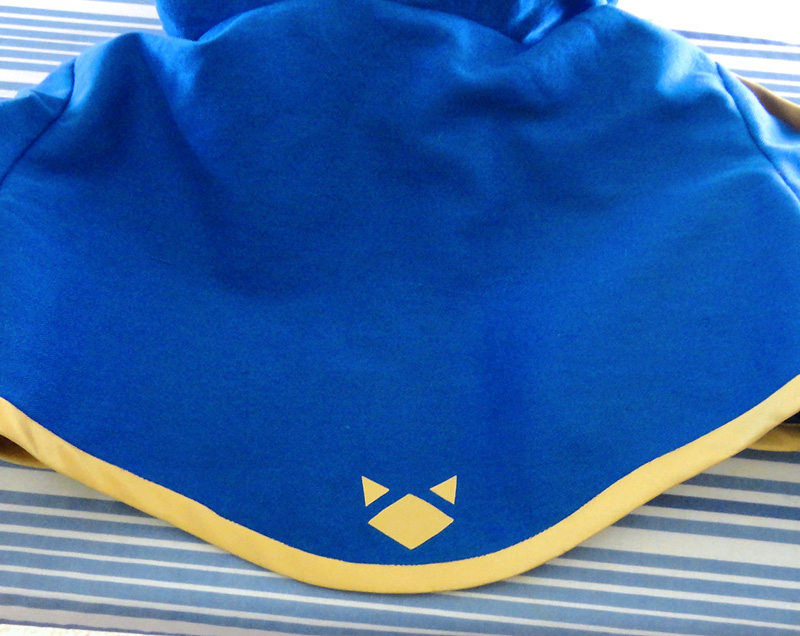
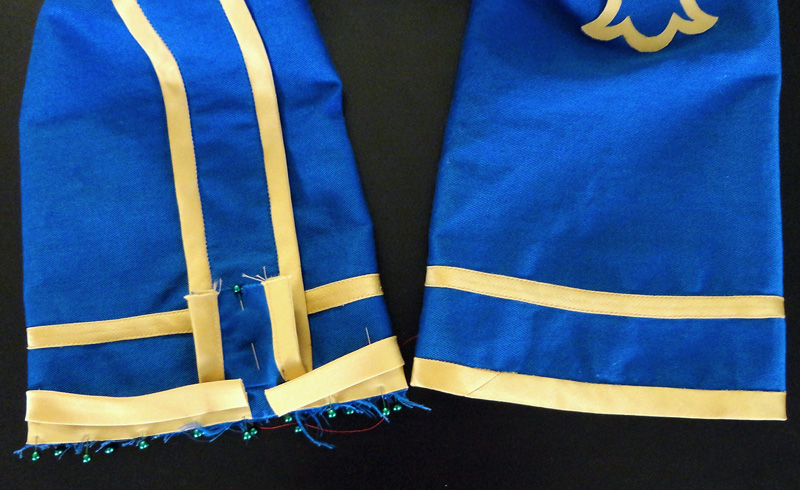
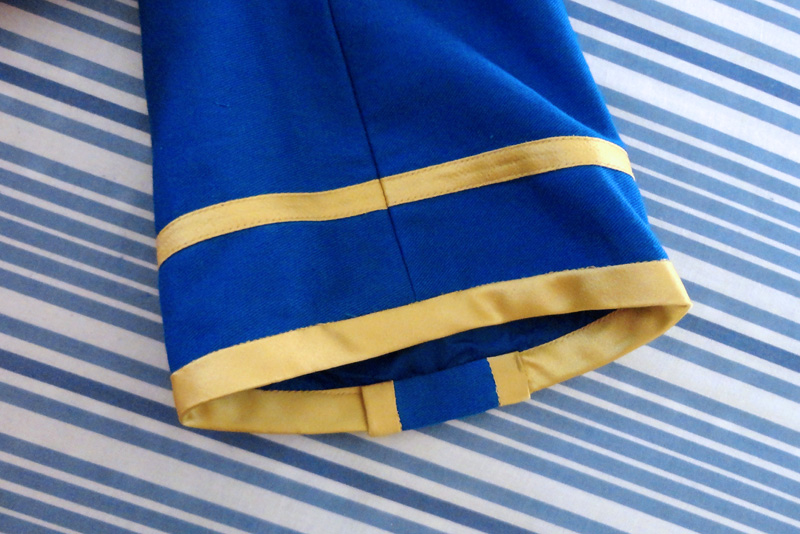
HOODIE

In progress. To be updated.
