
Stephen takes on the Union in this historical refight.
At a recent meeting we had an American Civil War game – the Battle of Antietam!
Being such a large battle, and the bloodiest in American history, we didn’t do the whole battle. Instead we focused on the action at the end of the day – the Union grab for Sharpsburg.
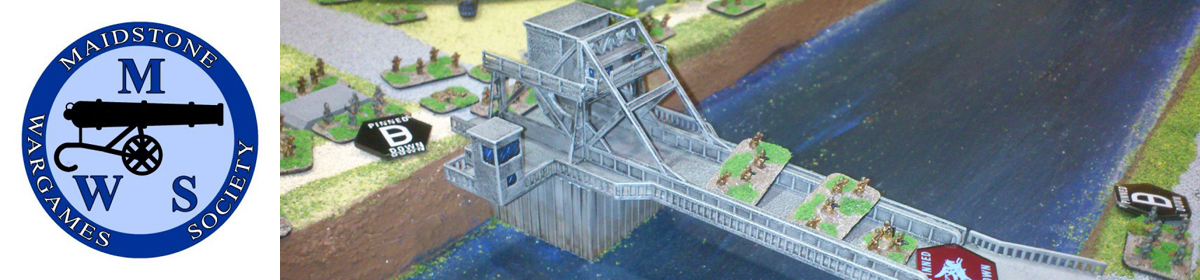
Our game took place after the battle for Burnside bridge. We set up the brigades as they were after the Confederates had been pushed back and Burnside’s corps advanced toward Sharpsburg.
Taking the Union were Jon R (Corps command plus Wilcox and Sturgis’ divisions) and Paul F (with Rodman and Scannon’s divisions). In control of the Confederates were Jeremey (Jones’ division) and Stephen (Hill’s division). There was no overall Confederate commander, with the two Confederate divisions (which were much larger than the Union divisions) acting independently.
The Union side also had a large artillery park with three batteries which were under Army command, so couldn’t be moved but would shoot at targets that came in range.
The Union objective was to get a brigade in Sharpsburg, the Confederate objective was to stop them!
Initially, Hill’s division was not deployed – his brigades were busily marching up the road from Harper’s Ferry to bolster the Confederate line. So at the outset the Union outnumber the Confederates. As such, the Union made an advance on the Confederate line. Not so on the southern edge – Scannon’s division was a bit tardy in its approach. Meanwhile, John deployed his artillery in a field, near to the Army artillery park, which would provide a powerful incentive for the Confederates not to counter-attack on that side.
Hill’s division came on, but was hampered in its deployment due to cramped conditions – it was proving hard to fit the brigades and artillery where they were needed.
Eventually the two sides came to blows – Jones’ division to the north around Cemetery Hill facing off against Wilcox and Sturgis, and Rodman (waiting Scannon’s arrival) to the south coming over Centre Hill.
The early part of the battle was going slightly in favour of the Confederates. The artillery to the north was making it hard to take the battle to the Union, so Jones’ brigades and artillery dug-in and pushed back the Union attacks.
On Centre Hill, Rodman came over the top, took a round of musketry, and then pulled back! Much to everyone’s amazement (not, least Burnside’s!). Paul did try to explain this (ahem) ‘cautious’ move.
But maybe it wasn’t such a bad idea after all. Because emboldened by this withdrawal, Hill advanced his brigades over Centre Hill and took the battle to the Union with a wild rebel yell. And paid the price for charging the guns.
Equally emboldened, Jones advanced Drayton’s brigade against the Union brigades and artillery to the north. After a round of pummeling from Union Corps and Army artillery they soon regretted it and hobbled back all but destroyed.
In the end our game had a very historical outcome – the battle just fizzled out. The Union didn’t have it in them to continue the push to Sharpsburg and the Confederates didn’t have it in them to counter attack. Like the actual battle itself, it was a no-score draw – both sides had taken so many casualties neither could carry the day.
My thanks to Jeremey and Andy for taking some pictures.


You must be logged in to post a comment.