A few days after installing the replacement cord caps, I bumped the bottom rail of the miniblind while opening the window and had one endcap disintegrate; apparently window hardware isn’t hardened against prolonged UV exposure. Who knew?
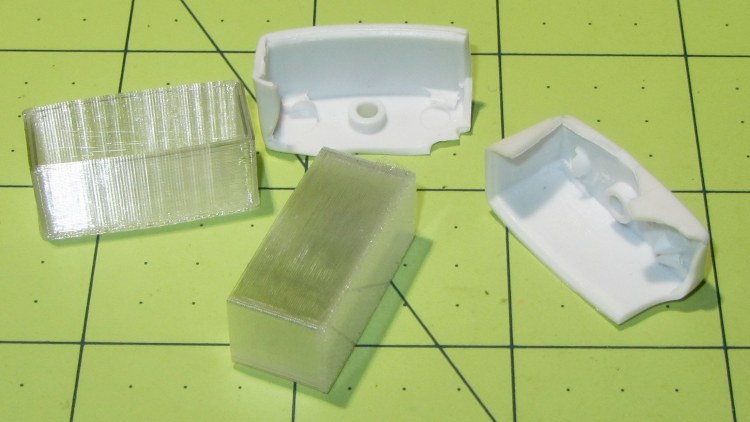
Fortunately, I can fix that:

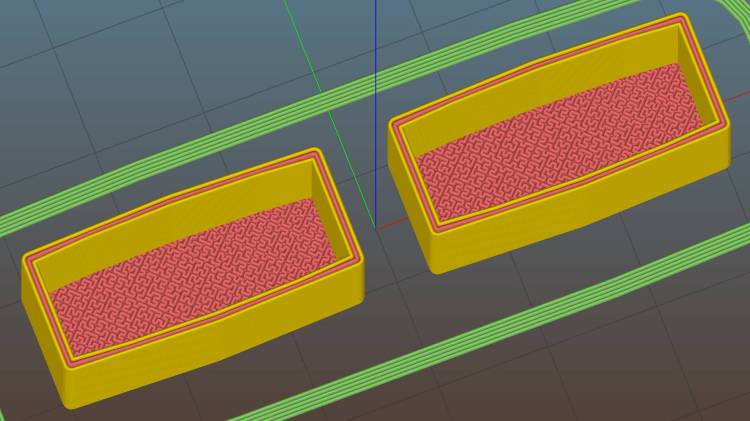
Making the walls three threads wide provides enough room for a single solid infill thread:

The exterior shape comes from a hull wrapped around six circles: four to define the corner radius and a pair that bump the center out by the calculated chord height. The interior shape comes from a pair of chord-radius polygonal circles (they only have three facets across the length of the inside wall) that fit the bottom rail almost perfectly.
As always, natural PETG has a crystalline, slightly transparent, appearance:

I should spring for some opaque white filament, but that way lies madness; I might start caring what these things look like.
You can buy entire miniblinds for a few bucks a pop, but the last time we did that, they were different than the ones we had before. That wouldn’t matter if the standard miniblind mounting brackets fit our 1955 Anderson windows, but noooo they don’t: the custom adapters I machined for the first miniblind brackets, of course, didn’t fit the new miniblinds.
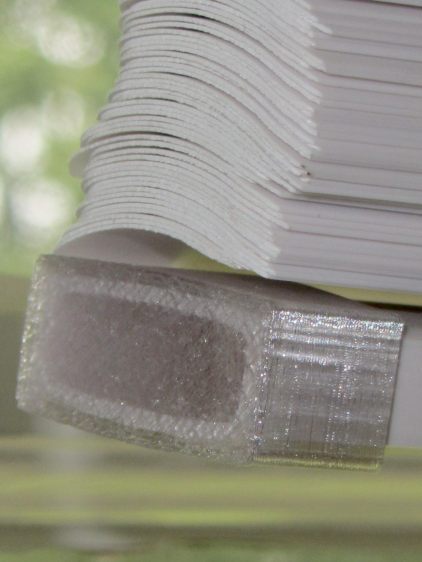
Now I can just snap the replacement endcaps (and cord pulls) in place, declare victory, and move on.
The OpenSCAD source code as a GitHub Gist:
| // Cap for miniblind cord and bottom rail endcaps | |
| // Ed Nisley KE4ZNU - September 2016 | |
| Layout = "BaseEndCap"; // CordCap BaseEndCap | |
| //- Extrusion parameters - must match reality! | |
| ThreadThick = 0.25; | |
| ThreadWidth = 0.40; | |
| Protrusion = 0.1; | |
| HoleWindage = 0.2; | |
| //------ | |
| // Dimensions | |
| OD1 = 0; | |
| OD2 = 1; | |
| LENGTH = 2; | |
| //---------------------- | |
| //- Build it | |
| if (Layout == "CordCap") { | |
| Cap = [9.0,16.0,25.0]; | |
| Cord = [2.5,7.0,Cap[LENGTH] - 5]; | |
| NumSides = 8; | |
| difference() { | |
| hull() { // overall shape | |
| translate([0,0,Cap[LENGTH] - Cap[OD1]/2]) | |
| sphere(d=Cap[OD1],$fn=NumSides); | |
| translate([0,0,0.5*Cap[OD2]/2]) | |
| sphere(d=Cap[OD2],$fn=2*NumSides); // round the bottom just a bit | |
| } | |
| translate([0,0,-Cap[LENGTH]/2]) // trim bottom | |
| cube([2*Cap[OD2],2*Cap[OD2],Cap[LENGTH]],center=true); | |
| translate([0,0,Cap[LENGTH] + 0.8*Cap[OD1]]) // trim top (arbitrarily) | |
| cube([2*Cap[OD1],2*Cap[OD1],2*Cap[OD1]],center=true); | |
| translate([0,0,-Protrusion]) | |
| cylinder(d=Cord[OD1],h=(Cap[LENGTH] + 2*Protrusion),$fn=NumSides); | |
| translate([0,0,-Protrusion]) | |
| cylinder(d1=Cord[OD2],d2=Cord[OD1],h=(Cord[LENGTH] + Protrusion),$fn=NumSides); | |
| } | |
| } | |
| if (Layout == "BaseEndCap") { | |
| Base = [25.2,9.0,12.2]; // base outside dimensions | |
| Edge = 8.0; // size of sqare ends | |
| CornerRadius = 0.75; | |
| Wall = 3; // wall thickness in threads | |
| ChordHeight = (Base[1] - Edge) / 2; | |
| ChordRadius = (pow(ChordHeight,2) + pow(Base[0],2)/4) / (2*ChordHeight); | |
| NumSides = 4*4; | |
| echo(str("Chord height: ",ChordHeight," radius: ",ChordRadius)); | |
| difference() { | |
| linear_extrude(height=Base[2],convexity=2) { | |
| hull() { | |
| for (i=[-1,1], j=[-1,1]) | |
| translate([i*(Base[0]/2 - CornerRadius + Wall*ThreadWidth),j*(Base[1]/2 - CornerRadius + Wall*ThreadWidth)]) | |
| circle(r=CornerRadius,$fn=4*4,center=true); | |
| for (j=[-1,1]) | |
| translate([0,j*(ChordHeight + Base[1]/2 - CornerRadius + Wall*ThreadWidth)]) | |
| rotate(180/(2*4)) | |
| circle(r=CornerRadius,$fn=2*4,center=true); | |
| } | |
| } | |
| translate([0,0,3*ThreadThick]) | |
| linear_extrude(height=Base[2],convexity=2) | |
| intersection() { | |
| intersection_for (j=[-1,1]) | |
| translate([0,j*(ChordHeight + Base[1]/2 - ChordRadius)]) | |
| circle(r=ChordRadius,$fn=32*4,center=true); | |
| square([Base[0],2*Base[1]],center=true); | |
| } | |
| } | |
| } |
The original doodle with some dimensions that didn’t withstand careful measurements:


You could spring for a white acrylic spray can… :)
And XTC-3D and high-build primer and a spray booth and …
I can almost always recognize a slippery slope when I’m halfway down!
I feel you. What started as “let me just change oil and clean my new lathe a bit” turned into a complete tear down, detailed cleaning and possibly a paint job – hopefully I’ll allow myself to paint only the stand, as bed is far to complicated to sand and paint by hand and sand blasting is obviously out of question :)
Fun fact: previous owner managed to evenly distribute oil and chips over all components. Fortunately, all he turned was Aluminium and Delrin. But finding oil in a closed 3 phase motor housing had me scratching my head for a while :)
Sissy! [grin]
The new owners of my old lathe must surely do the same thing I did when I got it: completely tear it down, clean the parts, strip the paint, repaint everything that’s not a sliding or mating surface, then reassemble in reverse order. It has plenty of grunge and I’m sure to be held up for ridicule…
We’re dealing with the aftermath of a water leak in the kitchen (I missed the part where it said to hand-tighten, then wrench 1/4 turn. Overtightened and got a crack/light spray for a too-long time before figuring it out.)
The remediation work was good (Belfor USA is good, IMHO), but we’re now to the “replace trashed cabinets” stage. The slippery slope included quartz counter tops on custom cabinets (the OEM cabinets were cheapified to a shocking extent). Insurance is picking up some, but the cabinet job (including the side opposite the leak) is going to be spendy. We’ll see the quote on Tuesday. I think the old base cabinets can be used in the barn/shop, but I won’t shed a tear if I have to build a new carcase for one or more. (I think I’m at the top of a well-greased glacier…)
Julie wants a plumber to hook up the dishwasher this time. Oops. I’m not going to fight that one; I’m better at electricity than plumbing.
Ouch, ouch, ouch…
Surely I’ve told the old story of my discovery of drywall screws, wherein the /first/ screw I ran into a (previously finished) basement wall to see how they worked found the water pipe to the outside hose bib? You may fill in the details as you see fit.
I missed that story; ouch in return.
Fellow I know drilled a hole in the sheet metal of his tractor. The water return for the radiator was behind the hole, and it was going to be the devil to fix. I tend to be paranoid about drilling, and have only one divot in my (circa 1979) drill press table. The mill-drill is clean…
On the other hand… The nail-gun scar long healed. 3.5″ nail, 3″ join, hand in the hot zone. Oops.