Remember that picture from my episode on Free Comic Book Day? Yeah well, I did say that pic was a bit photoshoped to make it look better but it didn’t really need that much photoshop in the first place anyway.
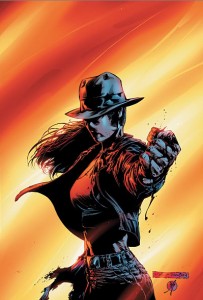
So let’s show you how to be as faceless or how to make a faceless mask like how Renee Montoya is as The Question!
Here’s a reference of my outfit for that day anyway. The artwork’s by Philip Tan and it’s from the Book of Revelations/Blood. I kinda borrowed the compilation book so I managed to see it in there anywho. Considering it’s the most casual outfit I did ever, it freaked a lot of people out due to the facelessness.
FIRSTLY, a note! You can also check the tutorial on how to make a faceless mask here by Jessica Smith. Her post enabled me to make my own so yes, let’s start on how I did it. You can try find at your own craft places but I pretty got my stuff from Art Friend here.
Things to get:
- 18 gauge wire
- Cheese cloth (Art Friend had it out of stock so I bought mine online, now they stock tons of it! Sheesh.)
- Dylon’s fabric paint! Red, yellow, black, white. (Make sure it’s in a small glass bottle and the new formula, not the old. 1 bottle each should work)
- Brush/spoon/some stirrer
- Pail/bucket/large bowl
- Newspaper or whatever scrap material to dry your cheese cloth
- Muslin or whatever “flexible” soft cloth large enough to cover your face
- Marker
- Pins
- Super glue
- Scissors
Let’s begin!
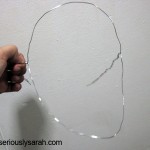
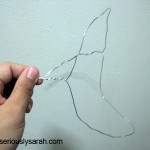
As you can see, the wire part is the easiest thing to do for this whole mask. I didn’t use the 32 gauge wire as stated in Jessica’s tutorial since I just twirled the ends together. If you note the wire there, the top part of the head is separated from the jaw part. Use enough wire so you can have the ends meet together and twirl it together (with pliers if you don’t have strong fingers) till they’re together!
Pretty much you just smoosh/bend the wire to conform to your forehead and to the part where your jaw ends. With the extra bit there, you should be able to wear the wire like a pair of spectacles.
The next part, take your cheese cloth out from its package. Fold it a few times until you can’t see the “holes” in it and that the length of the cloth should be able to cover your face with some extra inches left over. You just need that amount so cut it from the rest. At the moment, I still have some cheese cloth left over to make another mask if I wanted to.
Ok, this is where the bucket or pail or whatever comes in. Make sure you have good lighting in your room or wherever you’re doing this. According to your skintone, mix the paint: red, yellow, black and white. Well, I’m Asian so that’s the colour I needed. Just add more red or less yellow if you’re not and increase the tone by using black or lighten it with white fabric paint.
Warning: Carefully add black paint by drops and stir the whole paint mixture in the bucket or pail before adding more.
Add water as needed, I managed to get to my skin tone after at least half an hour of mixing and checking. Dump your cut cheesecloth in the bucket and make sure the whole thing is covered with it. The new Dylon fabric paints does NOT harden your cloth when you dry it.
ALSO, make sure that when you add the cheese cloth, it looks correct to your skin tone for it depends on what colour your cheese cloth is. Adjust when necessary.
Then lay it out to dry! Or hang it to dry. I chose to just lay it down.
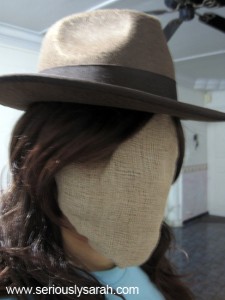
The next part is fitting it all in together. This picture is taken at night and kinda dark. You can note it looks like I’m already faceless! I didn’t photoshop this picture by the way so that’s the effect you’ll get and oh yes. You CAN see through it. The beauty of cheese cloth.
Right, remember the muslin or spare soft cloth? You might need help, just get someone to draw on your face WITH the spare cloth on it with a marker. It should outline your forehead towards your jaw. With that, cut out the piece with a few centimeters extra.
When your cheese cloth is dry, fold it up in the layers until you can’t see the holes from afar. You should be able to see through the cloth against your face though. With that folded, time to lay your spare piece on top and cut it out! Yes. Your cheesecloth might be in cut layers, that’s why you have pins, make sure they’re all together.
Alright, the difficult part. Don’t rush as you attach the cloth to the wire frame with the help of your pins and glue. You can pin the cloth to the wireframe, the extra bit from where you marked your face is to be folded down and super glued. Make sure you don’t stick your fingers together or something when you do this. trim when needed when all is done!
Also remember to do some test shots to just check!
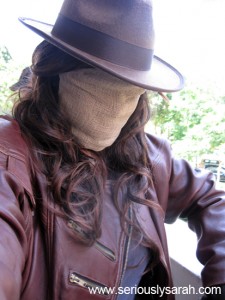
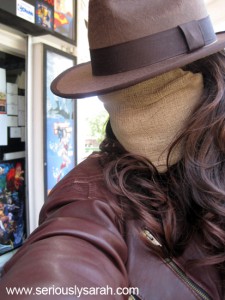
Considering this was freaking daylight with immense sunlight, it still looked good from afar. It’s much better with less lighting up close. Oh yes, for this one I rushed so it looks a bit off in some pictures.
The hat and wig pretty much covered and also helped to keep the mask in place. I can talk easily and see things pretty clearly too. I might be making a better version with more adjustments to the colouring and size next time but still, for a first rushed faceless mask I did just for Free Comic Book Day, it was pretty fun!



One thought on “Being Faceless: A Tutorial”