
![]()
WHAT IS IT?
Emulsion lift (also known as emulsion transfer) is an interesting photographic technique. By using this method, you can transfer your image onto a completely different surface like mug, paper, t-shirt, or tote bag, for creative printmaking.
It is all about the jelly-like emulsion layer of instant film being separated from its clear layer. Afterwards, a picture can be reattached to other surface you want. Other than that, you can enlarge or change the shape of the image during the process.
WHAT YOU NEED
Instant photo x 1

Scissors x 1

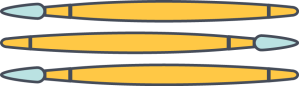
Soft paintbrush x 2-3
Tray of water (in room temperature) x 1
![]()
Carrier surface
STEP-BY-STEP
1. Use scissors to cut the edge off the picture.
2. Remove the whole frame. You will get a square image.
3. Peel the black plastic foil away from the image.
4. Soak the picture into the water for few minutes.
5. Use a paintbrush to gently brush the image layer (thin emulsion layer) away from the transparent plastic foil in water.
6. Pick the plastic out from the tray. Only keep the emulsion layer in the water. Make sure your image is forward.
7. Take the carrier material you have already prepared. Gently place it underneath the emulsion layer.
8. Carefully position the image layer on top of new surface by using paintbrush. Of course, you can use your fingers for help!
9. Remove the transferred image from water. After it is taken out of the water, you can still create or remove wrinkles and move the image around or even flatten it.
10. Once you finished playing around the shape, let it dry for about 24 hours. The emulsion will stick on the new surface. And you have a Polaroid / Impossible emulsion lift!
IMPORTANT NOTE
You have to do the emulsion lift within 2 or 3 days after the image is taken. Once the image solidifies, you will no longer be able to separate the layers.
