Tag Tutorial created by ®ivice2005
Last Updated: May 2017
Nivel: Intermedio.
Tools: PSP9 and Animation Shop3.
Targeting: the use of mask layers.
All materials included *
Tested in other versions of PSP incluiding , CorelPSPX7
..:: TERMS OF USE :
The materials I use belong to the artist who created,
Please don’t change the name or use them for your own tutorials.
..:: MATERIALS ZIP
Donwload here♥
- Tube Misted lady – by Joosje
- Brush Tip Naked before you – by ARaven
- Mask selection -by c_rahmen
- Gradient001- by lyndie
- Bankgothic lt bt font
Save tubes in a folder of your choice.
Install Brush, Mask , gradient in your Corel-PSP folders.
Install font in your system font folder.
..:: STEPS
Open tube “JOOSJE_MISTEDLADY072005″ in PSP
1..:: Create a new transparent image size of your choice
Mine is small 500×365 pixels
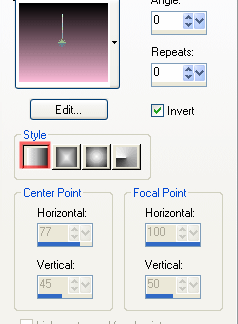
2..:: Set the color palette with your gradient “lyndiegradient001″
and Flood fill the image with it, using this settings:
3..:: In the layers palette duplicate your Background layer
and flip the copy layer that you have
MENU->IMAGE–>FLIP VERTICAL
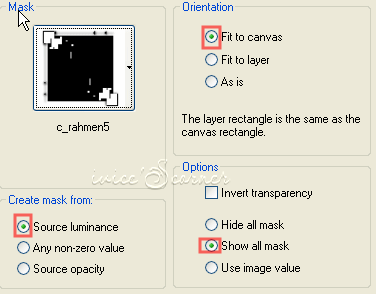
4..:: MENU LAYERS–>LOAD MASK–>LOAD FROM DISK
Look for our mask “c-rahmen5” and apply with this settings
5..:: This is how our layer palette looks now
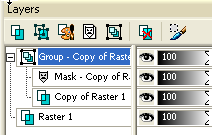
6.:: Right click with your mouse over the first layer: GROUP-COPY OF RASTER -1
to select it and in the floating menu that will appear select :
MERGE–> MERGE GROUP
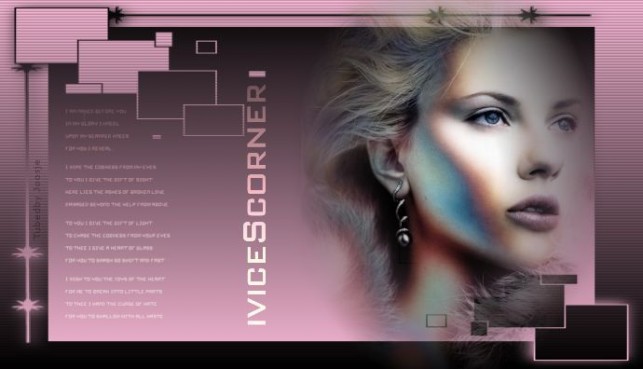
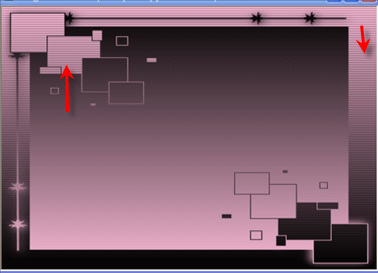
7..:: This is what we have:
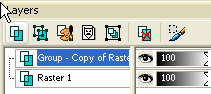
8..:: Click on GROUP MERGED LAYER to select it
and apply MENU EFFECTS–>TEXTURE EFFECTS–>BLINDS

We will get this:
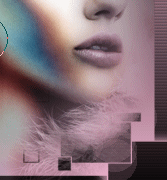
9.:: Copy and paste into position tube “JOOSJE_MISTEDLADY072005”
and apply a shadow effect with this settings
EFFECTS–> 3D EFFECTS–>DROP SHADOW
10..:: Select the layer with the mask:
GROUP COPY OF RASTER 1and using the ERASER TOOL ,
delete the parts that are over our misted lady tube face.
11..:: Set your color palette with color #e9e8b7
ADD NEW RASTER LAYER
SELECT BRUSH –> BrushTip_aRavenBrush-NakedBeforeYou
12..:: Apply brush over the new raster layer using this settings:
![]()
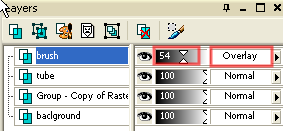
13..:: Change layer mode to OVERLAY , Transparency to 54%
14..:: Add text of your choice I am using font BankGothic Lt BT
foreground-background color #f6f6e0, SIZE 30px
LAYER MODE OVERLAY
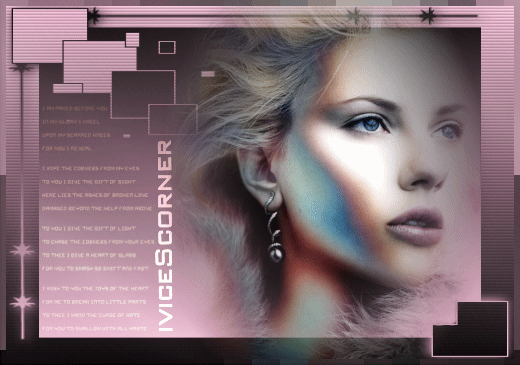
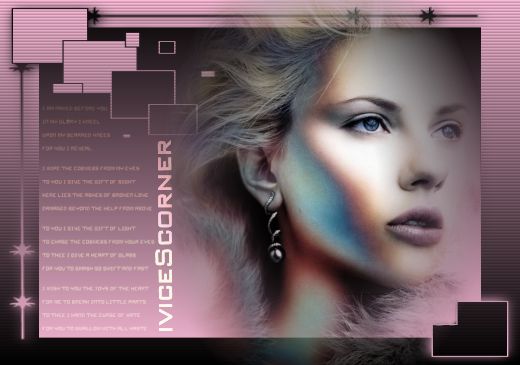
and this is what we have so far:
15..:: MERGE–>MERGE VISIBLE
16..:: We will add a border:
MENU SELECCTIONS–>SELECT ALL
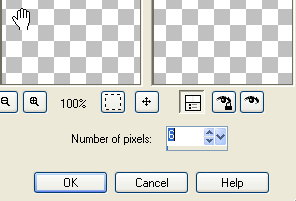
17..:: MENU SELECTIONS–>MODIFY–>CONTRACT by 6 pixels
18..:: MENU SELECTIONS–>INVERT
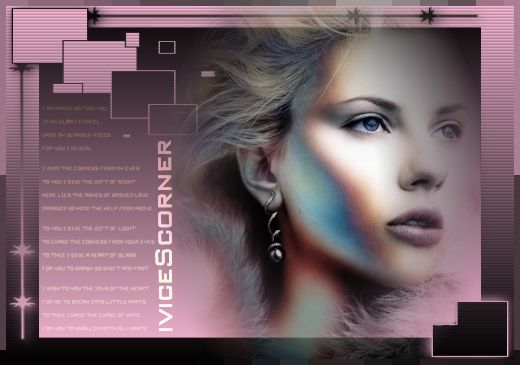
it should look like this:

19..:: With the selection still running
MENU EFFECTS–>DISTORSION EFFECTS–>PIXELATE by 3
SELECTIONS—> SELECT NONE
20..:: Save file as a PSP animation shop *psp
ANIMATION SHOP 3
1.:: OPEN file in Animation Shop
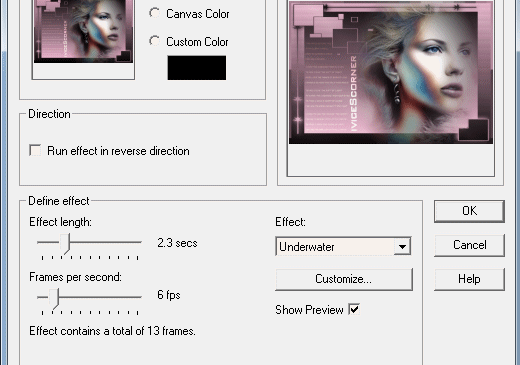
2..:: MENU EFFECTS–>INSERT IMAGEN EFFECT->UNDERWATER
With this settings:
3..:: CLICK CUSTOMIZE and adjust with this settings:
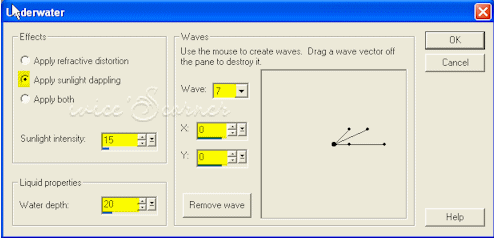
4..:: The vectors in the right screen are important, you can adjust them
to look similar like mine by dragging the lines with the mouse from the center
to the points I am showing you.
Once they are in place, change the setting numbers as I have set mine.
AND CLICK OK
5..:: You can preview your animated tag now.
I always delete the first frame to avoid that jump from the original animation.
Save as a GIF file, and is Done!
You could use different colors of gradients to suit the color of any tube of your choice.
If you would like to share your results with me,
You are more than welcome to post them in my
I would so love to see them 
loVE iS tHe WaY !
![]()
 English
 Spanish
 Dutch
Dutch
0 comments
No comments yet