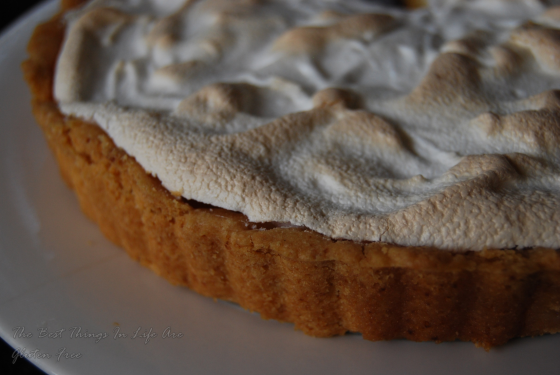
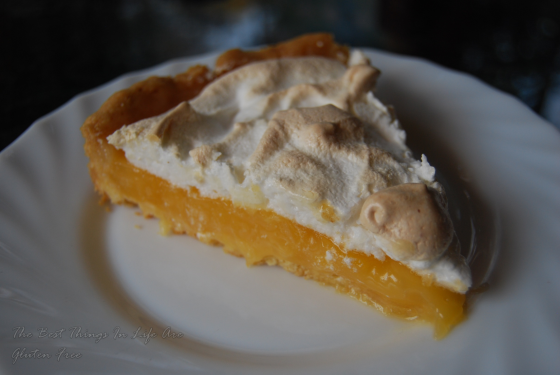
I don’t remember exactly the time when lemon meringue pies became my favourite dessert but it had to be relatively recent because I don’t normally like sweets. I used to make this pie quite often prior to meeting my coeliac boyfriend but since then I have eased off. This recipe was the first time I tried to make my own pastry which was so satisfying and actually not that hard! Since finding out I am sensitive to salicyates (amongst other things) I thought I wouldn’t be eating this again but actually with a few tweaks it can be failsafe and gluten free! I can’t remember where I got my first recipe for lemon meringue pie but here is my altered version which is pretty close to the original. There are a number of steps as you will be making three components: the pastry shell, the lemon filling and the fluffy meringue. Don’t be discouraged, its pretty easy!
“Lemon”meringue pie
Gluten free, dairy free, soy free, nut free, vegetarian, failsafe
Ingredients:
Pastry –
- 1/2 cup GF self-raising flour (I use Aldi’s)
- 3/4 cup + 1 tablespoon GF plain flour (I use Aldi’s)
- 1 tablespoon + 3 teaspoons caster sugar
- 120g nuttelex cut into pieces (or you can use butter)
- 1 large egg (~55g+)
Filling –
- 4 tablespoons + 3 teaspoons GF cornflour
- 3/4 cup white sugar
- 2/3 cup + 2 teaspoons “lemon juice” (use real lemon juice if you are not sensitive to salicylates)
- 2/3 cup + 1/4 cup water
- 60g nuttelex cut into pieces (or butter)
- 3 large egg yolks
Meringue –
- 3 large egg whites
- 3/4 cup caster sugar
Method:
Pastry –
- Place flours, sugar and nuttelex in a food processor. Pulse for a bit and then blend on low till it resembles bread crumbs. You may need to stop and give it a mix as the dry flour tends to sink to the bottom and not become incorporated.
- Add egg and process till it is incorporated and the mixture becomes clumpy. Again you may need to mix in the bottom.
- Use your hands and knead it to form a dough ball. Slightly flatten it and wrap in cling film. Refrigerate for at least an hour. You need the butter to harden up or it will be too sticky to roll out.
- Get two large sheets of baking paper (bigger than your tart tin) and place the unwrapped dough in between.
- Roll the pastry and slowly turning and flipping. As you go alternate peeling off the baking paper to check your dough for cracks and holes. Push them together and fix up deep cracks made from the paper. Keep doing this until the pastry is large enough to cover the base of your tart tin and up the edge for the crust.
- Once the dough is large enough an easy way to get it into the tin without breaking it is peel off one side of the paper and roll the dough over a rolling pin. Then peel off the other side of baking paper that should be on the top of the rolling pin. Then using the rolling pin, carefully line up the dough and roll it off the pin onto the tin.
- Push the dough into the tin and up the sides. Fix it up and make it all fit into the tin.
- Place one sheet of the used baking paper on top of the dough and put some pastry weights or rice on top before putting into an oven set at 180°C for 10 mins.
- After 10 mins, take out the weight and bake for a further 10-15 mins till golden.
- Set aside to cool completely.
Filling –
- In a saucepan, combine cornflour, sugar, lemon juice and water and stir till smooth.
- Place the saucepan on medium-high heat and stir constantly until boiling.
- Once it starts to boil turn the heat down to low and continue to stir for another 30-40 sec until mixture turns from cloudy to transparent and becomes thick and smooth. This is when the cornstarch cooks.
- Remove from heat and vigorously stir in the nuttelex and egg yolks till combined.
- Refrigerate till cold.
- Once cold, fill the cold pastry shell.
Meringue –
- Make sure all your utensils are DRY, this is essential for making meringues.
- Place egg white in a large bowl and beat on high.
- Gradually add sugar about 2 tablespoons at a time and continue to beat the egg whites,
- Continue beating until all the sugar has been added and it has been dissolved. You will know when this is the case is when you rub meringue between your fingers it is smooth and there are no sugar crystals left. It should look thick and glossy.
- Top the filled pie with the meringue making peaks and troughs to increase surface area,
- Bake for 7-10 mins 200°C or till the meringue is slightly coloured.
- Take out the pie and cool before putting it in the fridge to chill. If you cut it while hot the filling will leak out as it will not have set.
Using the Aldi flour blends result in a light and crumbly pastry that is quite fragile. You can experiment with other blends or try adding xanthan gum if you want to get it more like biscuity short crust pastry. I’m not too fussy which is why I never have bothered. It also keeps in the fridge for a few days. You can always adjust the lemon juice if you find it too acidic (or not acidic enough).
Now go and enjoy your pie made from scratch and with love!

