

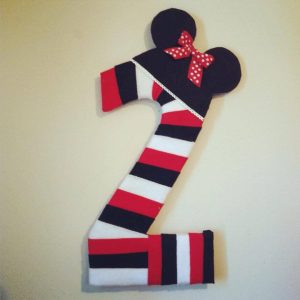
I have had lots of requests for wrapped numbers to go alongside party packages I created through my business (Purely Posh ~ Paperie & Events). I think people would be surprised how EASY and SUPER CHEAP these guys are to make! Most have been based off of a Mickey Mouse number I made earlier last year, here is a Classic Minnie Version of a easy wrapped number. There are so many directions you could go.
What You Need
{must haves}
– Cardboard/foamboard
– Felt (I used 3 sheets = .75)
– Glue (I used & recommend a hot glue gun)
{depending on how you embellish it}
– I used a small piece of pink scrap fabric for the rosettes, you could use an old tshirt or ribbon.
I literally spent less than a buck on this wrapped number (not including cost of glue, because I always have it on hand)! Not bad if you’re planning on creating your own party goods and trying to do it affordably! It has a great handmade quality and NOBODY would guess you made it out of an old diaper box 😉
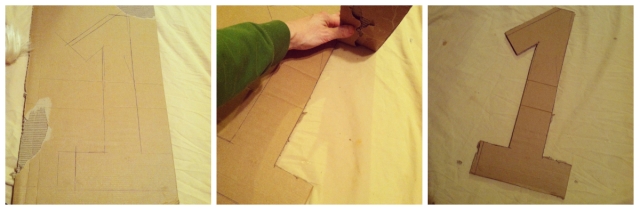
So first, you need to gather some cardboard/foamboard/something sturdy. Sketch out your number/letter, try to keep the size/width of your number equal throughout with nice straight lines. Next you simply cut it out.
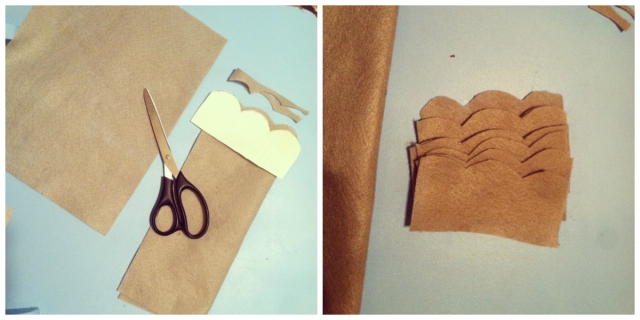
Next you need to cut your felt, I folded mine “hot dog” style, and created a scalloped “tracer” piece. You could do a straight edge also if your heart desires a little less work. So I cut 2 at a time and used 3 felt sheets total.
Now it’s time to assemble. If you’re doing a “1” you will want to start at the bottom, cover your starting edge with a piece of felt, gluing its edges securely and snug on the back side of your number. Next you will attach your first scalloped piece, slightly overlapping the initial piece of felt that you already attached. Try to keep your glue close to the “straight edge” on your felt pieces, so that each consecutive piece covers the area glued on the previous piece) If that makes any sense! Check out the picture..

When you reach the end of your bottom portion, follow the same steps and continue upward.

Once at the top, you will have to arrange some pieces at a slight angle to finish off the top of your ONE, and Voila, A completely wrapped number. Now it’s time to dress it up, and you’re on your way to looking like a crafty super mom – enjoy a glass of wine and pat yourself on the back. 😉 You can find my simple tutorial on making these easy rosettes {HERE}.

I used scrap fabric to make simple no-sew rosettes – You can learn how {here}. And simply glued them to my Number. Sooo stinkin’ cute, practically free, and 100% Homemade! Even if you’re not on a tight budget, This is such an easy way add lovely custom details to any event or party!


These cuties really are so simple, and there are so many different ways to make them your own. Pattern’s of color, cute embellishments, and so on. I would love to hear from you, comments, feedback or just a friendly Hello! Stay tuned for the Pink & Gray Elephant Party printables that I’m going to post soon. This number One was part of that order! I can’t wait to share it with you!

Find me On: 


Pingback: DIY Simple No-Sew Rosettes | Posh Tart
Pingback: Pink & Gray Elephant Party – Free Party Printables | Posh Tart