Welcome, friends! I say that because today we’re talking about the very. first. thing. you’ll see when you come into our house. I know that some people are blessed with a big beautiful coat closet but umm, our entry/living room is a little odd. When you come in you face this wall. Like, right in your face.
In fact, you have to come in, walk to the right, and close the front door to get to our roommate’s bedroom (to the left). It’s craaaaaazy squished in there. We DO have a coat closet, but it’s on this awkward angled wall and it’s built with an angled wall (where the closet door is) so there is one awkward little shelf, which we actually moved a few years ago.
It holds more coats now than it once did, but it still only holds about…my coats. I have a jacket/coat problem. I look really cute in coats. That’s the problem. Also, we needed it to house some other random things…I think it holds air filters and our little spot-treater steam machine thingy..and extra Ikea throw pillows that don’t have covers…and beach towels? Guests don’t need to be seeing all of that, right? Plus, like I said, really inconvenient to be opening ANOTHER door when you don’t even have the first one closed.
I could never really figure out what to do with that wall right as you come in the door. I think at some time in my roommate history it may have had some kind of picture hanging on it, but that could be totally made up in my mind. Well, I kept shopping around for cool entryway ideas and I found one at House of Smiths. Shelly (co-author of HOS) had a great idea to peek behind her existing closet…and she found the mother lode. She had space to expand on each end and create this cool recessed bench with storage above and below (seriously, go look at it- it’s incredible!). So, I thought, “Maybe the coat closet could become and entryway and we could just tear out that wall, push it back to the depth of the closet…and voila!” Um. No. The closet still has a hole where I cut into it, reached through…and knocked on the wall of our roommate’s shower. That was unfortunate. {note to self: patch that wall!}
Our house has a weird floor plan, obviously, because his shower is right up against the wall you see as SOON as you come in the house. One day I’ll have to share floor plans or something because this house is hard as heck to explain to people. Even once people have been inside the house, they don’t realize where all of the doors lead. In my head that sounded really creepy and was followed by, “Where DO all the doors lead? mwahahahahahahahahaha!”
Like some sort of crazy fate, John & Sherry from YoungHouseLove posted a Reader Redesign by a photographer named Sada Lewis & her husband. Well, to say that I fell in love with her idea would be an understatement. I had seen similar ideas on other blogs for hallways and mudrooms, but we don’t really *have* hallways or mudrooms. Now my house sounds totally crazy. There’s a shower wall as soon as you come in, no formal entryway/mudroom space, and NO hallways- at all. We actually live in a clown car.
Our entryway is not nearly as long as Sada’s so, we altered the plans a smidge and used different sized boards. We didn’t want anything as big as a 1″x 4″ or a 1″x 6″ for fear it would look too heavy and overpower our narrow little baseboards. In all of my amazing design and technical prowess, I drew up some “blueprints”.
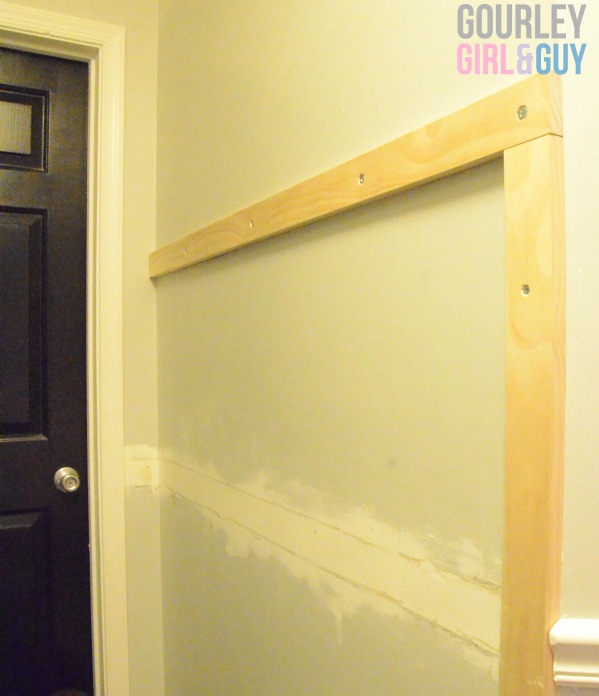
Oh yeah, we also had to remove the chair rail that you saw up there. That is the worst and really makes the drywall hard to paint over. We got it as smooth as a baby’s bottom and it still showed up through the paint…so we had a random step that the normal person without chair rail wouldn’t have to do.
Our supply list was:
1″ x 3″ x 6′ (6)
trim molding (one piece)
white semi-gloss paint (Oh yeah, gotta repaint all of the trim in the house, too. Sweet.)
circular saw (It’s what we have, but you could ask Lowe’s/Home Depot to cut for you.)
Kreg Jig
Drill
Countersink bit
Anchors with toggle bolts
Wall anchors
caulk
wood filler
regular ol’ drywall spackle
That seems like a lot but we had…almost everything. Just like with our rolling pantry, we originally bought the wood and then let it sit somewhere unsafe for long enough that it had warped and we would be unable to make it level. Genius. We also needed screws, but we had everything else left over. The paint was from the rolling pantry and…some other project I don’t remember, maybe the mirror? That’s beside the point.
At the bottom of my blueprints, I had written steps. Some of these we followed well. Others didn’t really matter if they got messed up or didn’t exactly match my blueprints. I think I swapped the order of hanging some of the boards between the drawing and the steps because I realized it would look less choppy or something.
1. Measure the length of your desired entryway wall and cut one of your boards. This will be your top horizontal. (Sorry, the pictures are grainy. It was very dark, but I couldn’t wait to get better photos.)
2. Cut a second board exactly like your first one. This will be the display “shelf” that rests on top of your horizontal board. Set aside.
3. Using wood screws (for studs) and toggle bolt anchors (for drywall), mark your wood, drill holes (with countersink bit!), and insert anchors (if necessary). Because our wall backs up to a shower and closet, the studs are in weird places so we had one side with lots of studs and one side with none. It was bizarre.
4. Measure from the bottom of your installed horizontal to your baseboards (vertically). Cut four boards at this length. Attach your outside boards first. This is where the job started to be ridiculous because our corners were obviously not square and one of our walls curves so the boards popped out…but we’ll address that later. For now, we just attached them as best we could and got them tightly secured to the wall. You could also cut the bottom edge of your vertical boards at a 45 degree angle (we used a miter box) so that they don’t sit out from your baseboards. We did this, but I’m not sure it was necessary from the angle we typically view this wall. Oh well, it doesn’t hurt. 🙂
5. Measure the space between your two vertical boards. Figure out how many sections you want on your wall. I wanted 3 so I had 2 more vertical boards to place. Take the total measurement (ours was 47 inches) and subtract the width of ALL other vertical boards. Since I had two and they were 2.5 inches wide EACH, I subtracted 5 inches. This left me with 42 inches. Hallelujah, this can be divided by 3! So, since 42 divided by 3 is 14, I needed a space of 14 inches between each vertical board. We started from the left and attached a vertical. Then, we measured 14 inches from the right and attached the last one. I figured that if my measurements were wrong, the two side panels would be the same, even if the middle was a smidge larger. Guess what? I wasn’t wrong. Booyah!
6. Cut 3 (or however many sections you have) boards to 14 inches (or the width of your sections between verticals) and attach them to the wall as well. Yeah, we ran out of screws/anchors and had to buy more. Upside? This joker is NEVER going to fall down. Like, we could climb it.
7. Screw and/or nail in top “shelf” board. We originally tried to Kreg Jig this, but with our wall being so curved, it was cuh-razy. We ended up just nailing it on top. Done and done.
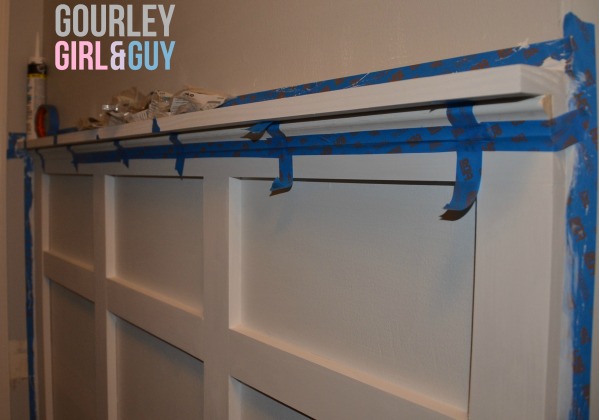
8. Using wood glue and tape, secure your trim molding under the shelf. We actually forgot to do this until after we’d primed, but luckily our trim was pre-primed so it got painted on schedule with everything else.
Once the glue is dry, remove the tape and move on to step 8.
9. Fill…and sand…and fill…and sand…and run your hand over the wood to see if it feels like a baby’s bottom…and sand…and fill…and sand…and vacuum. every. surface. ever. Our downstairs is all open, not as in open concept, but as in, no doors between rooms. The only doors close off our coat closet and our roommate’s bedroom/bathroom. Therefore, every surface in our living room and kitchen is COVERED in sanding dust. I mean, I vacuumed…ish…but STILL. It is EVERYWHERE. I mean, look at those countersunk screws! There was a lot of filling and sanding.
10. Now, prime. We did two coats of primer because the wood was so brand new and we did sand in between coats.

11. When you’re finally done with all that crazy (bonus points if you had to also put drywall spackle in a big huge crack because your corners aren’t square- high five!), paint the heck out of that. Sand between coats with some fine grit sand paper. That entryway will be the smoothest on the block! *I also chose to paint my baseboards (since the whole house’s trim needs semi-gloss) and quarter round, which has been wood-toned since I moved in…almost 10 years ago…
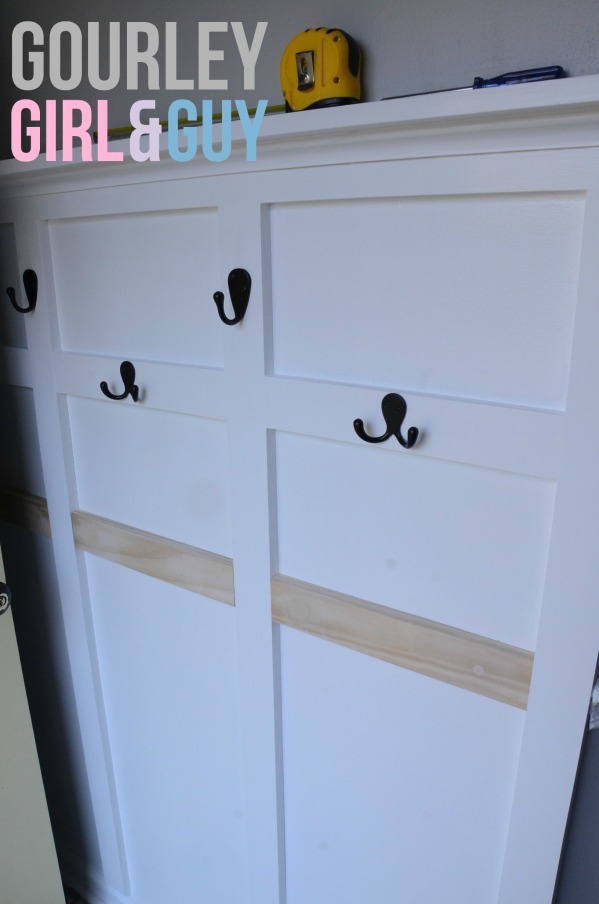
{11.5} Bonus steps: We realized that where we had removed our chair rail to start this project, there was just NO saving the drywall. I mean, the drywall is structurally fine, but there is just no amount of sanding that will make it *look* smooth. It feels fine. SO, we went back and added a second row of horizontal boards to disguise that little guy instead of skim coating. It’s a million times better, than before. We hung it first, filled/sanded, filled/sanded, primed, painted.
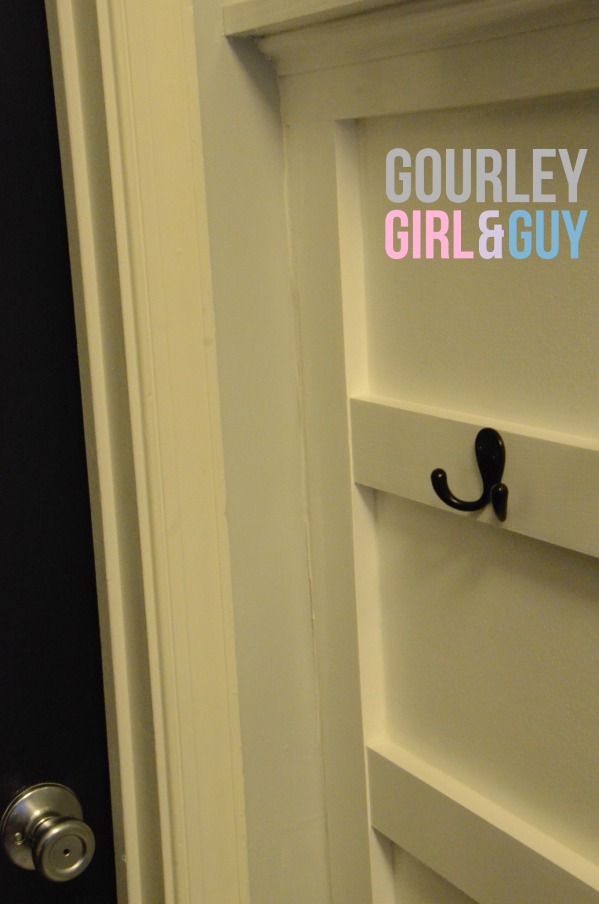
12. Caulk. Now, you might reverse this. We actually do have paintable caulk, but I actually didn’t see all of the spaces that needed caulk when the materials still appeared mixed (and knew I wouldn’t) so we bought paintable white caulk and chose to caulk at the end.If the whites ever look different, it’s paintable. I can go back and paint over it. Here are some examples of how much better it looks with caulk. 🙂
Before caulk there was a pretty big gap that I mentioned above toward the top of the board & batten where our corner wasn’t square (it got thinner as you went down the wall). We went back with caulk later and it looks WAY better…not perfect, but WAY better.
And after, still not *great*, but it looks way better in person than it does in the picture and our entryway light doesn’t do me any favors, hah.
13. Pick out cute hooks (ours are from Home Depot), put them in place, and get to decorating that cute shelf that now welcomes everyone into your home! 🙂 Bonus points if you invite over your neighbors so they can pet your entryway and be jealous of its smoothness!
**For EVEN MORE IRRELEVANT bonus points, while you’re doing wall touch-ups, paint your alarm box! It looks a bajillion times better!**
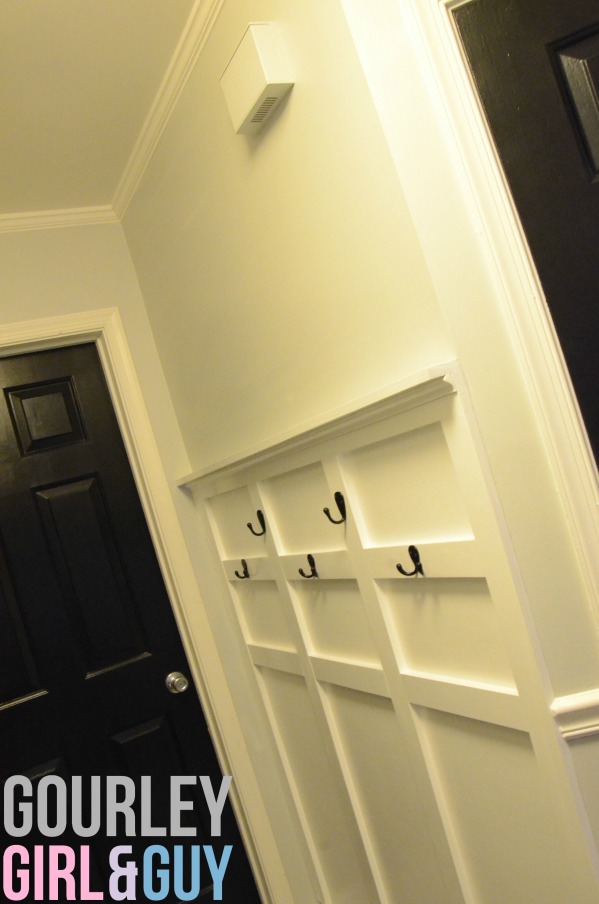
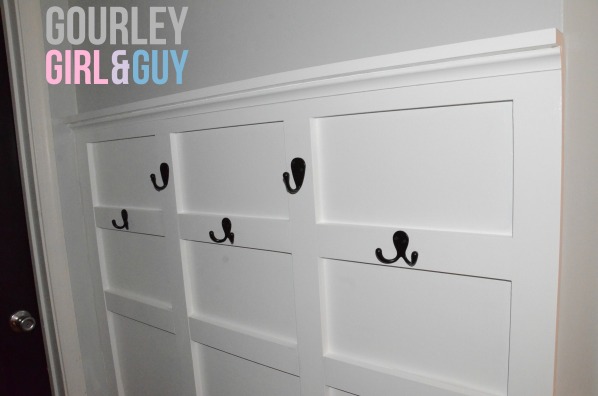
I took some pictures with flash, too. It was so dark outside that there was no natural light to be seen for the foreseeable future. It helps to see the true colors of the paint and appreciate the contrast of the crisp, shiny white! 🙂
I also realized, while taking pics, that the hooks in the middle make a face…like a teddy bear face. Am I the only one who sees that?
I think the true cost of this project was about 30 bucks. We had to buy the wood (but I’m only counting that once since we messed it up, but will use the other as scraps) and screws/anchors. We had everything else on hand. We DID buy new drill bits because we got the new drill that I can’t. stop. talking. about. for my birthday and didn’t have the drill bit set, but that doesn’t count as exclusive to *this* project. I’m pretty pleased at the bang for our buck and also that our guests have places to hang coats/bags! Hooray for a more welcoming home in 2014! 🙂
Now, how about YOU? Anybody else have a phenomenal mudroom that I can drool over? How about some place to drop your crap that guests don’t have to see? Am I the only one who sees the face in the hooks? Anybody tried board and batten or sprucing up the entryway? Anybody? …Bueller?
Accessorized reveal with *daytime* photos coming this weekend! Hooray!









Love it! Want to do this in our dining room and encouraged that you left the wall behind exposed… makes the project much easier! Looks great! And can we talk about the prolific nature of the blog these days!!! Love that too… keep it up, girl.
Thanks for noticing! It really was a pretty easy project…and I hate math!
Looks great! Such a great use of space. And I totally saw the teddy bear face too!!!
Thanks so much, Brandi! I’m glad I’m not crazy with the teddy bear face. 🙂 That wall really does make me so happy! I feel more organized even when it’s empty. 🙂