
Hello and welcome aboard the Australasian Close to My Heart Stamp of the Month Blog Hop. If you have arrived here from Monika’s Blog then you are in the right place. If you landed here by accident, no problem, please join in by following the link at the end of this post.
Today I would like to share with you this gorgeous Stamp of the Month 
- Cross Stitch Wishes Stamp of the month. This stamp is yours with any $75 purchase made in December with your CTMH consultant.
How awesome is it to have a stamp set to compliment pictures of crafts we do with needle and thread? I am an avid scrapbooker, but I also have embroidered, cross stitched and done patchwork. I have made many quilts but none have been as big, daunting or time consuming as my Dear Jane Quilt. I cannot show you the quilt…yet. It is about 2/3 complete now. That is about 2/3 of the 225 5 inch blocks are done! I started the project in 2004. Along the way in true Dear Jane style I have journalled when I am working on it, recorded each block and the number of pieces. One day, it wil be finished and that journal will need a home. It is SEW special! I have found the perfect stamp sets to create an awesome double page spread about the progress of this quilt 10 years after it began.

Dear Jane Double Page Spread using SOTM January Cross Stitch Wishes
Let’s take this project one page at a time. The title page ‘Dear Jane’ has been made with quite a bit of work – reflective of the quilt in many ways. I wanted to capture the look and feel of the quilt by quilting with paper and ink. I have used Cricut Craft room to create a series of cuts with the Art Booking Cartridge. I began with the Calendar on page 68. I moved it over the one inch grid and resized it as best I could to get smaller square blocks. I didn’t quite get it right, but then each block in Dear Jane won’t be quite right either as many are hand stitched. I also placed on the cutting screen the banners from p 63 multiple times. This was to suggest the triangles that border the quilt. Again I resized them against the vertical and horizontal axis. By rotating one and tucking it in I could use less paper too. Here is what my craftroom screen looked like.

The fist mat used to cut the shapes for the quilt page.
Next I proceeded to stamp each and every block and triangle. I decided as I was going that a 5×5 quilt would do the trick. I lifted each little square, moved it to my stamp spaces with scratch paper underneath and raided my Washi Wonder stamp set. I did a variety of those stamps in a variety of colours. Here is a shot part way through the process. I didn’t need to be too concerned about bright colour as the Champagne cardstock toned those colours right down.

As I stamped each block I put them back on the Cricut Mat. This kept them safe and enabled me to ensure there was enough colour and pattern variation. At this point all the border frames are still there.
Once all the stamping was done I then laid the quilt frame on the background paper. I have used the green side of the Chantilly B and T duos paper for this. I love this print! Being a consultant has its privileges and access to this paper is one of them. (Ask us – we are sure to tell you about this and more!)
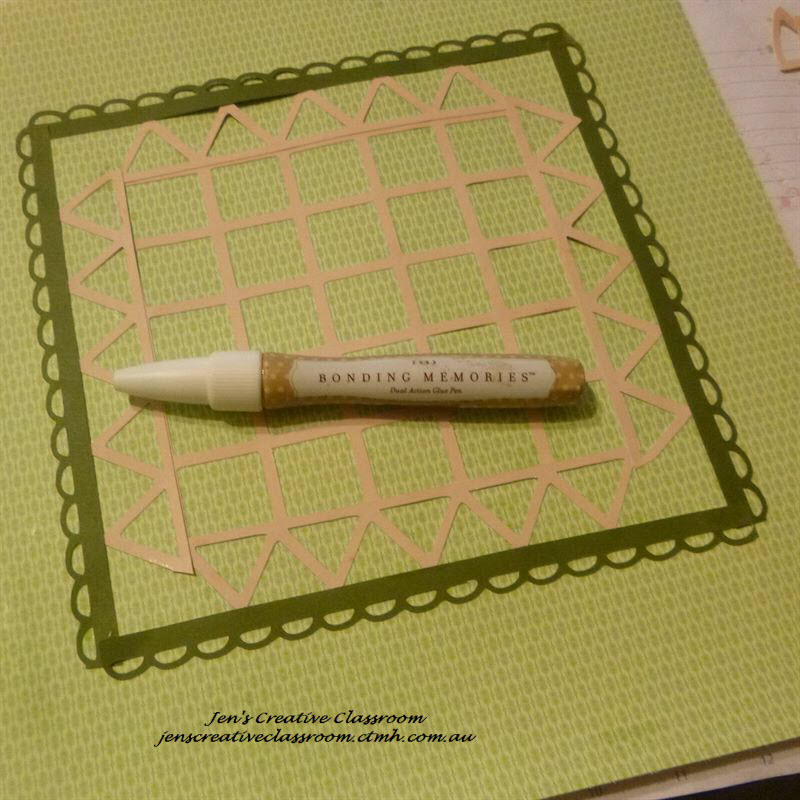
Frame for the quiltis adhered with Bonding memories glue pen – perfect for small thin lines.
The quilt border finishes it off. I did this with New England Ivy cardstock and the Scallop Border from p 47. The next step was to fix in all the quilt pieces. I had cut pieces to fit the corners and used a cross stitch flower to fill the space, masking off the stem. I added stitch lines with the Stitched Together stamp set (C1459) and then the flowers from our Stamp of the Month. I used New England Ivy Ink for these. I made the sub title and fussy cut the needle and threaded it with ribbon from my stash. I also added a pair of scissors cut using Artiste Accent 4 p 41.

It is a page without photos – but it suggests the dear Jane inspiration for all the photos to come.
Ok so now it is time for a photo page. I used the 9 square grid from Artbooking as a starting point. I grabbed a couple of photos of blocks I have made and I am fortunate this year my dear friend Sandra too photos of me working on the quilt in her studio, so I had to scrap them!
The 9 square overlay is on p 69 of Art Booking. I also cut the cotton spool p 42 of Artiste and paper clips (shift border) p 47 of Artbooking. I used the stitch lines stamps from Stitched together to ‘quit’ the border and toned down the card stock by daubing it with Desert Sand Ink.

Cricut Craftroom layout for the second page

I used both the negative spaces and the frame for this page While I was cutting I set up to cut the hearts from Artiste at 1.5 and 1 inch as per the stamp sheet ready for the cross stitch hearts.
The little photos are mounted on New England Ivy. The hearts are stamped with New England Ivy and mounted on double sided foam mounting tape. Everything is edged with Desert Sand on a dauber.
The Spool got a little more artistic attention. I cut the base in New England Ivy, the thread in Champagne. I drew fine lines on the thread piece from the sides inward, following the curves. I then daubed the edges with desert sand to give it the rounded look. For the spool base I drew a line to make the edge and with the help of masking daubed the shadow areas with New England Ivy.

Adding details and shades brings an otherwise flat element to life.
I hope you have enjoyed the techniques and ideas here. These two tools were a key in the creation of these pages – Cricut Collections Artiste and Art Booking. Please ask your consultant about how you can save by getting these collections at reduced prices by hosting a gathering! If you do not have a cricut machine ask your consultant for more information. We will be only to pleased to help you get started making artwork like this.

Here is another page I have done with this stamp set with the focus on stitchery 🙂 It is my first attempt at a mixed media page. The laces came from my stash – the Washi and the Teal Glitter trim are in the Cloud Nine cardmaking kit. More on that another day.

I hope You have enjoyed my Stamp of the Month Cross Stitch Wishes! Please stop by the next stop on the hop at
blog
List of items used in this project
SOTM Cross Stitch Wishes S1401
My Acrylix Stampset – Washi Wonder (Exclusive host only stamp set – hurry last month to get this!)
My Acrylix stampset Stitched Together (On the retiring list!) C1459
Cricut Collections Artiste z1970 and Art Booking z1906
Exclusive Inks Deset Sand; New England Ivy
Exclusive Colour Palette Cardstock Champagne, New England Ivy;
B and T Duos paper – Chantilly (Paper 1)
Bonding Memories Glue Pen Z553
This exclusive stamp of the month is only available during January. It can be yours for just $5 with a qualifying order of $75 or for $24.00 if ordered separately from your CTMH consultant. While you are ordering this you are also entitled to the Cloud Nine Card Making Kit for just $20 when you have an order of $55 or more. Why not take advantage of both offers and save?
If you do not have a consultant please contact me or place an order in my online store Jen’s Creative Classroom.
I’d love you to leave a comment before heading back to where it all begins at Lauren Moore’s Blog .Thank you for stopping by.
PS If you want to know more about the Dear Jane Quilt Head here! ( and yes my software still works on Windows 7!) You can view some of my Dear Jane blocks here.
Jen

Oh my goodness- this is a work of art! You have done an amazing job.
LikeLike
Thank You Lauren 🙂 Warms my heart to have such feedback. Thank you
LikeLike
Thank you Lauren. It was fun to do too!
LikeLike
Pingback: I am on Cloud Nine! | Jen's Creative Classroom
This is a great layout Jenny
LikeLike
Thanks Patricia
LikeLike
Lovely page layouts Jenny. I cant wait to get my hands on this cartridge … any day now … waiting for my order to arrive.
LikeLike
Thanks Jenny
LikeLike