
DIY Giant Framed Wall Map: How’s That For A Statement Piece?
Okay. It’s time for the big “statement wall” reveal.
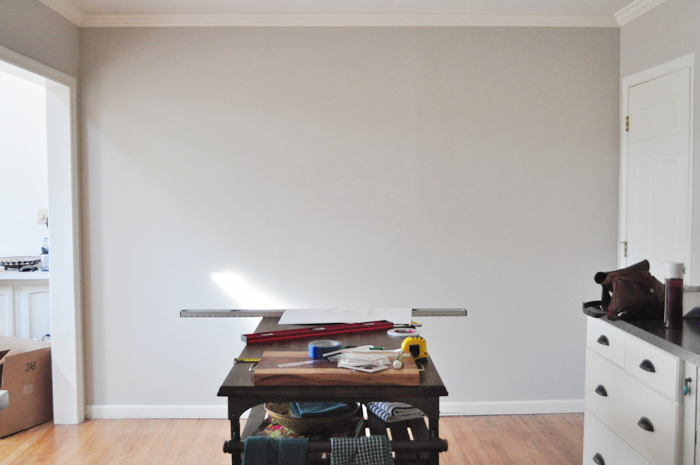
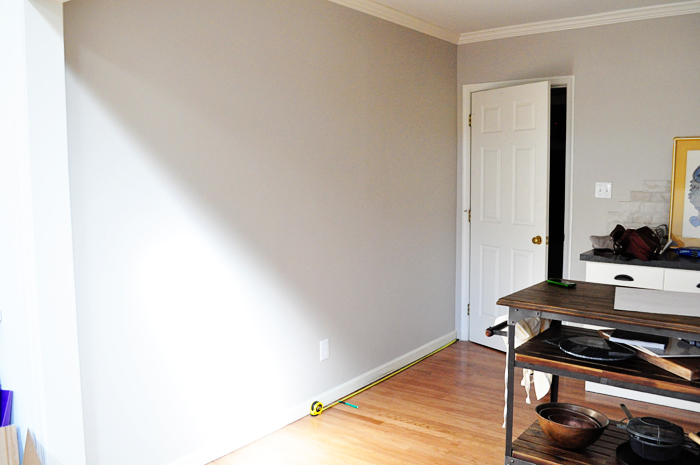
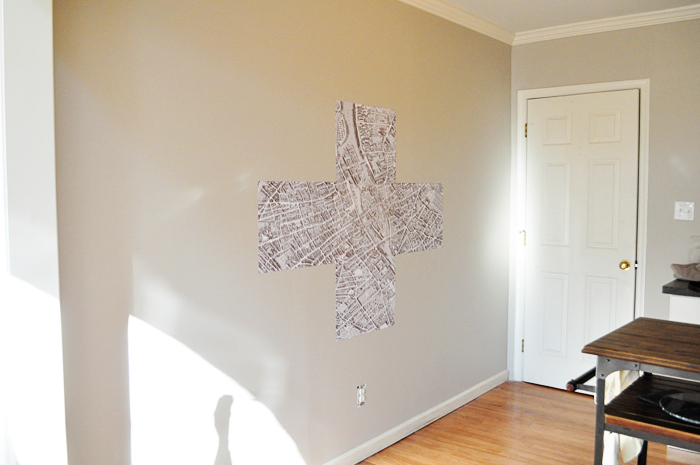
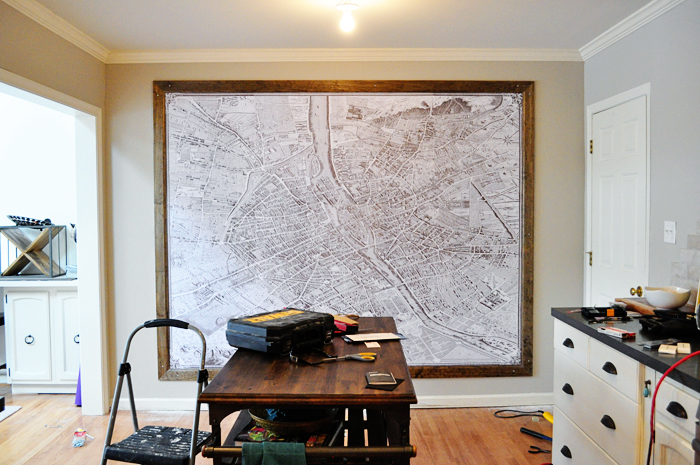
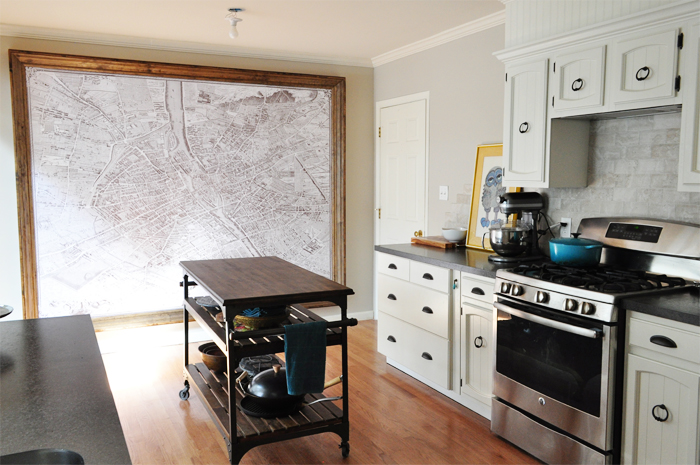
See, after a pretty extensive kitchen renovation, we still had this big blank wall:
So we filled it:
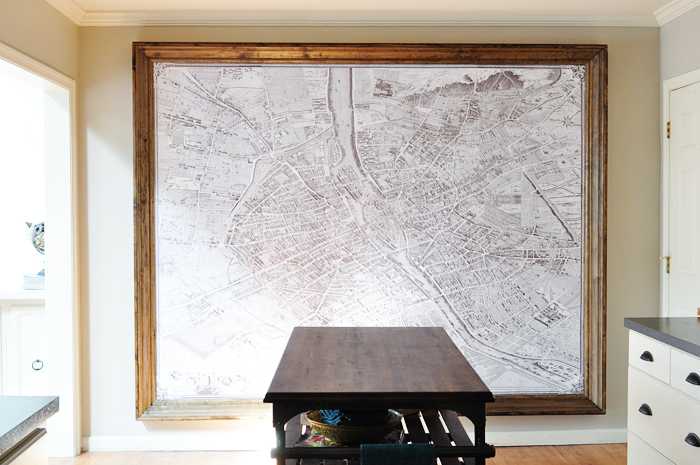
I’ve been nervous to show this to you, because let’s face it — a giant wall map of Paris from 1739 is pretty taste-specific.
Ignore our dangling bulb, missing shoe molding, and unpainted baseboard. Fixing those issues is next (and last) on the list.
But the thing is, something big needed to be done here. And I’ve owned this map for the better part of 3 years and have never actually hung it. And frankly, I’m tired of living with re-sale in mind. I know as a military family that moving just comes with the territory, but for once we decided to go for it and just do something we wanted to do rather than something we felt like we should do.
As a former geographic information system specialist, this takes my love for maps to a whole new level.
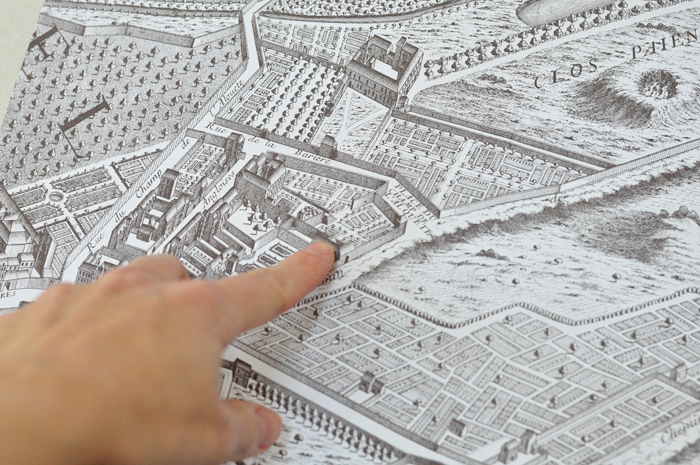
Three hundred years ago, Paris was probably pretty gross.
Think horse manure, rudimentary sanitation, poor health, and poverty. But this map from that time is like… really beautiful.
The amount of detail on this originally hand-drawn beauty is spectacular. It’s called Turgot’s map of Paris, but Michel-Étienne Turgot is who originally ordered its creation — Louis Bretez is the man who took two years to meticulously draw it with permission to enter private properties to take measurements and complete it with the utmost accuracy. (Fortunately, he decided to leave the horse poop out of it.)
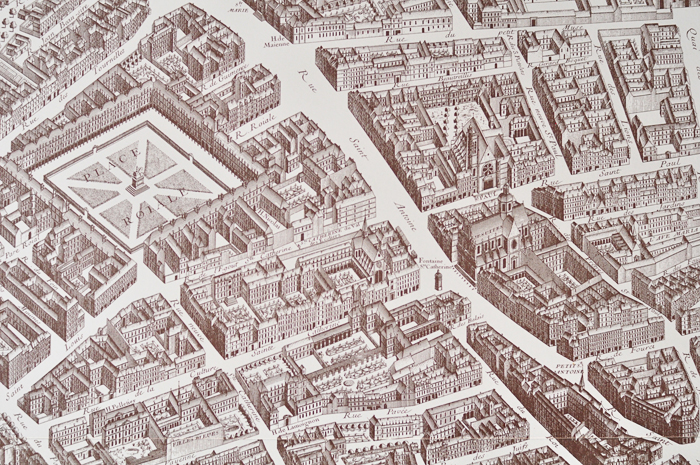
It’s pretty spectacular, considering he couldn’t exactly get a helicopter view the city from above at the time. The map comes in 25 panels that you can frame individually or hang all together. (Framing individually would be very expensive, because the panels aren’t a standard size.) I purchased the set on Wayfair for around $50 several years ago, but it looks like they no longer have it. You can get it for a bit more on Amazon though. At just over $75, it still seems like a pretty fair price for something this huge. (It’s also available as 3 large scrolls, for significantly more mo’. Oh, and here it is mounted on wood at Restoration Hardware for a Restoration Hardware price.)
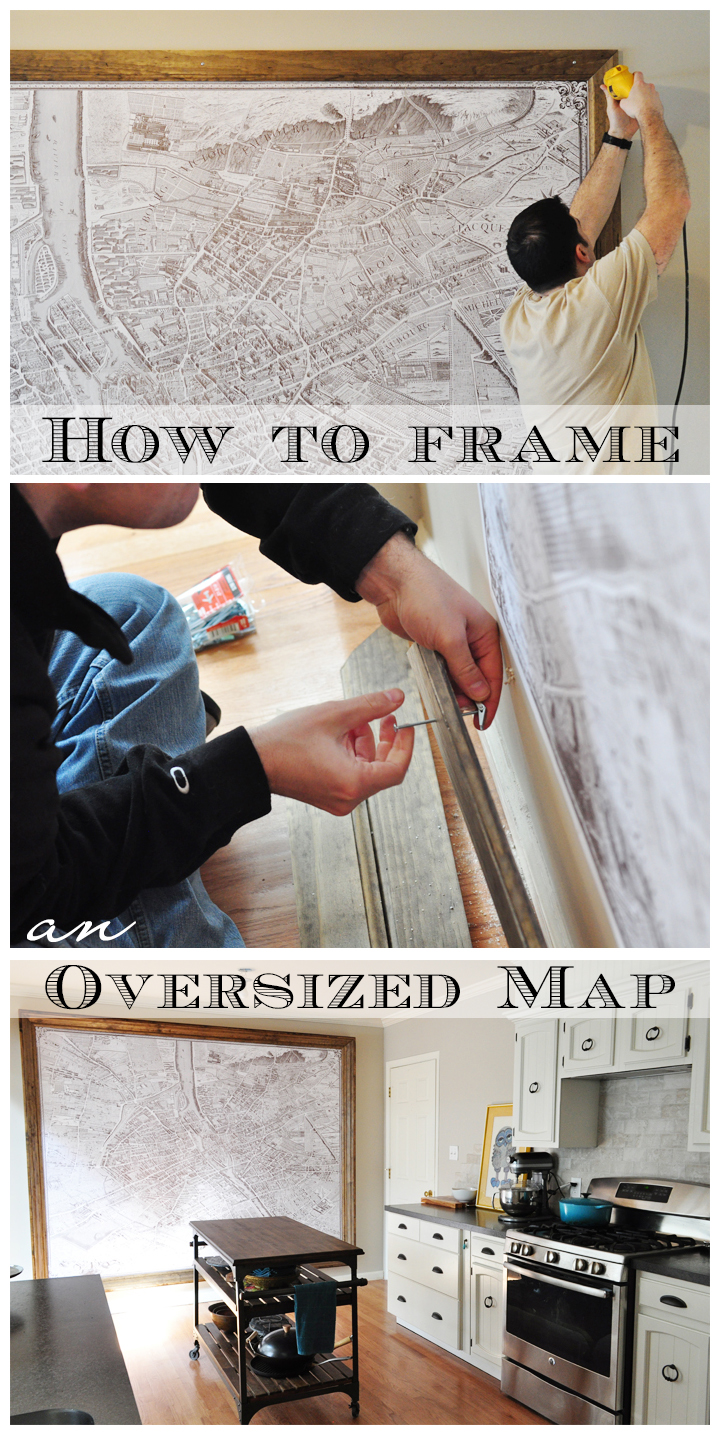
To hang it, I used:
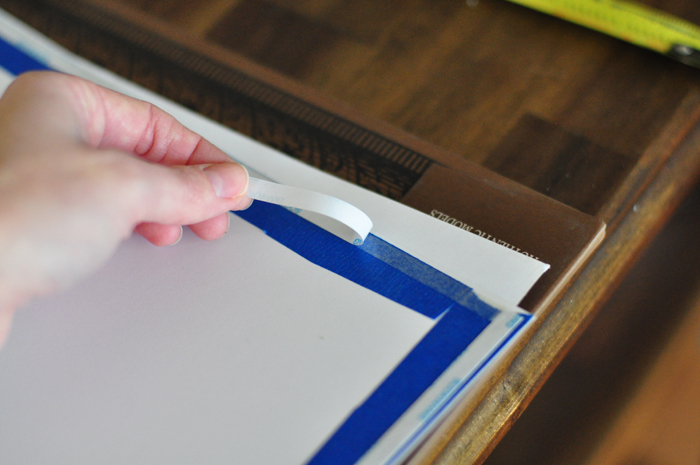
- Blue painter’s tape
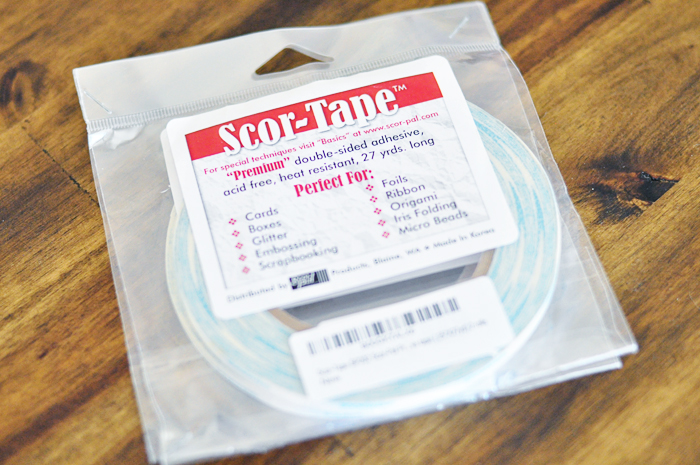
- Scor-Tape
Scor-Tape is a super thin, double-sided tape mostly used by scrapbookers. I needed 2 (27-yard) rolls to cover the perimeter of each panel. (It cost less than $10 for both rolls.)
Considering how thin this stuff is, it holds up really well.
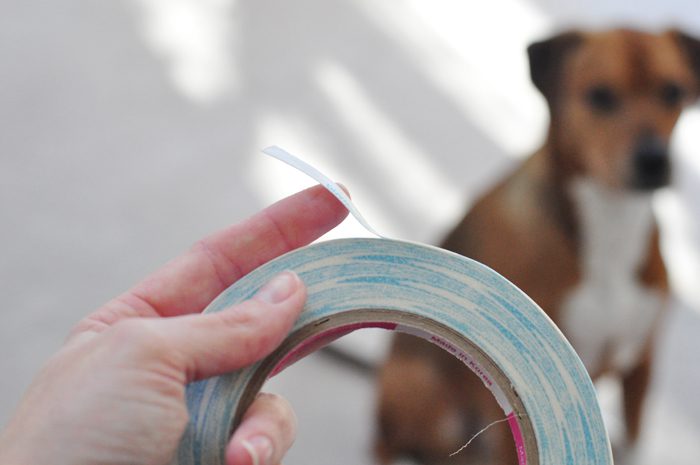
I stuck it to the painter’s tape in the hope that this would actually be removable one day. Though now that it’s all framed, I’m thinking this is a pretty permanent hanging that will get sold with the house. (Note: It’s not protected by UV glass or anything else — that would’ve added an expense we just weren’t ready to take on.)
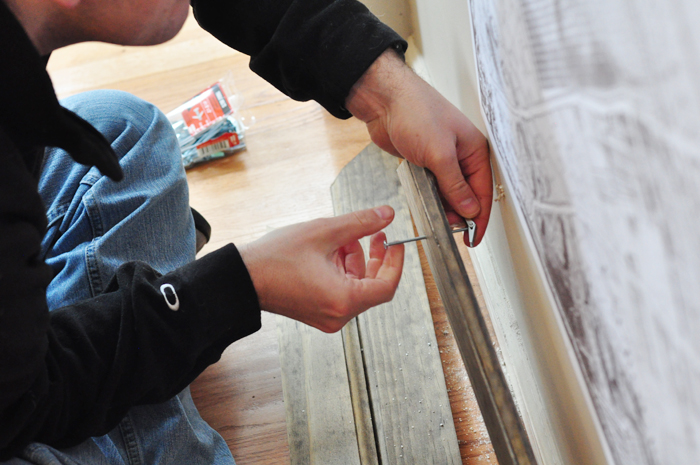
I tore the painter’s tape in half lengthwise so I didn’t use so much of it, and then put it around the perimeter of the back of each panel:
Then I added the Skor-tape and peeled off the backing:
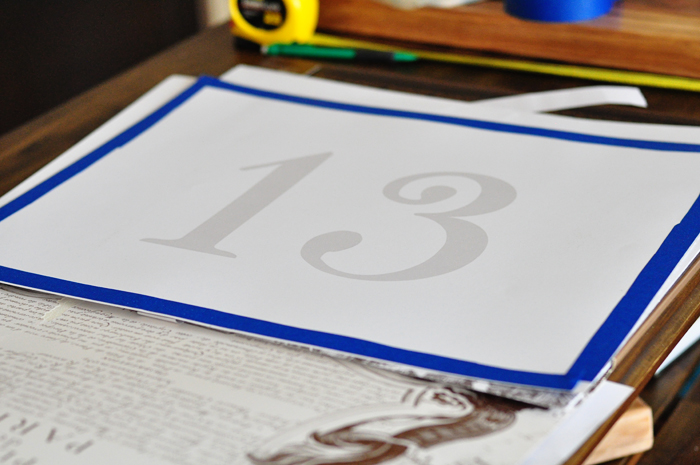
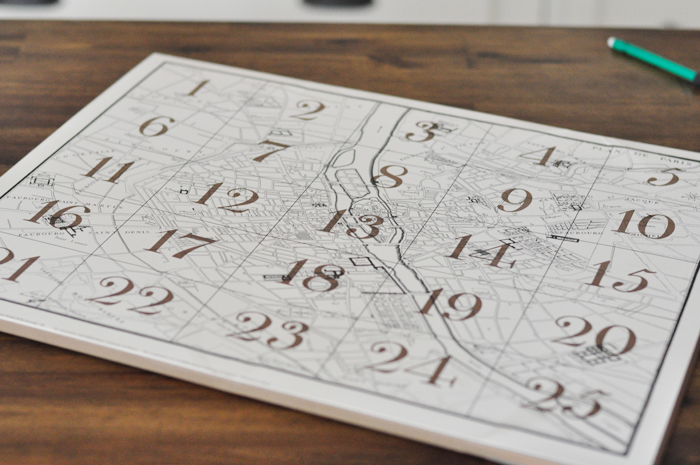
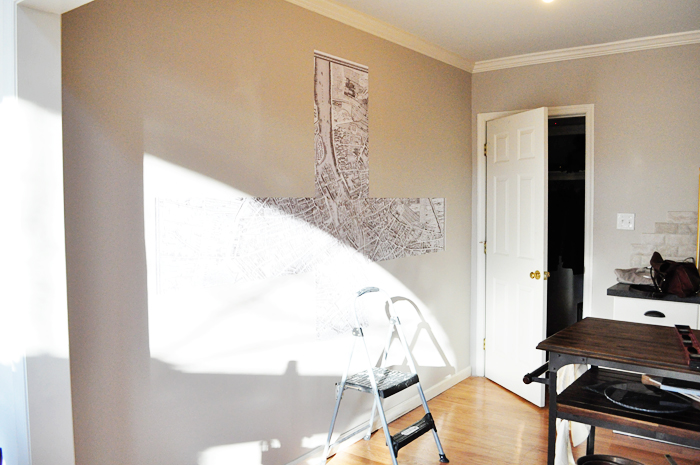
Fortunately, the box set comes with a “map” of the panels, making it simple to hang them in any order you’d like:
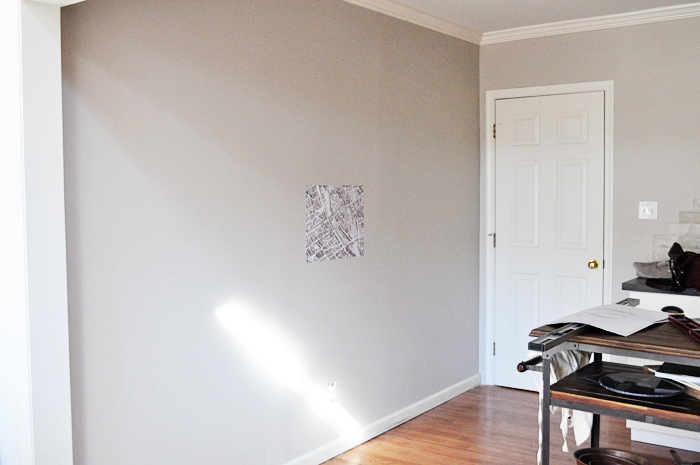
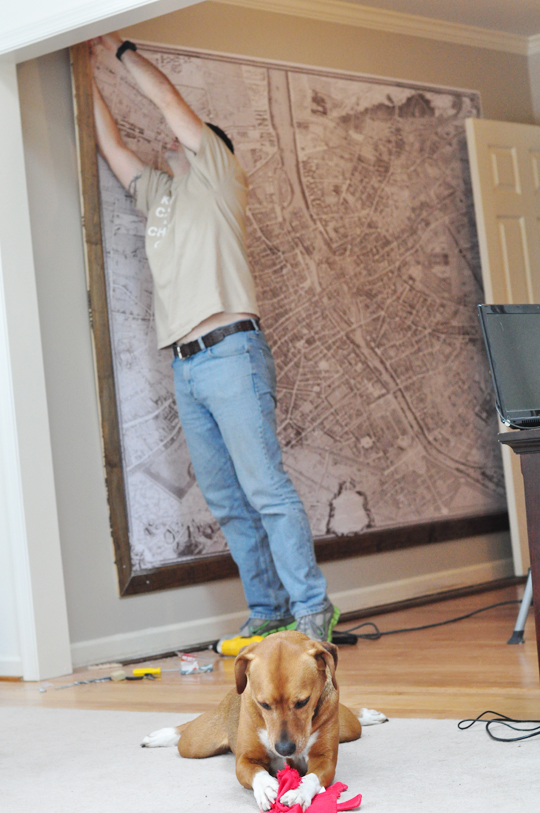
I decided to start with Panel 13 in the center of the wall so it would be easier to keep everything level. Finding the center was probably the trickiest part of this entire ordeal:
Then, I just started hanging, checking to make sure it was level along the way:
TIP: The Skor-Tape is VERY sticky. A couple of times I had to pull a panel off of the drywall, and it pulled the paint right along with it. Some of these panels bubble ever-so-slightly — in part because our drywall is wonky, but also because I didn’t put any tape in the middle. If I were to do this again, I would probably add an X of tape across the middle of each panel.
Eventually, I ended up with this:

The plan wasn’t printed exactly perfect, so all of the lines don’t line up precisely, and there are even some slight gaps between panels here and there. But unless you’re standing right up on it, it’s really difficult to tell.
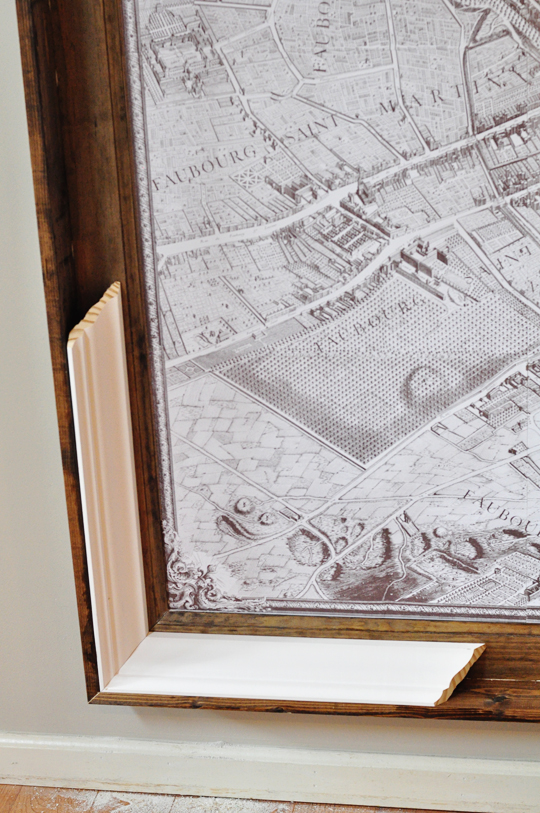
And I could have left it there. In fact, I’m certain Justin would’ve been thrilled with that decision. But I felt like it needed a chunky frame to look more intentional and less college dorm.
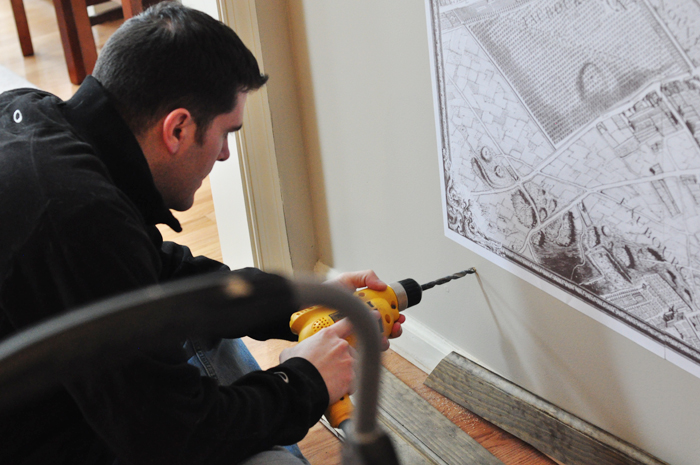
To build the frame, Justin used:
- Minwax stain in Walnut
- Heavy duty screws, anchors, wood glue, and finishing nails
- Baseboard, 1×2 boards, and crown molding
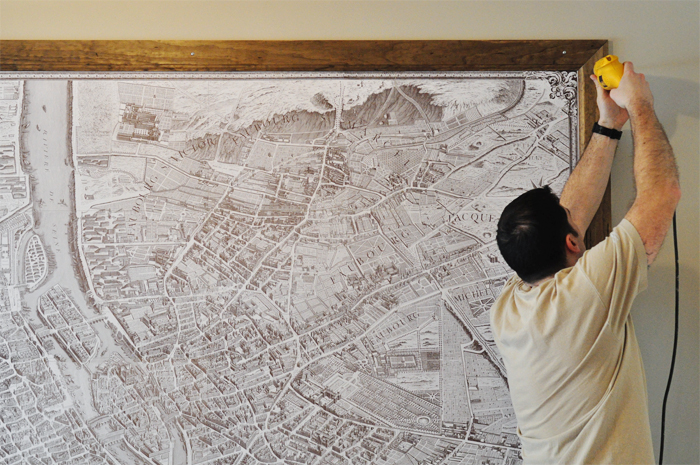
He framed the entire poster with the baseboard, then framed that with the 1×2 boards, then installed the crown molding on top of everything. Here’s a picture with the baseboards and 1×2 installed and some un-stained crown sitting on top so you can see how he put it together:
I’m not going to lie.
This would be a great way to build a frame for a medium-sized piece of art. But for something this large? This was not a small-scale project:
This is how it looked with just the baseboard installed:
Not bad, but it still needed more chunk.
We actually happened to have a bunch of clamps already, and these were 100% necessary for holding everything together while the glue dried.
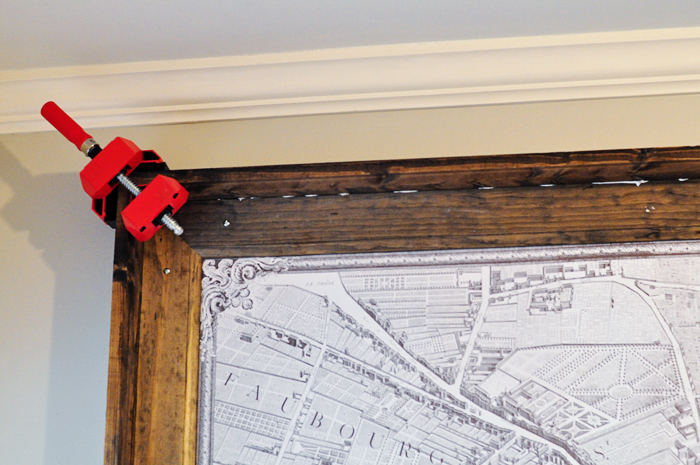
Finally, he installed the crown in the middle with finishing nails, and we had a completed frame!
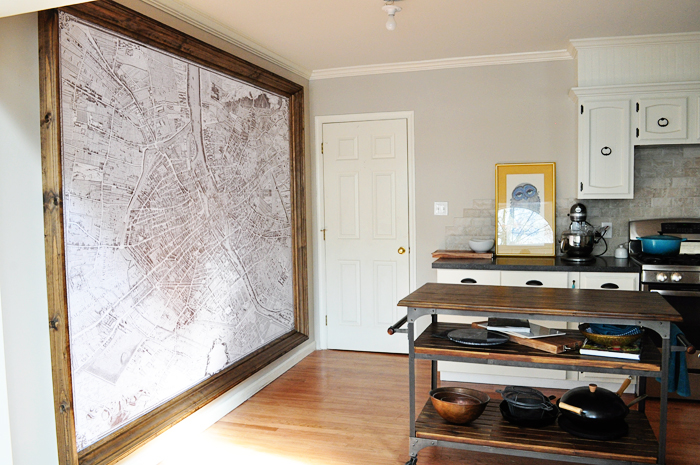
Before:
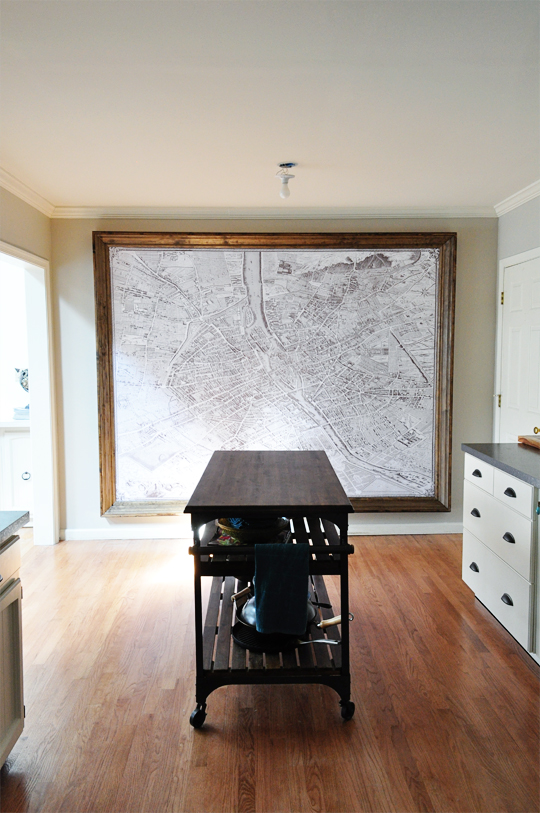
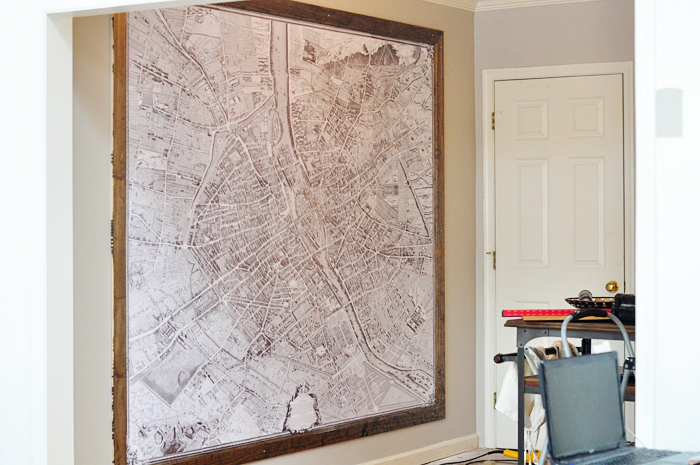
After:
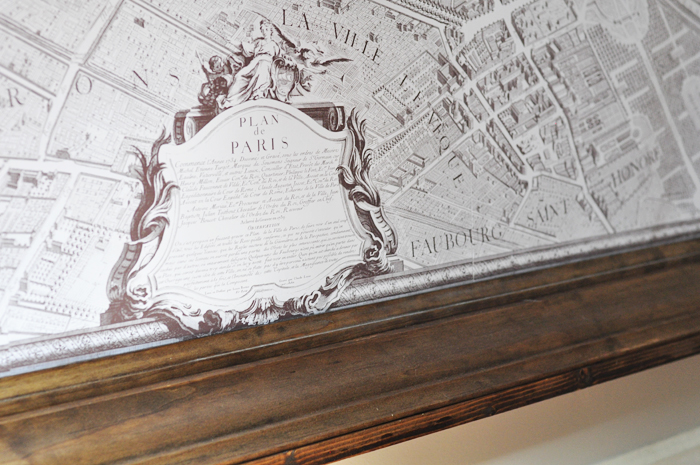
It looks really beautiful up-close:
We still have some details to finish in here:
- Hang a chandelier over the island
- Build a cover for the range hood
- Paint the baseboards and add shoe molding
This is easily the boldest we’ve ever been with decor. It might not be for everyone, but I’m madly in love with it. I find myself staring at the map, seeking out fun details like the Notre Dame cathedral and imagining what it must have been like to walk those Paris streets a few hundred years ago.
I promised a statement piece, and I’m pretty sure I delivered.
What do you think?
PIN-WORTHY:
P.S. We have drawn winners for our Perfect Road Trip Bag Giveaway! Check out the post to find out who won.
Comments
I love,love,love this! Is Justin available to install one in my office?
Haha! I’m sure he’d be THRILLED to tell Steve how to do it. ;) Thanks, Brianna!!
Justin did a nice job on that frame. It ties in nicely with the island.
Thank you! That was the plan. We were originally going to paint it the same color as the trim, but I thought this would end up tying things together. :)
Wow, I’m super impressed! I love old maps and never thought to DIY. When we first moved to Providence, RI, I bought my husband a giant old map of the city and had it framed and we still have it hanging in our hallway.
I bet that is beautiful! If you’re buying an actual old map, professional framing is probably the way to go — that way the map is protected!
Haha this is pretty good Katie! I like it!:-)
Thanks, Jason! Play your cards right with my sister, and maybe you’ll get to see it in person. ;)
Good god you’re good.
I have a huge map (well, not this huge and not this pretty but still) that I hung up. It was going to cost me 200+ $$$ to frame it at a store so I just stuck it up with tape. Maybe I should get a man in my life to make me one of these schmancy frames! That’s a blue job.
To be honest, this frame was probably close to that (though Justin’s not big on collecting receipts — ha!). We already had the tools, but the wood alone, even this “cheap” pine, definitely adds up! You’re absolutely right it’s a blue job, though. ;)
wow that looks so great!! you have a beautiful kitchen. :) i love it! maybe one day we’ll move back into our house and start working on it again.
Thank you! This kitchen has come a LONG way in the past year from the horrendous ’70’s throwback it was when we bought the house. :)
First of all, I LOVE any maps, but antique maps are extra special!! This is such a fabulous idea, and I’m sure it looks even better in person! Good for you, attempting this feat and succeeding as you did! I don’t know if I’d be that brave! Love it!
It really does look great in person! I was lazy and didn’t pull out the tripod, so these photos aren’t the best. I’ll get some better shots when the kitchen is finally, fully DONE!
Loooooove this. I have a bunch of maps on my walls and now I wish they were like, 50 times bigger. Beautiful!
Just get yourself one of these puppies! It could cover a whole wall and you definitely don’t have to frame it. :)
It’s a map, you can’t go wrong! Love it, it looks fantastic.
Very true! If GIS could make a map like this, I might’ve stuck with the biz. ;)
Have I mentioned that I think your husband needs to join the Super Husband League? I of course, being a francophile, love it! The wood frame is a little dark for my taste, but I love the idea nonetheless, I would have to save up for a plexiglass cover or never have liquids anywhere near the wall. I am known to trip on absolutely nothing and spill on the floor and the wall!
Haha, he IS the Super Husband League! We were trying to match the frame to the wood of the island the shelves he built across the room to tie everything together. I think a project like this would look great with a painted frame, too! And yes — I’m terrified that something will get splashed or spilled on it, but it’s just not worth it to spend the money for protection in a temporary house. Fingers crossed we can keep ‘er whole till resale!
Gorgeous! Now I’m wishing I had some sort of big wall somewhere :(
Don’t you in that lovely new home of yours? I love the bohemian vibe you have going!
I love this! Great job! Don’t be afraid of the “next owner”. It’s a myth in my naïve eyes, but my hubby and I bought our first home, painted the whole thing with rather bold choices. Yet when we put it on the market it sold that same day! So much for that! I will never let that worry hold me back from living in my house the way I want. I love this! Keep sharing!
Well then I might need you to come be my color consultant! I would love to have more bold color choices, but re-sale has always scared me away from that. We had neutrals in our last house (with the exception of my dark charcoal bedroom and bright turquoise closet), and it sold in two weeks. Not bad, but if I can sell bright colors in a day, I’m there! :) Thanks for the encouragement!