Click here for the recipe or scroll to the bottom of the post.
I made my grandmother’s shortbread cookies this past weekend. I have very vivid and fond memories of her cookies…their taste, how light and flaky they were, how she *always* seemed to have some nearby. To a child, that right there was Grandmother Magic!
Light and flaky. Buttery. Somehow, food is always ten times better coming from your grandmother.
Nana has since passed away, but I have had a copy of her shortbread recipe for awhile now, just waiting for the perfect day to be brought out of the dark crevices of my recipe box. That day came upon me this past weekend.
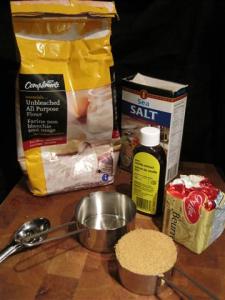
What I love about Nana’s recipe is that it is extremely straightforward and simple: flour, butter, salt, brown sugar and vanilla…to see the detailed recipe, visit my twin blog: Recipes from Edible Noir
I figured it would be quite easy and I wasn’t wrong. I *did* make one mistake though, but I’ll share that towards the end of this post.
So…I gathered my ingredients:
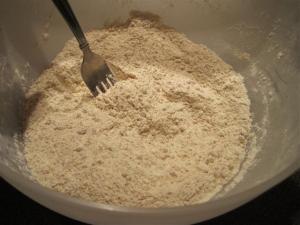
Began by mixing the dry ingredients…salt, flour, and brown sugar. I used a fork to mix, doing my best to break up clumps of brown sugar.
This is where I ask my readers a question: How do you mix in brown sugar to dry ingredients? Or do you? Is it preferable to mix it with wet ingredients first, due to moisture content? With this recipe, the only wet ingredients were the butter and vanilla. The butter I attempted to cut in rather than cream or stir in so I don’t know whether mixing the butter and sugar together first would have been the best choice. Thoughts?
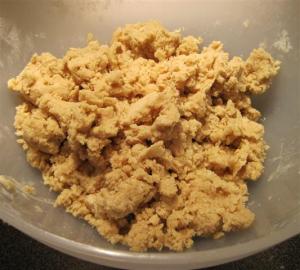
After the dry ingredients were thoroughly mixed, I added the butter and vanilla. The butter was room temperature and I initially began to cut it in with a large fork. That didn’t last long and I eventually used my hands instead which resulted in a somewhat crumbly (and awesome smelling) dough:
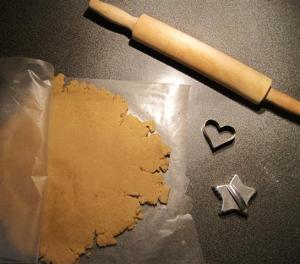
I rolled the dough into a ball and chilled it in the fridge for half an hour. At that point, I turned on the oven and pulled out my only two cookie cutters: a heart and a star. (Note to Self: Buy more interesting cookie cutters!)
I decided to use wax paper to roll out the dough as I felt as though additional flour would detract from the yummy, buttery taste. From what I read online about shortbread prior to attempting this recipe, the cracked edges are a desired trait of shortbread dough.:
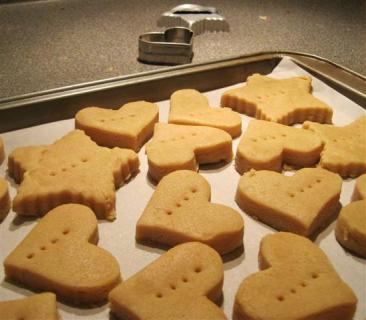
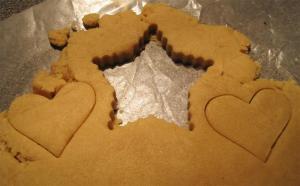
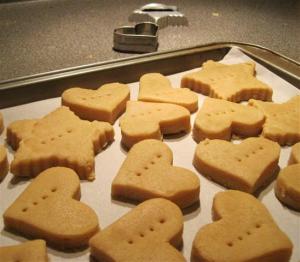
I attacked the dough with my two little cookie cutters and found that I had enough cookies for a good sized tray.
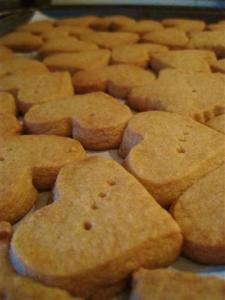
One thing I noticed about my ready-to-bake cookies is the sort of layered effect observed in the shortbread. You can see it in the following picture. My grandmother’s cookies always had a flaky consistency. You could see the layers and feel them on your tongue. I was quite excited to see the layers in my cookies….It let me know I was doing something right!
Here is where I admit my mistake. I cooked them at 350 for 20 minutes. Way too long. I allowed them to brown and on re-examining the recipe, as well as doing more online reading, I found that they should have been removed from the oven *just* before they browned.
They are still absolutely delicious…just a tad harder than the cookies I ate as a child. Not a complete “Edible Failure” but not perfect.
Ah well, a minor error.
Now that I know to reduce the cooking time, I will be sure to add a picture of the perfect second batch once they are done!
RECIPE
- 1/2 cup brown sugar
- 1 cup butter
- 2 cups flour
- 1/4 tsp salt
- 1tsp vanilla
- Mix salt, flour and brown sugar together. Use a fork to break up brown sugar clumps.
- Cut in room temperature butter and add vanilla.
- Knead dough a few times until it is an even colour, roll into a ball and place in refrigerator for approx 30 minutes to chill.
- Preheat oven to 325 degrees.
- Roll out dough between two pieces of wax paper until 1/4″ thick and use cookie cutters to cut out shapes.
- Bake for approx 15 minutes. Keep an eye on them and once they *just* start to brown, remove from oven.




July 4th, 2012 at 1:39 pm
[…] The original recipe is her Nana’s, and you can find it here, with her commentary here. […]
January 2nd, 2011 at 7:18 pm
[…] THE SCENES: Read about my experience making these yummy cookies on my twin blog: Edible Noir This entry was posted on Sunday, January 2nd, 2011 at 7:18 pm and tagged with baking, banana, […]
December 14th, 2010 at 1:57 pm
They look delicious!
December 13th, 2010 at 10:19 pm
I can attest – as Chief Guinea Pig – that they were very tasty. But there is always room for testing and improvement… Until I explode!
Also the mobile version of the blog looks great.
B.
December 13th, 2010 at 9:48 pm
[…] BEHIND THE SCENES: Read about my experience making these yummy cookies on my twin blog: Edible Noir […]