Version 2.6 of Quoll Writer introduces the ability to create your own Assets. An Asset is any type of thing that may relate to your story that you want to keep track of. For example I am currently writing a science fiction story set in spaaaaace and I want to keep track of the planets I’m creating, now I can. Additionally I can record as many fields or bits of information about my new type of Asset as I need.
Note, these new “user customizable fields” as I call them also apply to the standard, existing Quoll Writer Asset types of Characters, Locations, Research Items and Items. Everything that applies to new types of Assets also applies to them.
Any new types of Asset you create will be available in all of your projects.
Creating a new type of Asset
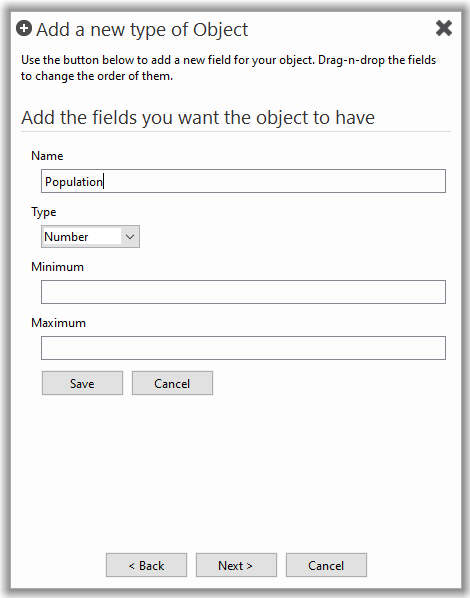
To add a new type of Asset right click on an existing section in the Project sidebar (or right click on the background of the sidebar) and select Add new type of Object. You’ll see the following popup.
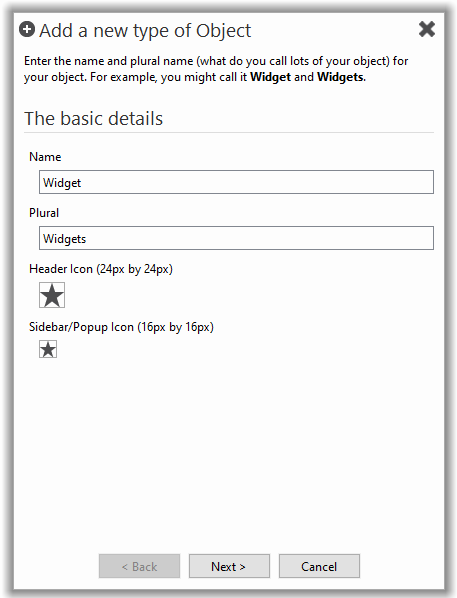
As should be clear this first step sets up some basic things about your object. Things are pre-filled in to get you started.
Clicking Next > takes you to the next step where you can add fields.
Adding fields to the Asset
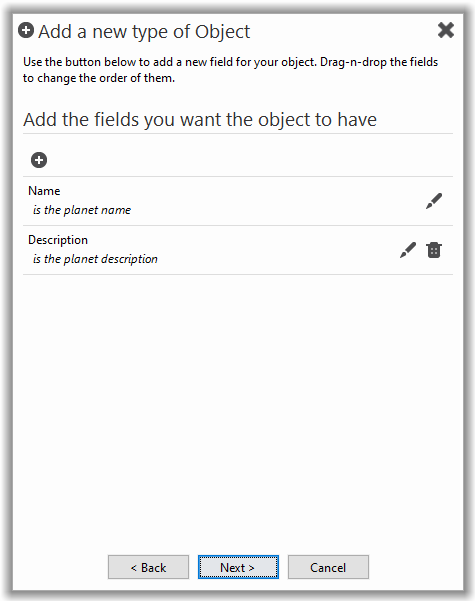
A couple of “standard” fields will be automatically setup for you, this is to allow you to quickly get going by clicking Next a few times.
There are a number of different types of field you can add. To add a new field click on the + icon above the fields. A few of the field types are described below.
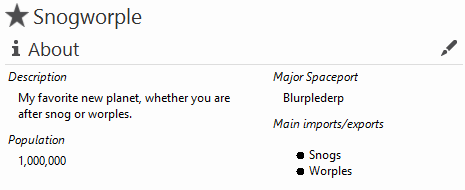
You’ll notice I named my new type of object “Planet”.
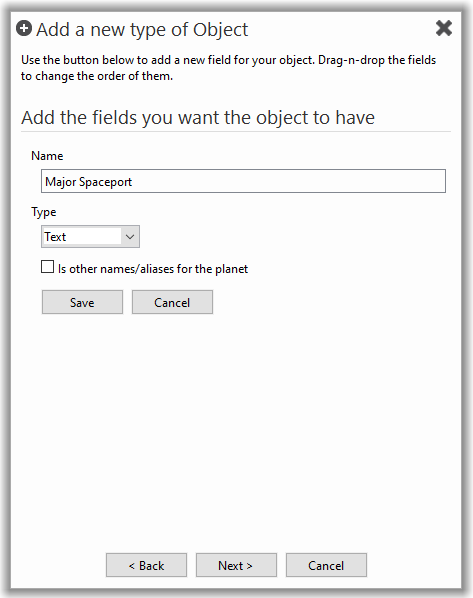
Adding a single line text field
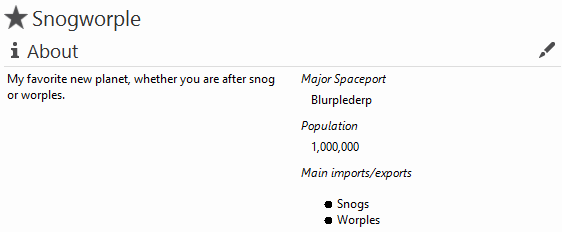
To add a single line text field to the object, click on the add field button then select Text from the drop down list (it’s the default). You need to give the field a name, remember I’ve already got a “Name” field which would be for the name of the planet. In this case I want to record what the main spaceport is for the planet is so I call my field “Major Spaceport”. You can change the name later. Click on Save to add the field.
Note: if you want to have aliases or other names for the object check the Is other names/aliases for the planet, any values you enter in the field will be assumed to be an alias for the object and thus identify the object. You can have as many fields marked as aliases as you want.
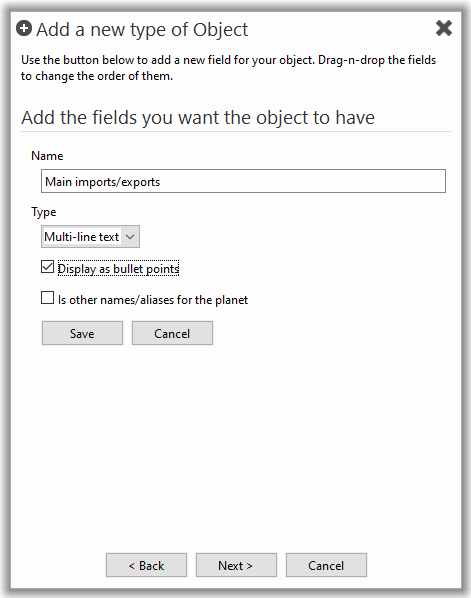
Adding a multi-line text field
To add a multi-line text field (think more than one line) select Multi-line text from the drop down list on the add field form. Here you have the option to display the text entered as bullet points and it can also be aliases/other names.
In this case, I want to record the main imports/exports for the planet and have them displayed as bullet points.
Adding a number field
Finally I add a number field and you guessed it I need to select Number from the drop down list.
In this case I want to record the population of the planet, you can specify a maximum and minimum value for the field (this can be useful if you want to record a value that usually has well known limits, for example the age of a human). The maximum/minimum are optional to complete though so you can ignore them if they don’t interest you.
Other types of fields
The fields above are just some examples to get you going, but you can also add:
- Web links
- Lists of things
- Images
- Dates
A future version will also add the ability to link different objects together, so I might create a “Spaceport” object and then have a field in the “Planet” object to directly refer to the specific Spaceport object. Other improvements will be to have an image “gallery” that allows you to have one field for multiple images. I also have plans to move the existing “Documents” section to be just another field. I wanted to do all these things in version 2.6 but I just ran out of time. If you would really like to have these things added, or have ideas for other fields then let me know.
Moving fields around
Some of the field layouts, which are discussed in the next section, take the order of the fields into account. You can move the fields up and down in the list by using drag-n-drop.
Selecting how the information is displayed
So you’ve selected the name of your object and added some fields about it. Now it’s time to decide how the fields/information should be displayed.
Shown below is the layout selector. By default the fields will just be shown in a single column. Once created you can change the layout as much as you like and the display of the object will be updated.
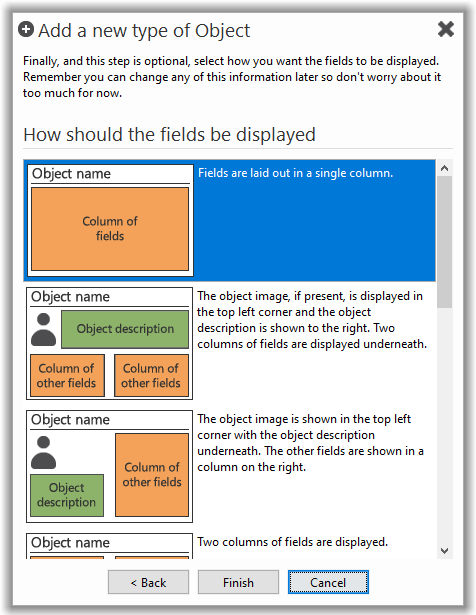
The layout you choose will affect how the fields are displayed and how they are shown when you are adding new instances of the object or editing them. Some examples of layouts are shown below.
Changing the layout is easy and I would encourage you to experiment to find the layout that suits your needs the best. In general the name of the object, the description and its image are all classed as special fields for the layouts and are treated in special ways. For example, the layouts that give the object description special relevance will try and make that field as big as possible, the object image is also shown in a specific place.
Changing things around
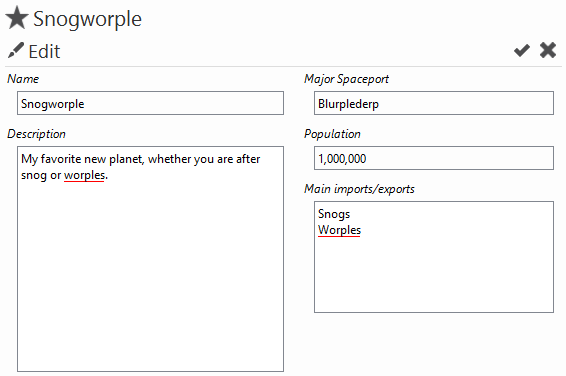
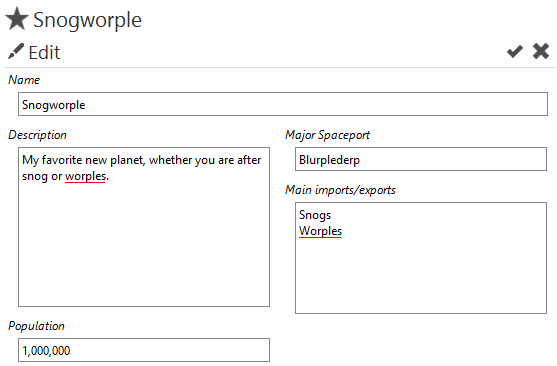
Once you’ve saved the information about your new object, you can easily change things around to fit what you need. Just right click on the type of object in the sidebar or right click on an instance of the object when viewing it (in its own tab) and select Edit the Object information/fields. Any changes you make will be immediately reflected in the object tab. You can change the icons, the name of the Asset, add new fields, remove fields, change them, move them around, go wild 🙂
However, I recommend creating your own type of Asset first and learning how to add fields/move them around and so on before changing any of the standard QW Asset types (i.e. Characters, Locations and so on). Bear in mind that if you remove any fields from those standard objects you may lose information, so take care!
