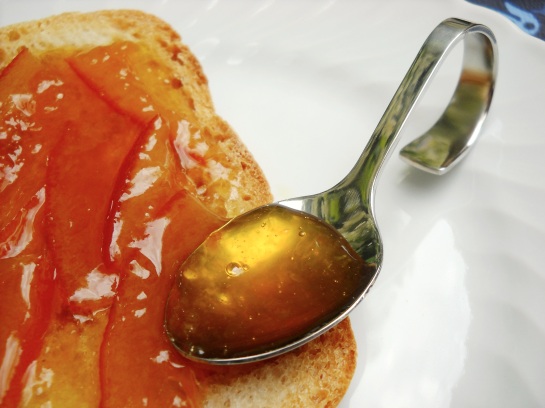
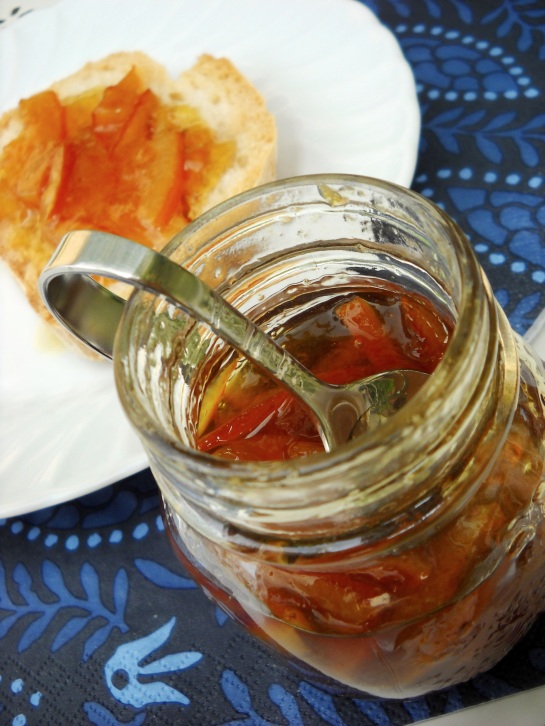
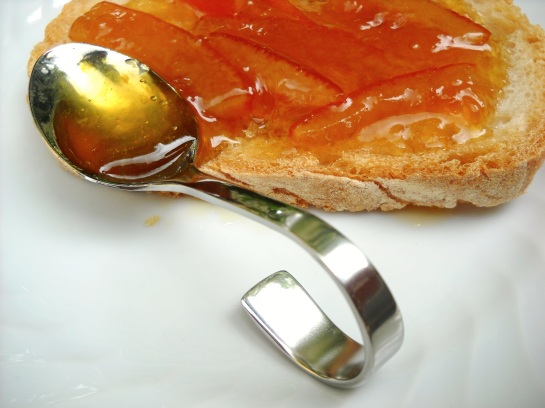
Orange Marmalade
Nothing is more ecstatically relaxing, on a summer morning, than breakfasting under the porch with a cup of coffee and a slice of bread with butter and jam, preferably with home-made butter and home-made jam. Ok, this is not the season to think of breakfasting outdoors, but it’s surely time to prepare preserves for next summer, especially if you plan to have the queen of preserves: orange marmalade.
The very first thing that comes to my mind whenever I think of orange marmalade is England: a Country that counts only on imported oranges is probably the best in making orange marmalade. It’s weird when you come to think of that, isn’t it? But what’s best than naturally grown Calabrian (or Sicilian) oranges to make marmalade? So it happened that my father-in-law brought us a heaps of oranges from an uncle’s orangegrove in Calabria. They were so many that we didn’t know what to make of them: they were dramatically languishing. My husband is not fond of orange marmalade (he claims it’s too bitter and sour…), but I couldn’t let all those citruses go bad: it would have been sacrilege! Moreover, I had read an article featured on The Guardian online where it was reported that shoppers are buying fewer jars of jam and marmelade. This is said to depend on the raising of sugar prices as well as a new interest in home-made (and healthy) food. Whatever the reason, home-making marmalade and jam is surely better than buy them.
There are several ways to make orange jam. For this recipe I followed Delia Smith’s recipe from How to Cook – Book Three, but I substituted half the sugar with brown sugar (it’s less sweet).
Ingredients
900 g oranges (about 4: they make about 400 cl of juice), preferably Seville (they’re bitter)
1 lemon
2 ¼ l water
900 g white sugar
900 g brown sugar
Makes about 8-10 small jars
First of all, place a saucer into the freezer so that it’s pretty cold for the wrinkle test (to know if marmalade has reached the setting point).
Halve the lemon and oranges and squeeze the juice out of them. Place all the pips and pith clinging to the squeezer in a square of muslin, laid over a dish to avoid getting everything dirty. Pour the juice into a large saucepan together with water.
Now cut the orange peels (not the lemon peel) into thin shreds (the thinner they are, the better) and toss them into the saucepan. Add any possible pips and/or pips to the muslin (they contain natural pectin that helps the marmalade set). Tie the square of muslin with the pips and pith inside, thus forming a sort of a little bag. Use a long thread to tie the bag to the handle of the saucepan so that it can float suspended in the water/juice liquid.
Place the saucepan on a medium heat and bring to a simmering point. Cook uncovered for about 2 hours or until the orange peels become soft. At this point the liquid should be reduced by half.
Remove the muslin bag from the saucepan and let it cool a little. Now pour in sugar and stir well over a gentle heat so that all the crystals are completely dissolved. Squeeze the muslin bag over the saucepan to extract all the jelly-like substance, that is pectin (I used kitchen rubber gloves to prevent my hands from getting sticky). Now bring to the boil and start timing. Be careful because this is a very delicate step. After about 15 minutes of boiling, try the wrinkle test. Drop a little jam onto a cold (better if previously refrigerated) saucer, wait for the jelly to cool, then tilt the saucer on its side. If the jam doesn’t slide off, but wrinkles on its surface, it is set. Otherwise, keep on cooking remembering to try the wrinkle test every 10 minutes till you reach the right consistency.
Now pour the jam into airtight jars. Cover with lid. To sterilize and vacuum-seal the jars, put them in a saucepan, cover them with cold water and bring to the boil. Let boil for about 20-30 minutes. Remove from the pan and let them cool upside-down, so that the lid is sterilized, too. When they get cool, you should hear the vacuum-sealing “click”. Jars are perfectly sterilized and can be stored in a cool and dry place.
Just a Note – Runny or thick?
The main problem with this marmalade is that it sometimes comes out a little too runny, that is liquid. I must confess that it happened to me: actually, even if it’s runny the taste of the orange marmalade doesn’t change at all, but it can be complicated if you mean to have it spread on a slice of bread. What to do then? Of course, forget to throw it all away! The problem can be easily solved, though with a little trouble: remove the marmalade from the jars and pour it into a saucepan; add the juice of one lemon (1 lemon for about 1,3 kg of marmalade) and bring to the boil again. After 10 minutes try the wrinkle test with a freezer-cold saucer. In this way you can have an orange marmalade as thick as you choose according to your own taste.
Just another Note – To skim off scum or not to skim off scum?
During the cooking of all jams and marmalades, a little scum can appear on the surface. Skimming it off depends on personal taste, because scum doesn’t alter the flavor (it just makes jams cloudy). I usually skim off scum but I leave it in the orange marmalade. It’s just a matter of taste.
Marmellata di arance
Non c’è niente di più rilassante, le mattine d’estate, che fare colazione sotto il pergolato in giardino con una tazza di caffè e una bella fetta di pane, burro e marmellata, meglio se con burro e marmellata fatti in casa. D’accordo, questa non è esattamente la stagione adatta per parlare di colazioni in giardino, ma è sicuramente il momento di preparare le conserve per la prossima estate, specialmente se intendete fare la regina delle marmellate: la marmellata di arance.
La prima cosa che mi viene in mente pensando alla marmellata di arance è l’Inghilterra: strano che un Paese che le arance le vede solo di importazione sia tra i migliori al mondo in fatto di orange marmalade. Ma cosa c’è di meglio delle arance calabresi o siciliane per fare la marmellata? Mio suocero ce ne aveva riportate un sacco (nel vero senso della parola) dalla Calabria, dove uno zio di mio marito ha un aranceto (e ciò mi dice che sono piuttosto naturali). Solo che erano talmente tante che riuscire a smaltirle era un’impresa e, a forza di stare lì, stavano languendo inesorabilmente. Devo dire che mio marito non è un grande fan della marmellata di arance perché dice che è troppo aspra e troppo amara (mah…), ma io l’adoro e far finire le arance nella spazzatura perché non sapevamo come consumarle mi pareva un sacrilegio. Oltretutto, avevo letto un articolo del Guardian online in cui si diceva che, a causa dell’aumento del costo dello zucchero e della frutta di importazione, le vendite delle marmellate erano calate in Gran Bretagna, stimolando i consumatori alle preparazioni fai-da-te. Qualunque sia il motivo, le marmellate fatte in casa sono sicuramente meglio di quelle comprate.
Per la ricetta qui proposta, ho seguito quella di Delia Smith riportata sul suo sito e tratta dal suo libro How to Cook Book Three, ma ho sostituito metà dello zucchero con quello grezzo di canna che è meno dolce.
Ingredienti
900 g di arance, meglio se Siviglia (sono circa 4 e fanno circa 400 cl di succo)
1 limone
2 ¼ litri di acqua
900 g di zucchero bianco
900 g di zucchero di canna
Per 8-10 barattoli piccoli
Prima di cominciare, mettere i piattini nel freezer, in modo che siano ben freddi quando si fa la prova della densità della marmellata.
Tagliare le arance e il limone a metà e spremerne il succo. Mettere tutti i semini, le pellicine e quant’altro rimane attaccato allo spremiagrumi in un quadratino di mussola, precedentemente collocato su un piatto o scodella per non sporcare, e versare il succo nella pentola insieme all’acqua.
A questo punto, tagliare le bucce delle arance (solo arance, non limone) in strisce il più possibile sottili e versare nella pentola. Mettere eventuali altri semini e pellicine nella mussola: questa operazione è fondamentale, perché è proprio nei semi e nelle pellicine che è concentrata la pectina, ovvero il gelificante naturale che fa solidificare la marmellata. Chiudere il quadrato di mussola a formare un sacchettino e legarlo con un filo di spago piuttosto lungo al manico della pentola, cosi che rimanga sospeso nel succo.
Mettere sul fuoco e portare a leggero bollore: far bollire delicatamente e senza coperchio per un paio d’ore o comunque fino a che le bucce non siano diventate morbide. Alla fine della cottura, il liquido dovrebbe essere ridotto di circa la metà.
Togliere il sacchettino della pectina dalla pentola e lasciarlo freddare un po’. Versare lo zucchero nel liquido e mescolare bene affinché i granelli si sciolgano completamente. Fatto ciò, strizzare il sacchettino di cotone direttamente nella pentola in modo che, strizzandolo, fuoriesca tutta la pectina, che servirà ad addensare la marmellata (io ho usato i guanti per evitare di appiccicarmi tutte le mani). Portare a fuoco vivace e, dal momento in cui prende un forte bollore, cominciare a misurare il tempo. Questa è una fase molto delicata nella preparazione della marmellata perché è da ora in poi che dipende la sua consistenza, più o meno liquida. In genere, dopo 15 minuti di bollitura si fa la prova piattino: versandoci sopra un po’ di marmellata, dopo qualche secondo, inclinando il piattino, la marmellata dovrebbe scivolare molto lentamente fino a fermarsi. Se invece, scivola via veloce, non è ancora pronta e deve cuocere ancora. Da questo punto, si fa la prova piattino all’incirca ogni 10 minuti, finché la marmellata non ha la consistenza desiderata. Quando è pronta, togliamo la pentola dal fuoco e la lasciamo riposare per una ventina di minuti, dopodiché la si invasa nei barattoli.
Per sterilizzare i barattoli, metterli in una pentola, coprirli con acqua fredda e far bollire per circa 20-30 minuti. Toglierli dalla pentola e lasciarli raffreddare a testa in giù così che anche il tappo si sterilizzi ben bene. Quando si raffreddano, dovrebbe sentirsi il caratteristico “click” del sottovuoto. I barattoli sono quindi sterilizzati e possono essere conservati in dispensa.
Nota – Liquida o Densa?
Il problema di questa marmellata è che, anche seguendo scrupolosamente tutte le istruzioni, a volte la sua consistenza risulta troppo liquida. Confesso che a me è capitato: in realtà, l’aspetto più liquido non cambia il sapore, ma può dare fastidio se la si vuole spalmare sul pane. In caso ciò avvenga, niente paura e, soprattutto, niente strane idee di buttar via tutto!! Rimediare è molto semplice, anche se può sembrare un po’ noioso: basta svasare la marmellata, rimetterla nella pentola e aggiungere succo di limone (1 limone per circa 1,3 kg di marmellata) e portare di nuovo a bollore. Dopo 10 minuti, provare di nuovo con la prova piattino (freddo di freezer, ovviamente). È un sistema assicurato e si può decidere quanto farla densa a seconda dei gusti.
Un’altra nota – Schiumare sì o no?
Durante la cottura, come in tutte le marmellate, può formarsi della schiuma. Toglierla o meno, con l’aiuto di una schiumarola, dipende dal gusto personale. La schiuma, in effetti, non cambia il sapore della marmellata ma la rende semplicemente più torbida. Io, personalmente, nella marmellata di arance la lascio, mentre la tolgo in altre marmellate. Questione di gusti.


Mmm…looks so healthy and delicious! Can you believe I just made a cherry compote with all those frozen cherries I was telling you about? Turned out just fabulous, dahling. :p Thanks for the inspiration!!
Really? I hope you’ll post your cherry compote: I’m soooo curious to read how you made it, dahling… 😛
Rita, so very nice. I am a serious devotee of orange marmalade, and even make peach jam with so many oranges it is borderline marmalade. This is the perfect time to replenish your pantry with homemade marmalade now that summer fruits are out of season. Love your photos, I want to eat them up!
Peaches and oranges? Mmmm… that’s interesting! I’ve never thought of combining the two of them, but they sound wondeful. Have you already published this recipe or will you do it soon? I’m curious to know how you make it. 🙂
I just read the article about the declining sales and was surprised, I personally adore the stuff!
No home should be without marmalade.
🙂 Mandy
I love marmalade of any kind but my hubby is not fond of it. I found a solution to that as well as a batch of runny marmalade, I made marmalade brownies with it by substituting thebsugar for marmalade. In factbyounhave inspired me to make them again today.
That’s a lovely idea! I’m sure these brownies are superb. 🙂 I’ll tell hubs and I’m sure he’ll love them as well. Thanks for the idea! And thanks for stopping by! 😀
You are the master jam-maker, aren’t you? Great job again! Looks great. And I love orange marmalade.
Your marmalade is so attractive! I had exactly that problem with runny marmalade, so I wound up adding pectin. What about just adding lemon juice to the batch while making it? Would that help?
In the list of ingredients there’s 1 lemon whose juice must be squeezed together with oranges. You can try adding 2 lemons instead of 1 and cooking the marmalade a little further. Anyway, I think that the marmalade consistency (runny or thick) depends mostly on the fruit: anytime you make marmalade, it comes out differently according to the quantity of pectin fruit contains (each orange is different from the other: the type, where they have grown, how much sun or water they received, and so on…). I’d start with 1 lemon, then, if you see that the marmalade doesn’t set properly after a lot of cooking, add some more lemon juice. It’s worth trying. 😉 Personally, I love both the runny and the thick version so I made them both. 🙂
I’ve never ever ever had marmalade. Is it supposed to bitter?
Not that much. A little more bitter than jam (strawberry jam, for example), but you use a lot of sugar to make it, so it’s rather sweet. In any case, it depends on the kind of oranges you choose. Seville oranges, for instance, are more bitter than Navel oranges. 😉
Making a jam or a marmalade is on my list of things to do this year (and to learn to speak Italian fluently) Have a great day 🙂
Thanks. Well, I hope you manage to do them both (making marmalade and learning Italian). If you learn it, we can speak Italian sometimes! 😉
Yum! This looks great Rita. P.S. We nominated you for the Stylish Blogger Award today! Check out our page to see it. We love all that you do on your blog 🙂
Thank you so much for the award!!! I’m so excited and honoured!! Thanks, thanks so much! I’m going to make a post at once and share it! Thanks again! 🙂
I actually bought some delicious orange marmalade when I was in England recently… But when it runs out, I’m gonna try my hand at making my own with this recipe! Bookmarked! 🙂
Well, one must admit the English are really great at making marmalade… however, I hope you enjoy trying to make it! 🙂
Woah, this looks so easy and simple to make. I really want to give it a try. I’m glad I stumbled upon your beautiful blog.
Thank for stopping by Damaris! I’ve just hada look at your blog and it’s amazing!! I want to check it carefully as soon as I have a little time! 🙂