5 day black and white photo challenge

You may or may not have seen that there is a black and white photo challenge doing the rounds on social media sites at the moment.
This is to take and share a black and white photo a day for 5 days. A friend of mine nominated me for this and so I started yesterday and decided that while it isn’t strictly showing extreme creativity I would share them on here. Who knows I may keep going past 5 days.
#5dayblackandwhitephotochallenge

So here goes Day 1 of 5
From a pleasant late afternoon walk with my dog

IMG_0849.JPG

Day 2 of 5
Out for a morning bike ride in the Yorkshire Dales

IMG_0847.JPG


iPhone Fisheye lens

Sorry I haven posted anything for a while, I really need to get back to doing some more creative stuff with my Photography. Having said that, a couple of months ago I was in the National Media Museum in Bradford and as I always do I had a look around the gift shop (it’s always full of cool little gadgets, as well as brilliant books etc). That is when I stumbled across this cool little gadget

20140607-083359 am-30839379.jpg
At £5 it seemed link a bargain and it was. I set about taking photos that day and experimenting with what field of view it gave me and how close up I could photograph objects.

I was amazed, okay it has some serious focus fall off towards the corners and edges, but when photographing close up I couldn’t believe how short a distance I was from the object (a lot closer than an iPhone will normally focus at) and how it mimicked the function of a macro lens picking out sharp detail.

Below are a variety of shots I have taken with the SNAP FISHEYE LENS

20140607-104534 am-38734139.jpg

20140607-104534 am-38734920.jpg

20140607-104532 am-38732555.jpg

20140607-104533 am-38733352.jpg

20140607-104536 am-38736491.jpg

20140607-104535 am-38735713.jpg


X-Lapse early results

So as promised I have done a couple of short tests with the X-Lapse.

Test 1 was done over 15 mins and produced a 15 second time-lapse. If my memory serves me right it was a frame every 2 seconds.
I set the shutter speed to 1/4 but didn’t lock the exposure at the start. As you can see this flickers slightly part way through.

Test 2 was again done over 15 mins and produced a 15 second time-lapse. I did lock the exposure at the start on this and it stayed consistent throughout.

I am currently experimenting with different frames a minute. More to follow…


Veho Muvi X-Lapse

Today my latest photo purchase arrived in the post.
The Veho Muvi X-Lapse 360 degree auto rotating time-lapse mount. To find out more check here.

The X-Lapse comes with an iPhone mount to allow you to use your phone to capture the images for a time-lapse sequence, an additional app is required to be able to take sequential images but there are many options in the App Store which are free of charge, some of these are upgradable for a small charge to access more features.
When you remove the iPhone mount there is a bushing to take a small compact camera or you could even use a GoPro on the tripod mount accessory or one of Muvi’s cameras (though not owning one of these I don’t know for definate if they have a time-lapse option, but I’m guessing they must have seen as they make this product). The GoPro has a time-lapse feature built into it.

I have done a couple of quick test runs using it with my iPhone and the free version of the TimeLapse app, but when I have a proper test I will upload a link to the time-lapse video here, watch this space.

20130617-030844 PM.jpg


Image weaving

Image weaving is a great way to be creative with your photography. For anyone not familiar with the technique, it often uses two images, which can be the same, the same but one in colour one in black and white or two totally different images, the options could be endless, it’s up to you. The process then is a simple one. Across the back of your images you measure out equal strips (I used a width of 2cm), horizontal on one and vertical on another. These are then cut, the image with vertical lines only being cut to the border of the image so they stay held together. The other image is cut all the way through after numbering each strip so you don’t lose the order in which they need to be weaved.
Now comes the weaving part. I usually cut off the border from the first strip so as it doesn’t show in your final weave, then simply weave your first horizontal strip under and over each vertical strip. Turn over your image to see the back and then making sure the strip is tight up against the top tack it down with some sticky tape.
Repeat the process making sure you alternate how you start, under or over.

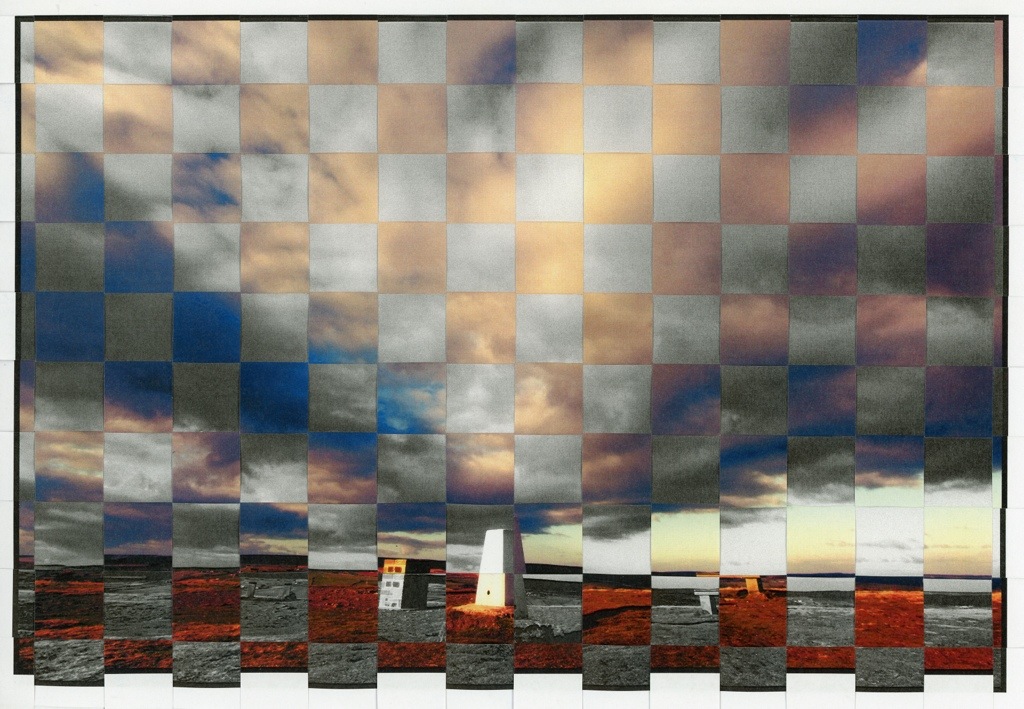
So for my image weave, shown below, I used the same image but dropped one to greyscale.

20130328-111213 PM.jpg

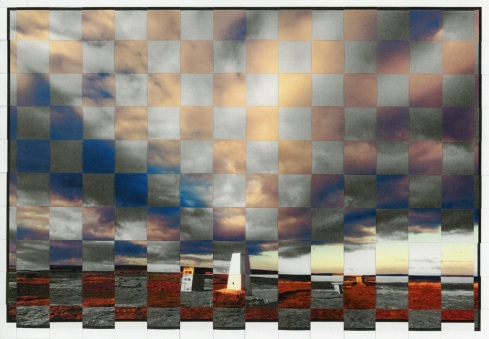
As you will notice, one inherant problem with image weaving is that very thin gaps appear between each strip as you weave, effectively making one image bigger than the other, and the resulting effect becomes greater as you reach the bottom.

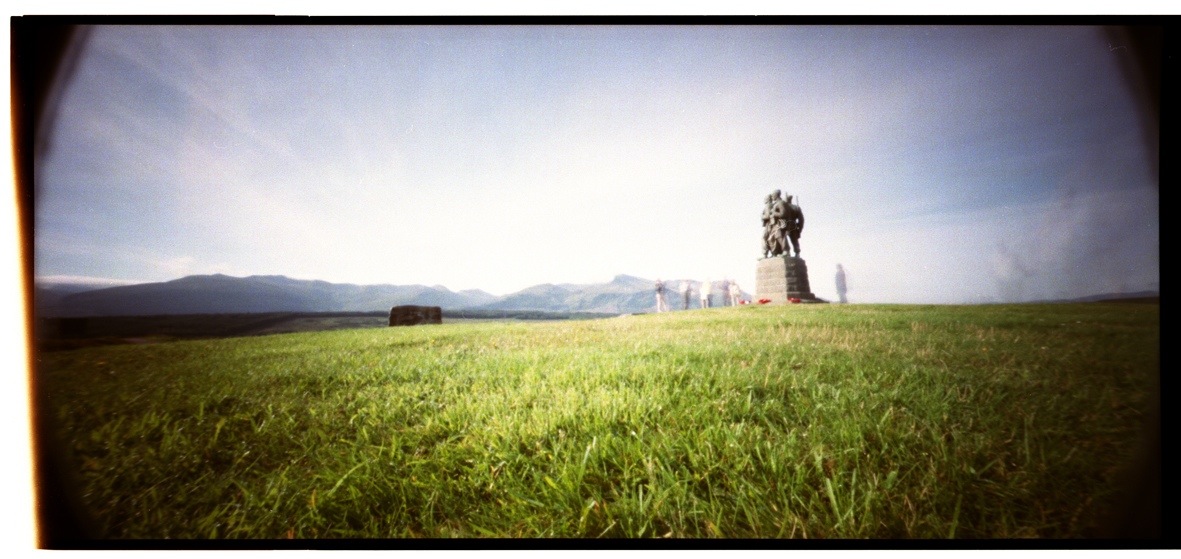
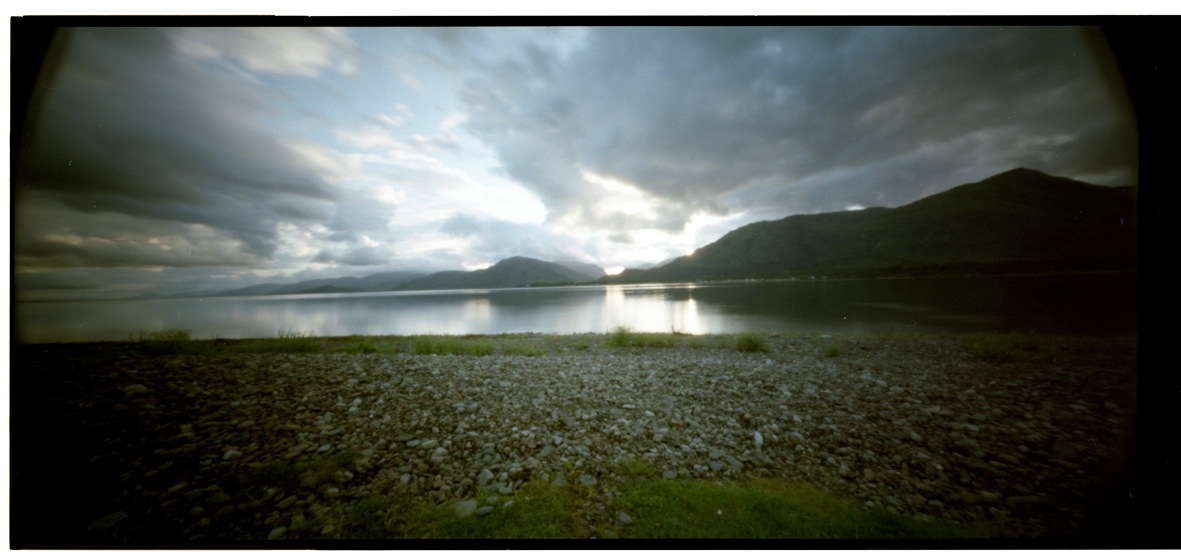
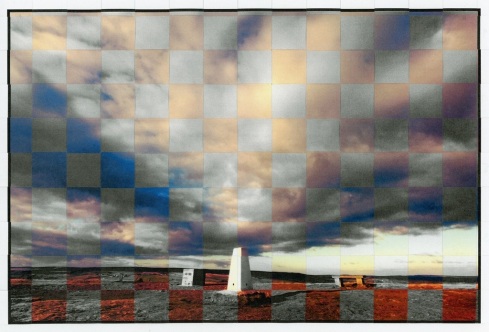
I repeated the process again with the same two images trying something a little different to try and overcome this small problem.

First of all I worked from the bottom of my image as the effect of the images going out of alignment would be less obvious in the clouds than the landscape. Then after having cut each horizontal strip I took off a very thin slither (about the same as the gap which appeared on my other weave) from the top before weaving it.

As you can see below this has corrected the slight in accuracy within the technique.

20130502-110552 AM.jpg

Be sure to check out Todd M Dyum’s time-lapse of him making an image weave.


Polaroid PoGo the results…

So here it is, the first experiment with a print from my pogo. It didn’t quite go according to plan as I think I may have over dried it, causing the yellow and magenta layers to bond back to the cyan layer on the backing paper rather than the cartridge paper I was transferring them to.

20130425-063548 PM.jpg
I have another soaking to try again.


Polaroid PoGo

I am currently in the process of experimenting with an image printed on my Polaroid PoGo Printer. This funky little printer has no ink but uses special Zink (zero ink) paper, which reacts to heat as it passes through the printer to activate three colour layers (yellow, magenta and cyan), creating an image.

My inspiration came from a video I saw on YouTube a couple of years ago, have a look to see how you can also be creative with your Pogo prints and give it a go.

Results will follow…


More from the Holga Pinhole camera

The other day I processed a roll of colour film which had been (disgracefully) sat in my camera from the summer! I wanted to share a couple of them with you, to give you all something fresh to look at until I have my black and white film and the lith from the Obscura Pinhole processed.

First of all is a shot taken at the Commando Memorial in the Highlands of Scotland. This always attracts a lot of tourists who stop to take in the panoramic views, pay their respects and snap a few photos. On this occasion there were a few people wandering about, whom I have just managed to capture. Unfortunately I didn’t write down my exposure time and cannot remember it but I’m guessing in the lighting conditions it was probably about 10 seconds.

20130323-064108 AM.jpg

The next shot from the same trip is taken on the edge of Loch Linnhe. I have photographed from this location many times, as it is perfect for sunsets with the setting sun dropping down behind the mountains on the other side of the Loch, simply stunning.

20130323-065819 AM.jpg


Watch this space…

…this evening I’ve been playing with some Kodalith film, I’m intending on using it in my Obscura pinhole camera. Looks like its going to be fun to use and produce some interesting results, can’t wait 😀

Still to come… As I keep promising I will have my black and white Holga pinhole film shortly.


Ilford Obscura Pinhole camera

20130311-092519 PM.jpg

While at this years Focus on Imaging at the NEC in Birmingham I was lucky enough to get my hands on Ilford‘s soon to be released (Easter 2013) Obscura Pinhole camera.
This nifty light collecting box has an 87mm focal length and a chemical etched 0.3mm pinhole (f/248) to give brilliantly sharp images.
Either 5×4 inch sheet film or photographic paper can be loaded into this simple to use camera, it is also great for use with Harman Direct Positive Paper. So far I have only used photographic paper, but from the results I have achieved I am really looking forward to working on both film and Direct Positive with this camera.
This weekend I had a trip to London planned and this was perfect opportunity for me to really give the Obscura a try.
First off I set myself up outside the Globe Theatre, using B&W photographic paper as my light sensitive media, which has an ISO of 6, my exposure was 9 mins. Pinhole exposures do tend to be on the longer side but the very low ISO of the paper coupled with a very overcast day is what made this particularly long. This didn’t have a detrimental effect on the final outcome, in fact it allowed me so capture a seemingly quiet walkway in front of the theatre (which I can guarantee was very busy), with the odd ghostly figure of a few people who where standing about just noticeable and a slight movement of the flags twitching in the wind.
Next up was the London Eye, again this was a 9 minute exposure which has captured movement of the main structure of the wheel, with only the sections of glass pods reflecting light registering. The effect is interesting as it makes the Eye look like it is moving very quickly unlike the 30 mins it actually takes for one full rotation.

Below you can see the two shots as they have come straight from the camera. Below these are the positive prints created in the darkroom from a face down contact print of the original.

20130311-092918 PM.jpg

20130311-093050 PM.jpg

All in all this is a great pinhole camera, which allows you to get back to basics while having some creative fun with Photography. Expecting to retail at £69 it won’t break the bank either, for this you get the camera, 3 boxes of light sensitive media (Ilford Delta 100, Ilford MGIV, Harman Direct Positive Paper), an exposure calculator and some stickers so you can personalise your camera.

20130311-094504 PM.jpg

http://www.ilfordphoto.com/home.asp